


What is Double Opt-in?
Double Opt-in Setting(DOI) is an email subscription confirmation process that requires a new subscriber to verify their email address before they are fully added to your contact list. This two-step process ensures only real, interested subscribers make it into your database.
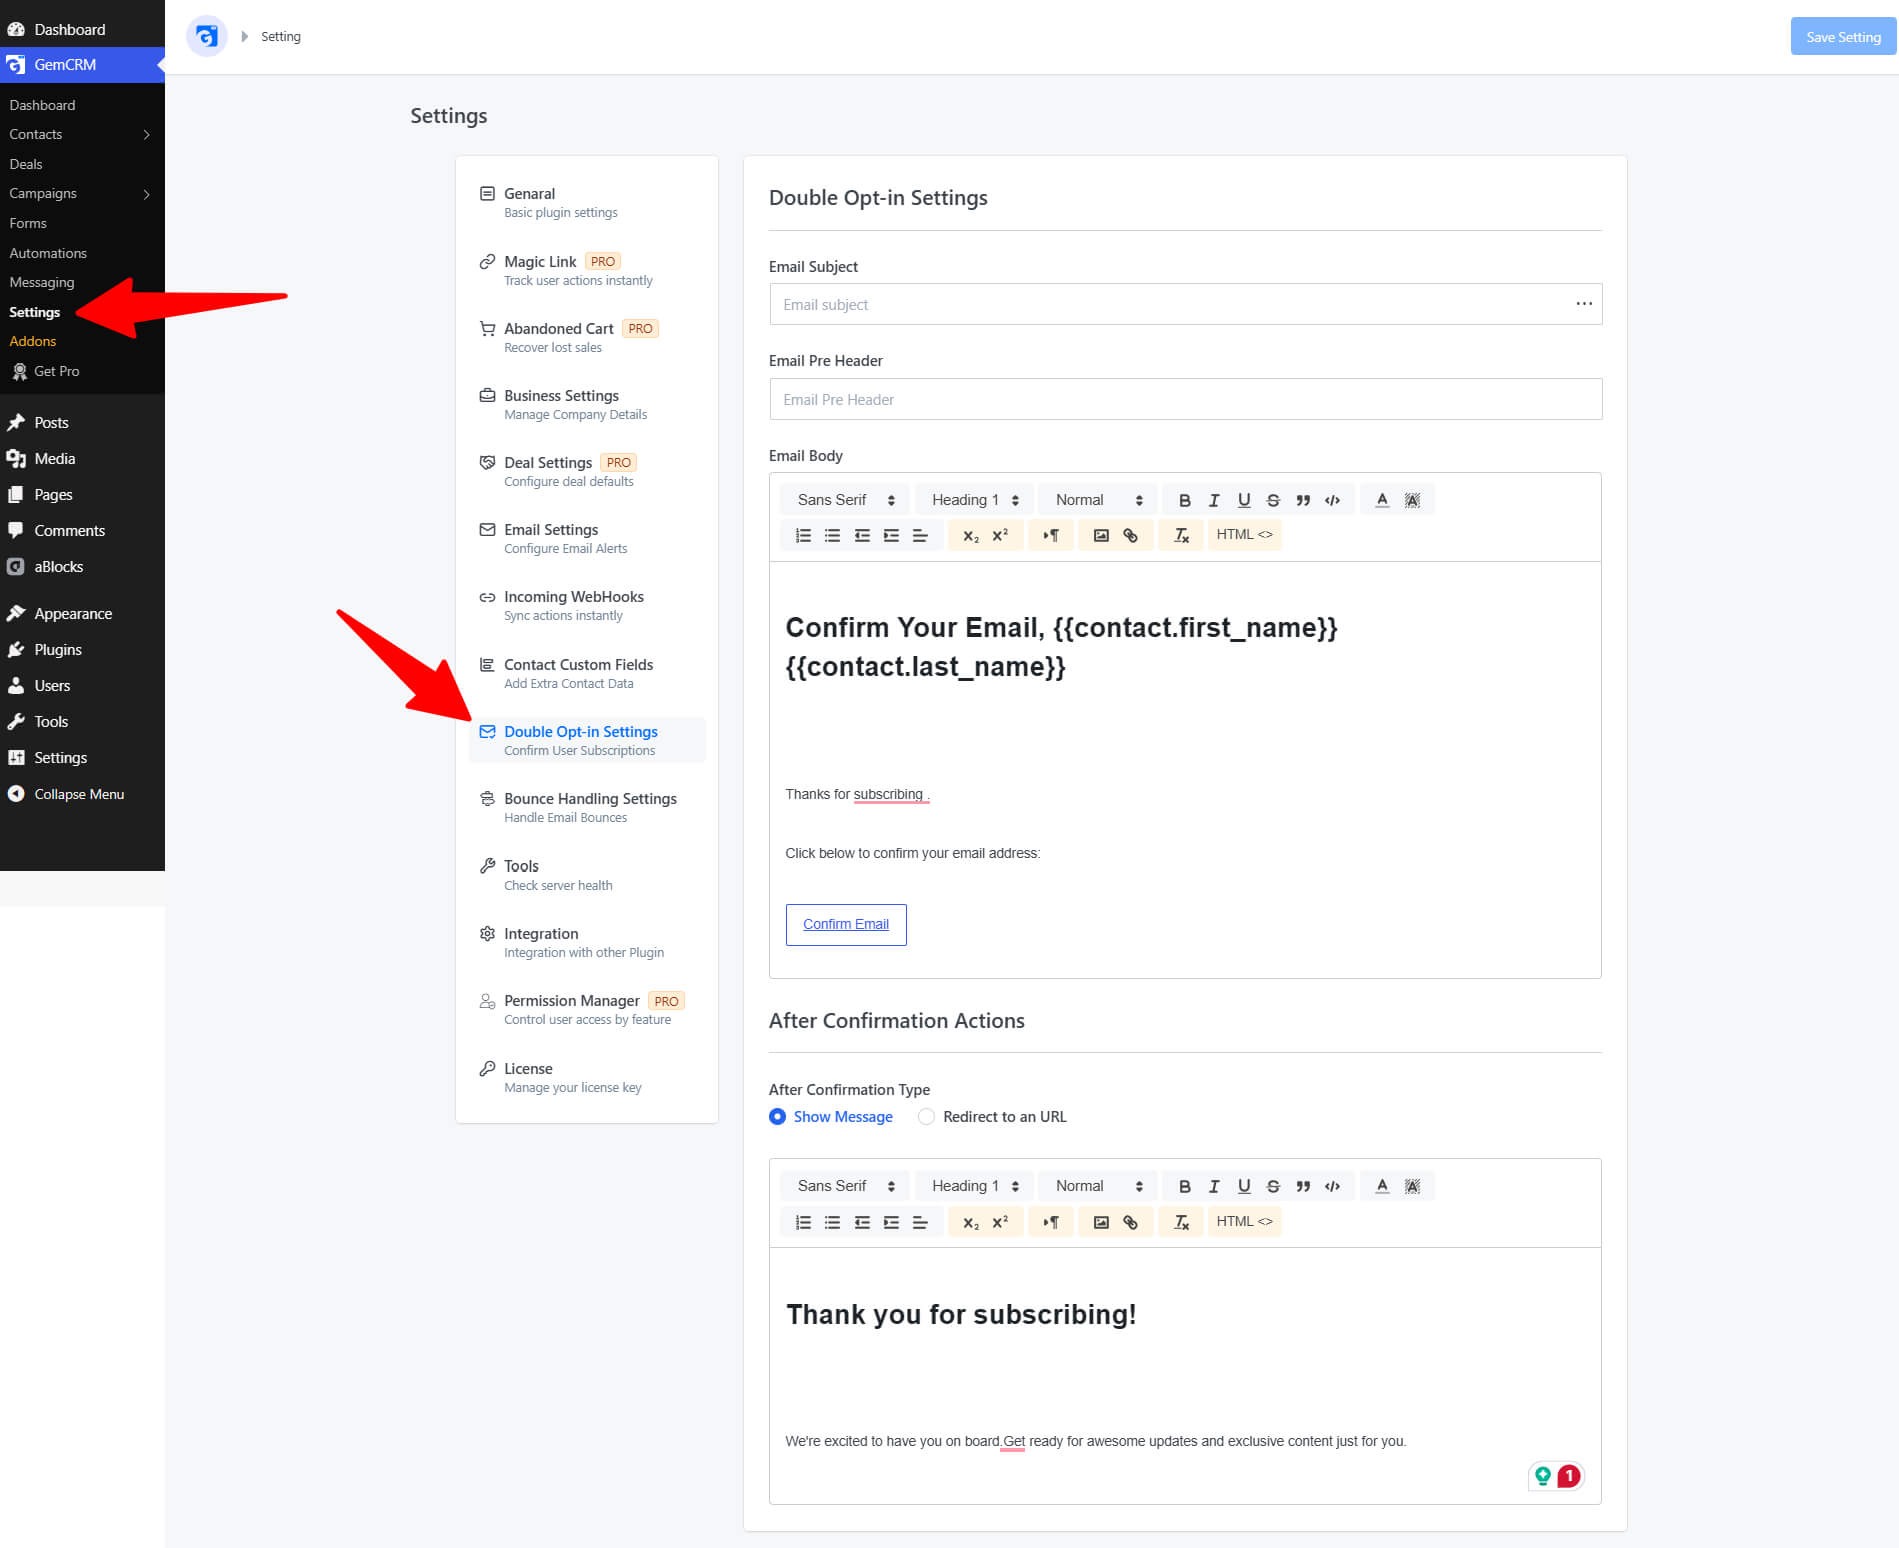
How Double Opt-in Works in GemCRM
|
Step 1 |
A visitor fills in your subscription form and clicks Subscribe. |
|
Step 2 |
GemCRM creates the contact with status Pending and sends a confirmation email. |
|
Step 3 |
The subscriber clicks the confirmation link in the email. |
|
Step 4 |
GemCRM verifies the secure token, updates the contact status to Subscribed, and shows the configured confirmation message or redirects the user. |
Enabling Double Opt-in
Double Opt-in can be enabled at two levels:
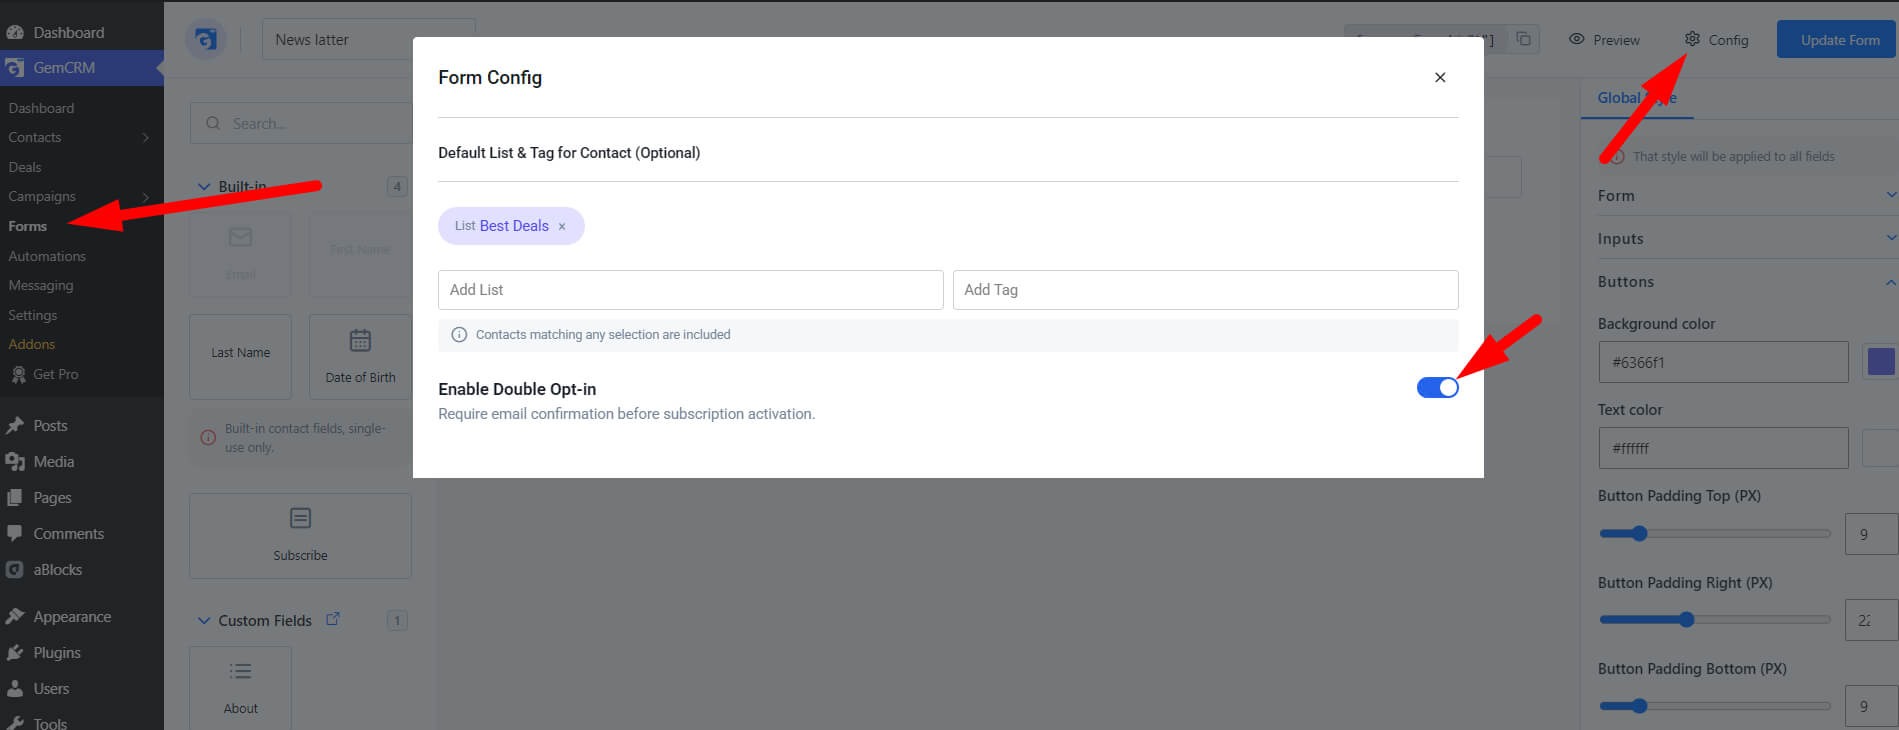
Per Subscription Form
When creating or editing a subscription form (GemCRM → Forms), there is an Allow Double Opt-in toggle. When turned on, any contact submitted through that form will receive a verification email before being marked as subscribed.
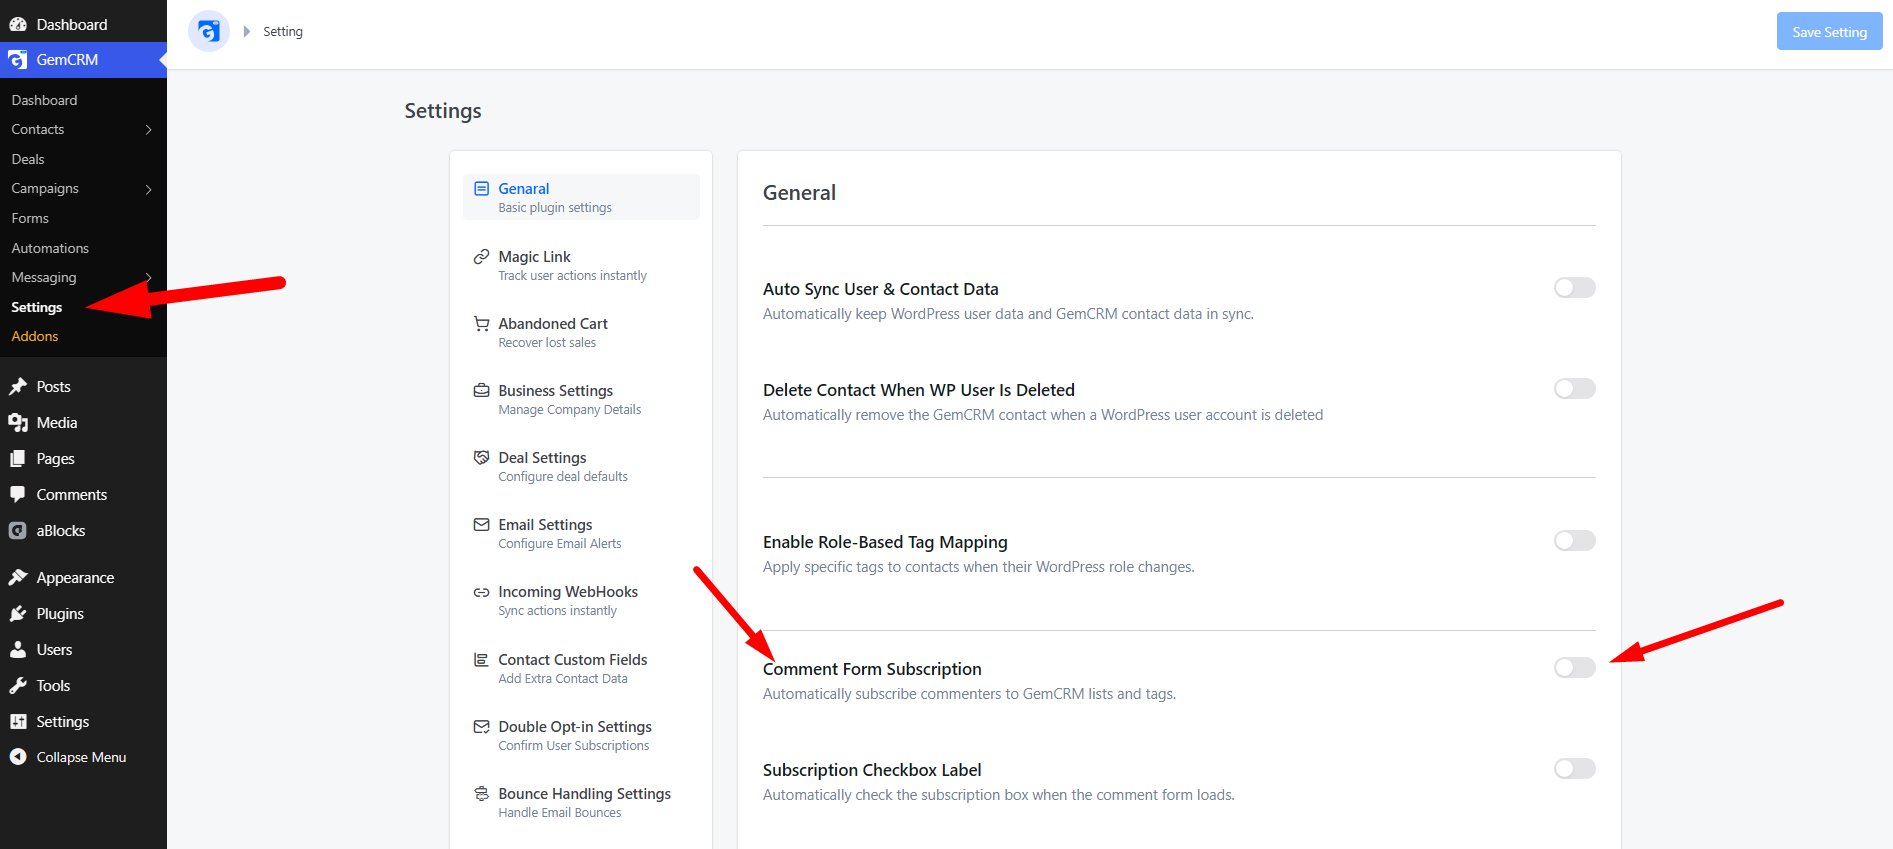
Via Comment Author Sync
Under GemCRM → Settings → General Settings, when the “Add Comment Author as Contact” option is active, you can also enable email_confirmation for those contacts, sending a DOI email to commenters who opt in to your newsletter.
Configuring the Double Opt-in Email
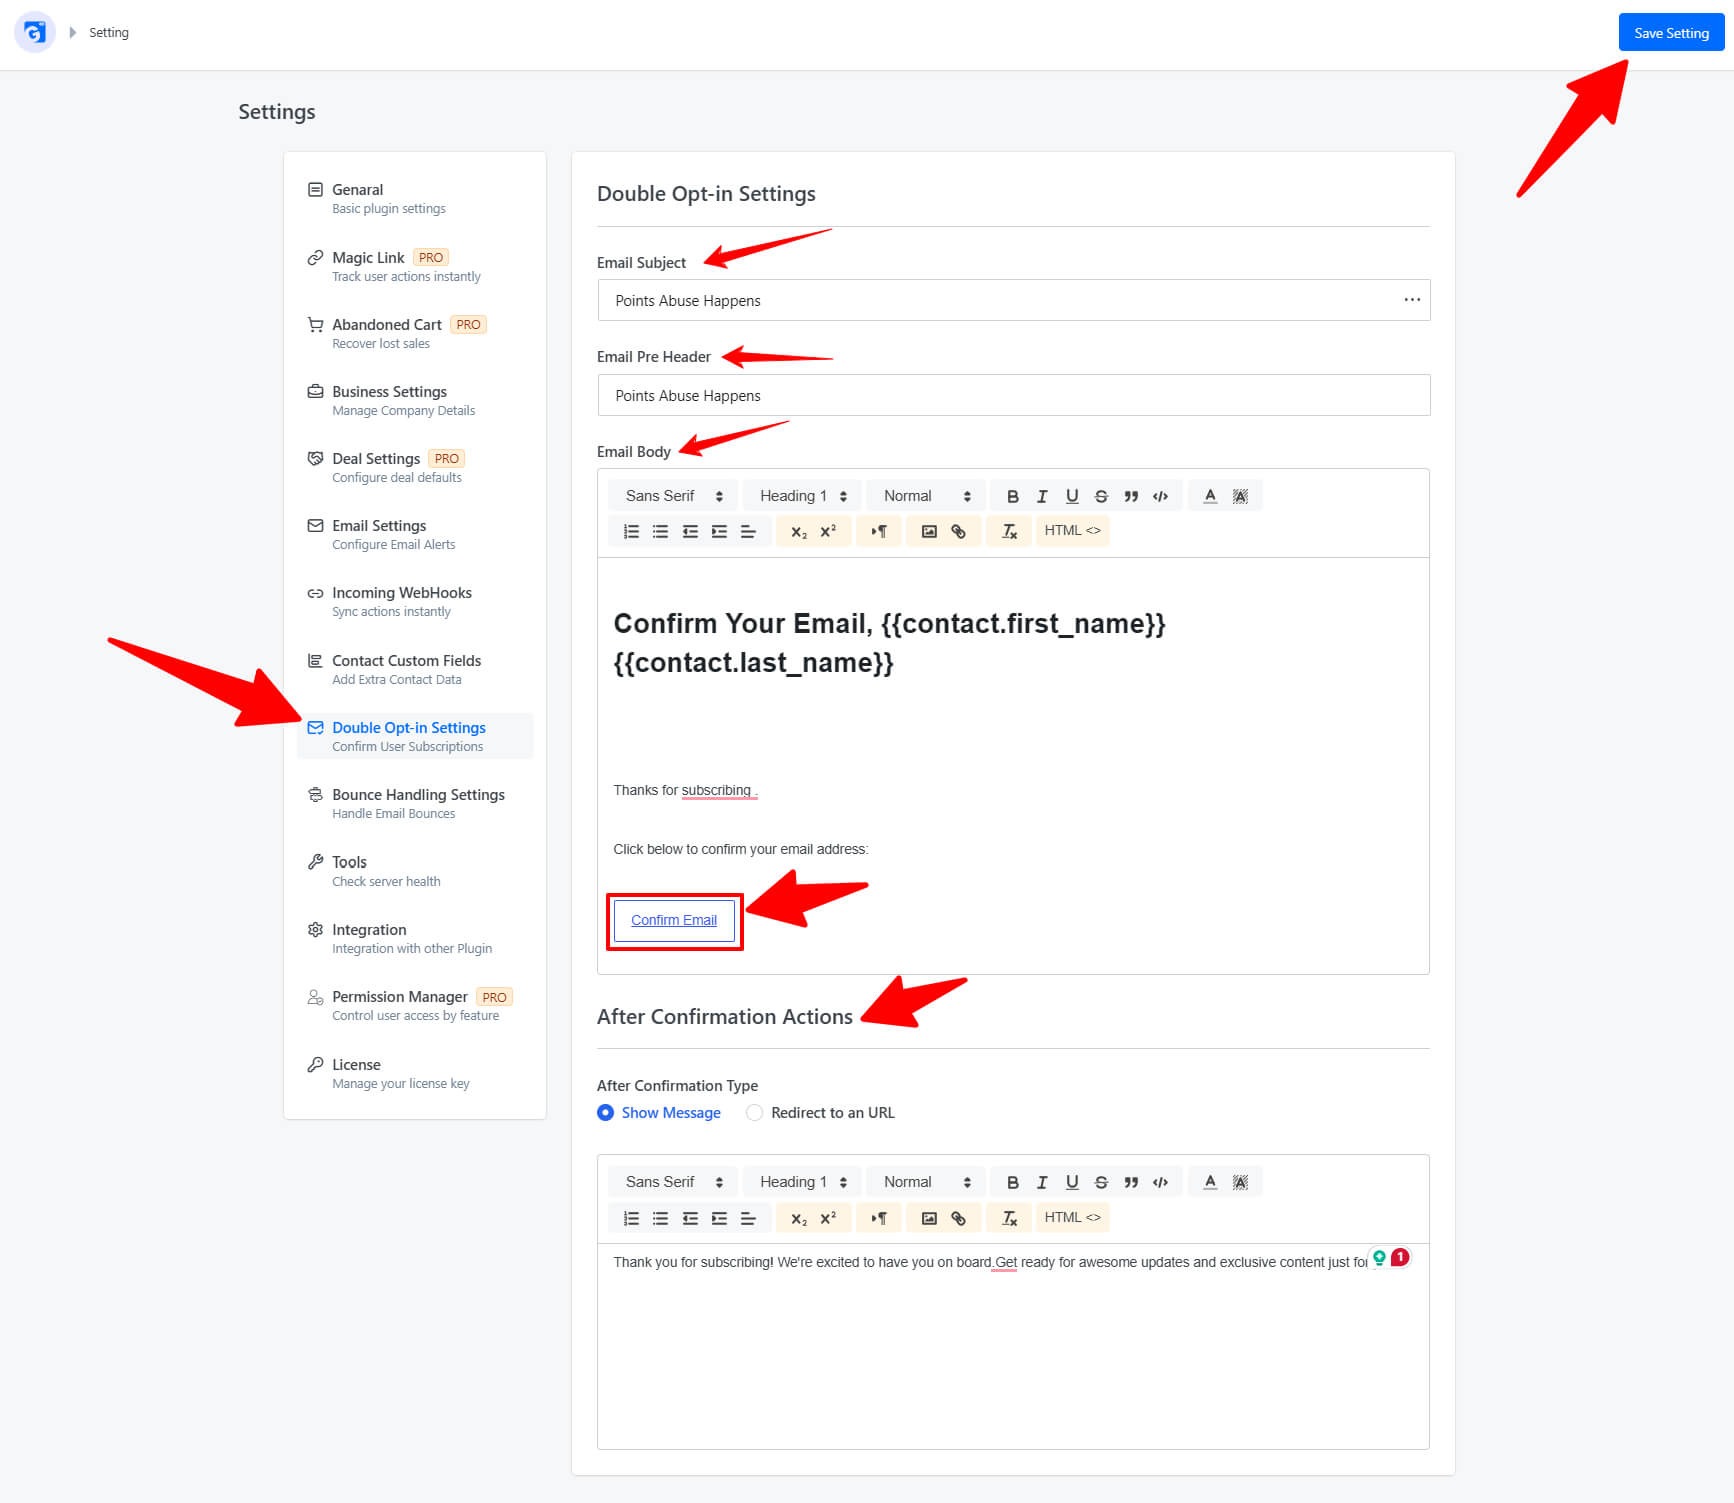
Go to GemCRM → Settings → Double Opt-in Email Settings. You will find the following configurable fields:
Email Subject
The subject line of the verification email. You can use merge tags:
• {{contact.first_name}} — subscriber’s first name.
• {{contact.last_name}} — subscriber’s last name.
Default: Email Subscription, {{contact.first_name}} {{contact.last_name}}
Pre-header Text
Short preview text that appears in the email client’s inbox list view, below the subject line. Keep it under 100 characters for best display across clients.
Email Body
The main HTML content of the verification email. The following special merge tag must be included to make the confirmation link work:
{{contact.confirmation_link}}
The default template includes a “Confirm Email” button that wraps this link. Example usage:
<a href="{{contact.confirmation_link}}" class="button">Confirm Email</a>
Email Template
GemCRM includes a built-in email wrapper template called simple_boxed. This wraps your email body in a responsive, styled container. You can override the template by providing custom HTML in this field.
After Confirmation Settings
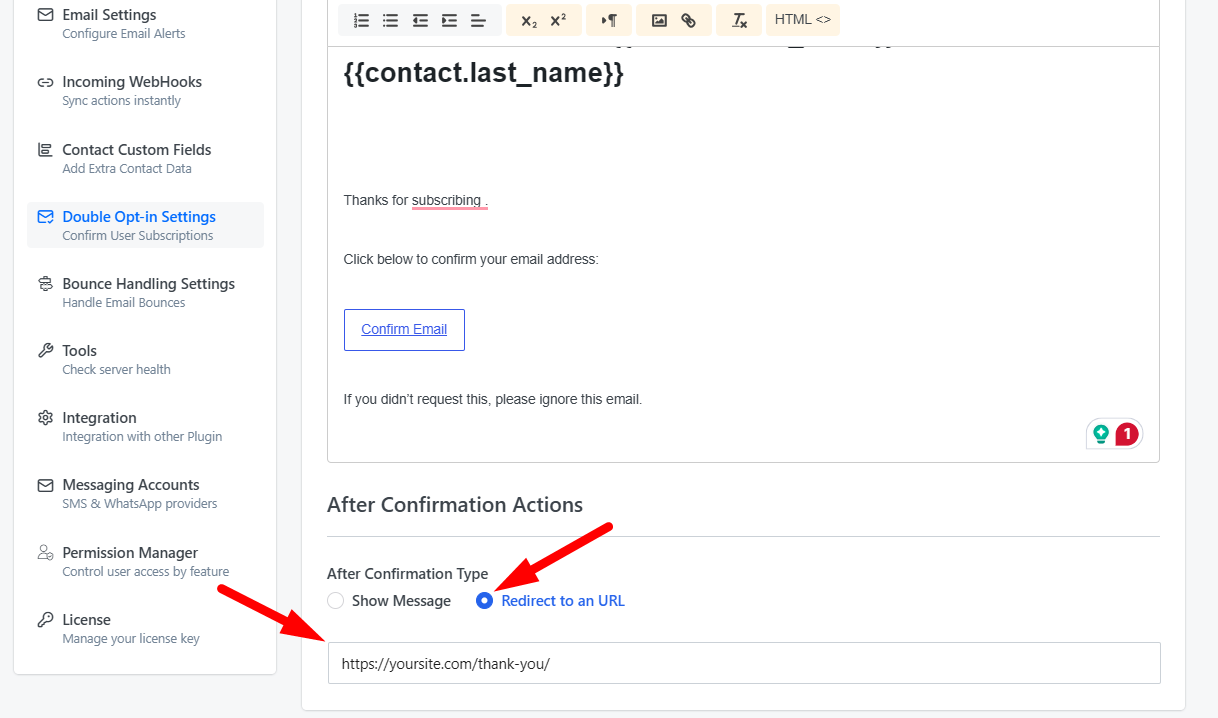
These settings control what happens after a subscriber clicks the confirmation link.
Type
Two options are available:
• Show Message — Display an HTML confirmation message on-screen after the subscriber confirms.
• Redirect — Redirect the subscriber to a custom URL after confirmation.
Message Content
If you selected Show Message, enter the HTML content to display to the subscriber after they confirm. The default message thanks the subscriber and encourages them to look forward to updates.
Confirmation Redirect URL
If you selected Redirect, enter the full URL (including https://) to redirect the subscriber to. Example: https://yoursite.com/thank-you
💡 If no redirect URL is provided, GemCRM will fall back to the site home URL.