


In GemCRM, the Company Module feature organizes your contacts under one or more company records. In each company record, you can see company information along with the contacts associated with that company. This article will guide you through the process of using this feature.
One of the notable features of the Company Module is its ability to organize one or more contacts under a single company entity, giving you a unified view of interactions, deals, and activities at the company level for smarter relationship management.
Activate/Enable Company Module
You can enable the Company Module feature from the Addons section. Follow the steps below —
Enable Company Module Using Addons
First, go to the Addons section in your GemCRM Sidebar.
You will find the Company addon card. By default, it may be set to Inactive.
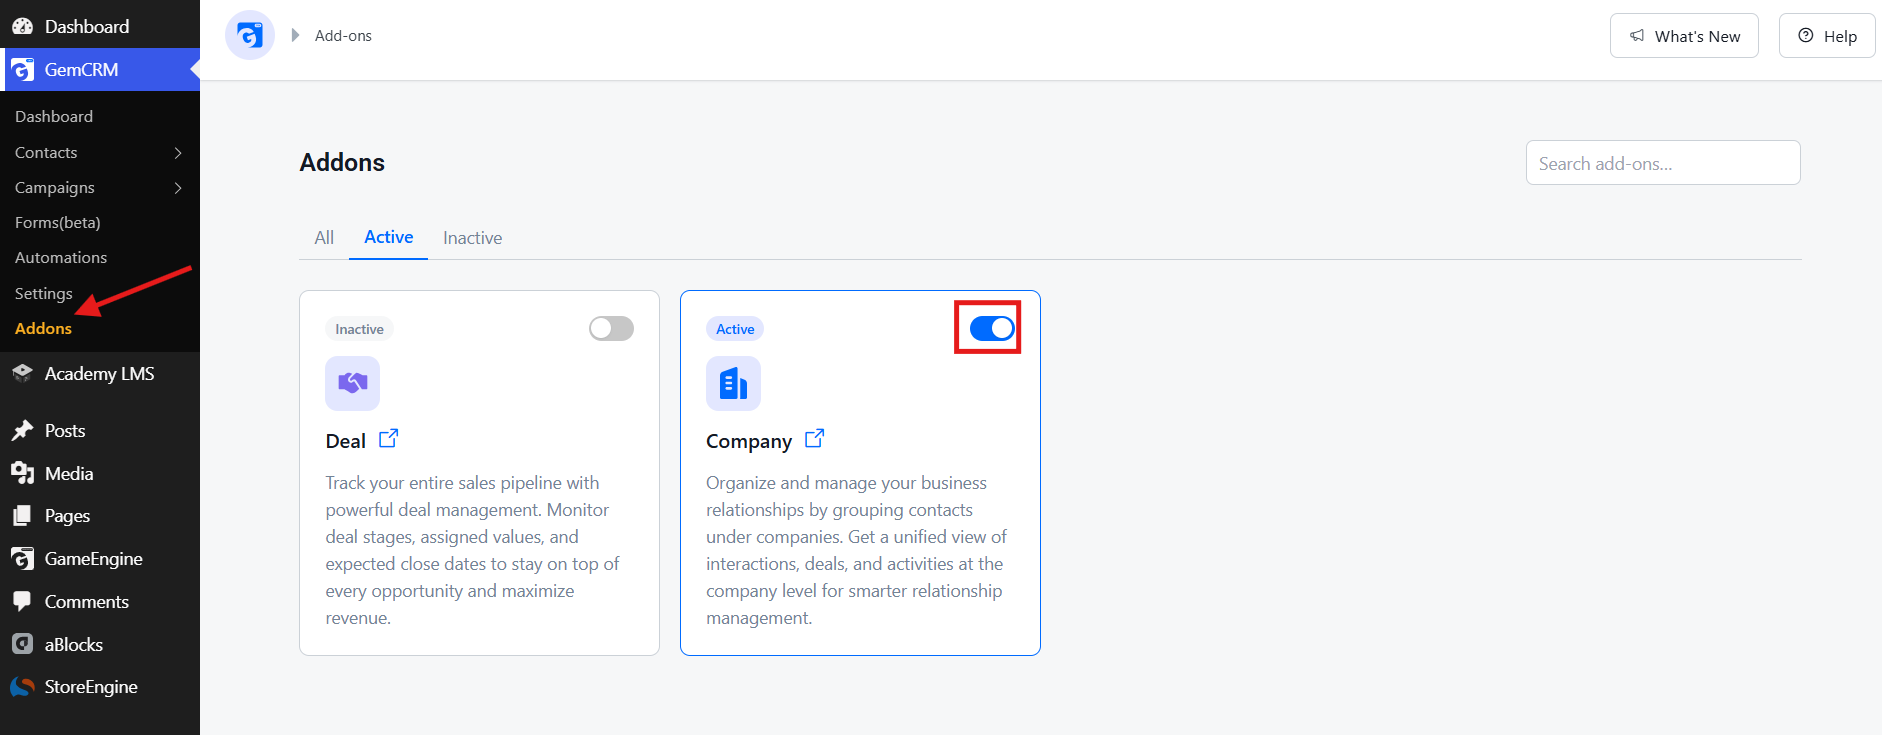
Click the toggle button on the Company addon card to activate it. Once enabled, the toggle will turn blue, and the status will change to Active.
After activation, a new Companies option will appear inside the Contacts section of your GemCRM Sidebar, ready to use.
Adding Companies
After enabling the Company Module, go to Contacts from the GemCRM Sidebar and click on Companies.
The Companies page provides a quick summary at the top, showing:
- Total Companies — the total number of company records added
- Subscribed — companies with subscribed contacts
- With Owner — companies that have an assigned owner
- With Industry — companies that have an industry type set

To add a new company, click the + Add Company button at the top right. A pop-up will appear where you can enter the company details.
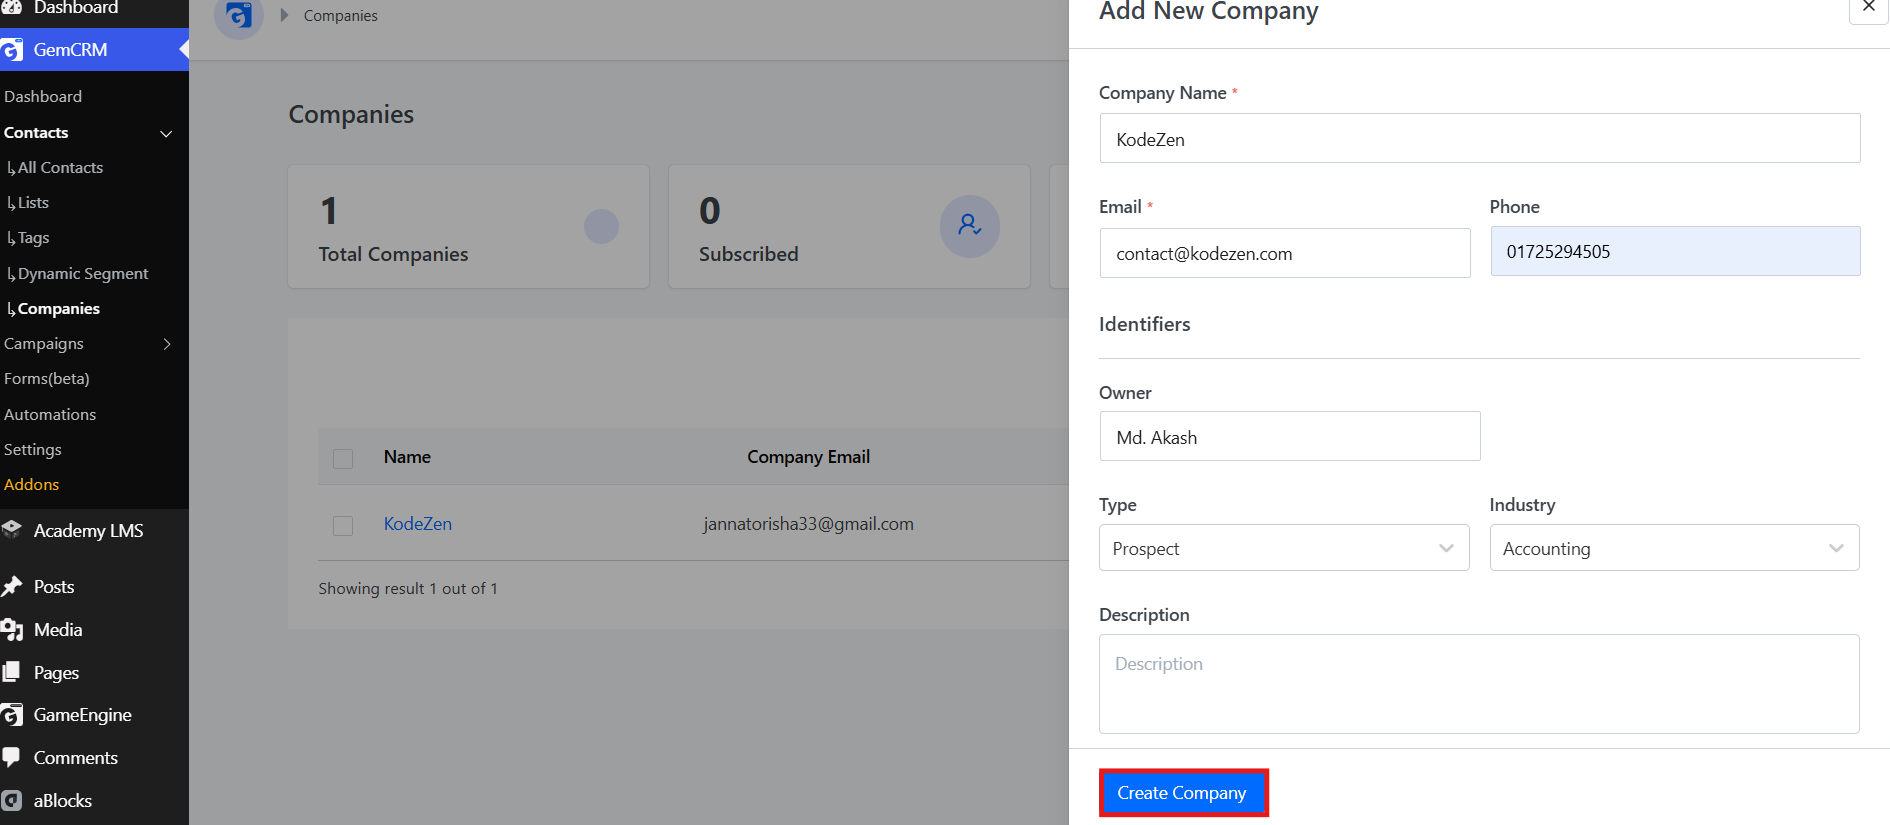
Fill in the following fields:
- Company Name (required) — the name of the company
- Email (required) — the primary email address of the company
- Phone — the contact phone number of the company
- Identifiers — any unique identifiers for the company
- Owner — assign an owner responsible for this company
- Type — set the company type (e.g., Prospect, Customer, Partner)
- Industry — select the industry the company belongs to (e.g., Accounting, Technology)
- Description — add any additional notes or details about the company
Once you have filled in all the necessary information, click the Create Company button to save it.
After a company is created, you can click on it to manage contacts, notes, activities, and other details associated with that company record.