


The Campaign Reports page gives you a complete performance overview of an individual email campaign. From a single screen you can monitor delivery numbers, track engagement, resend to specific contacts, and trigger tag-based actions — all without leaving the report.
Getting There
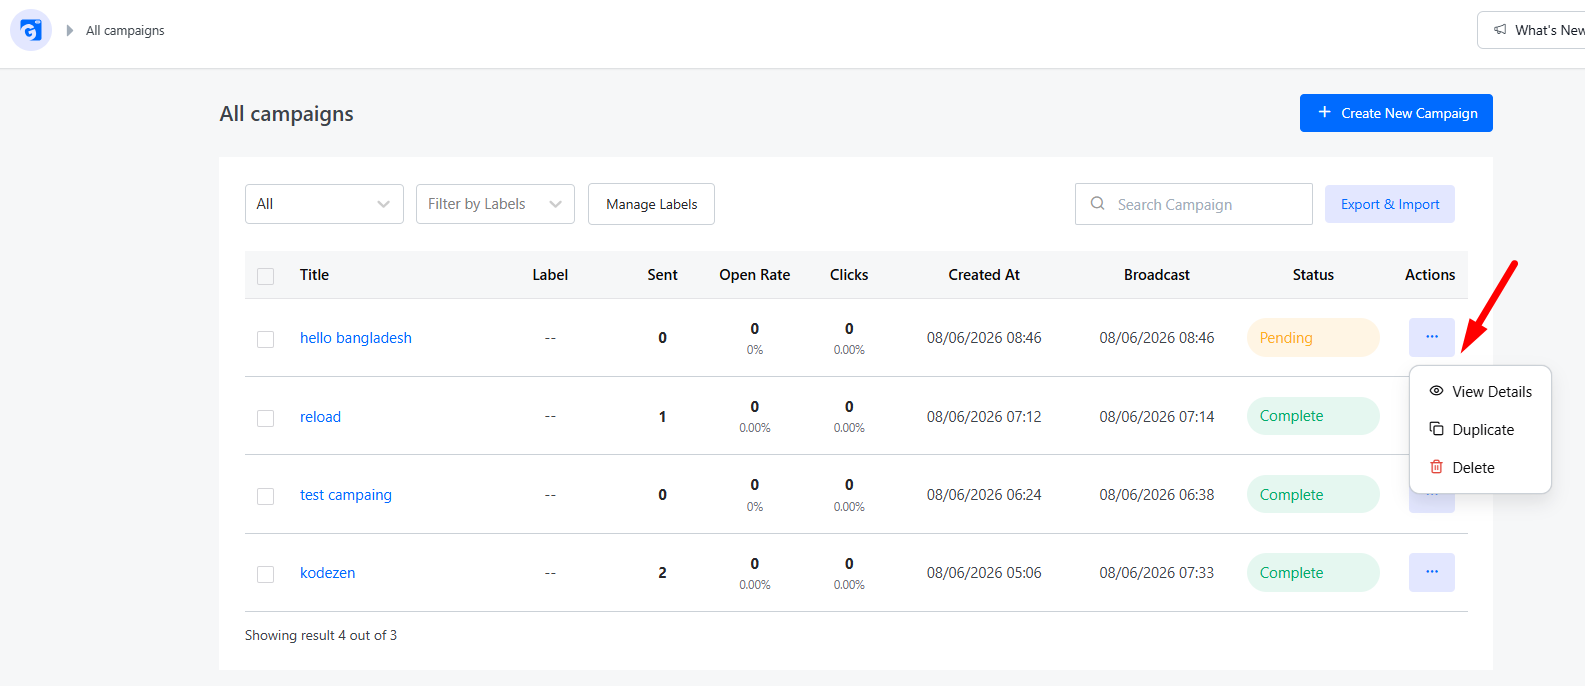
From the Campaigns list, click the report icon or the campaign name to open its report page.
Page Layout at a Glance
The report page is structured in four stacked sections from top to bottom:
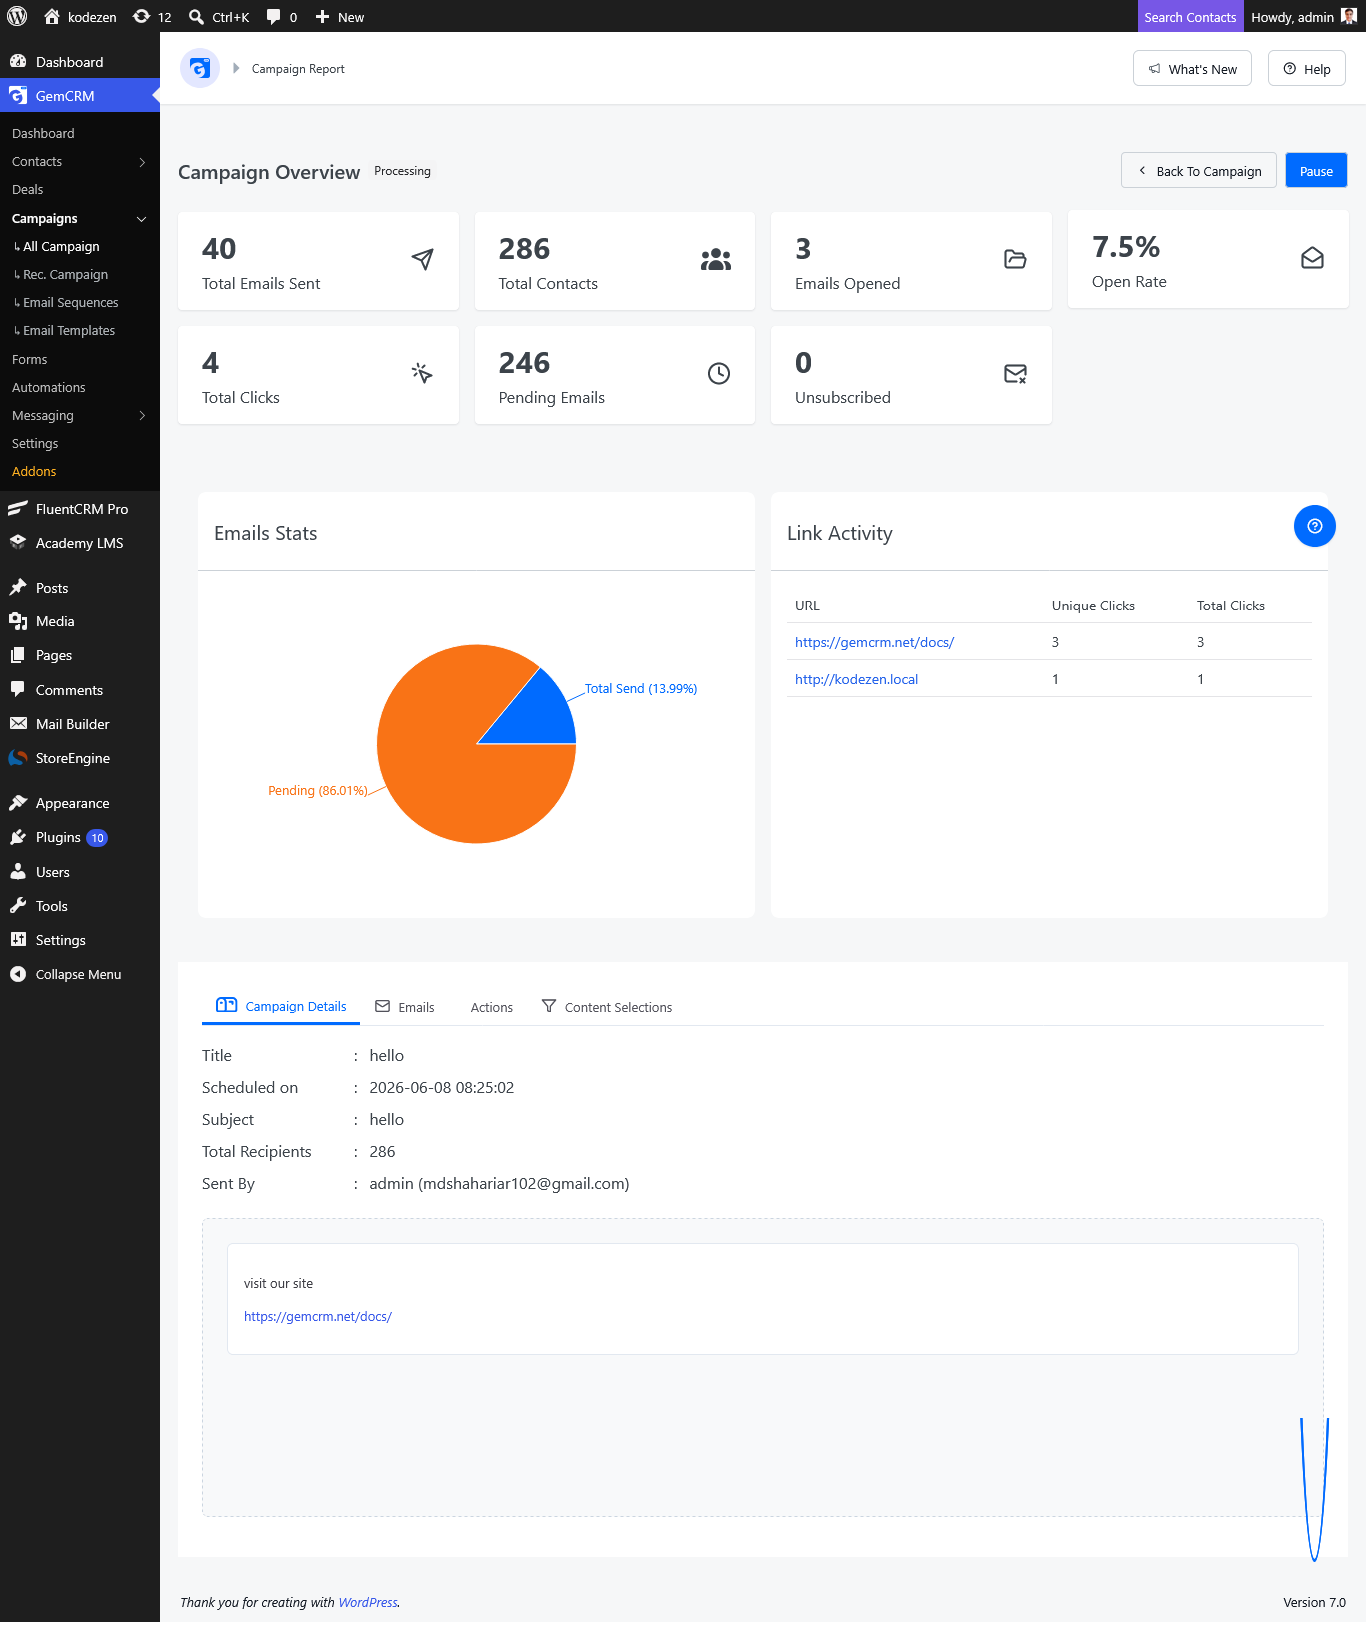
- Header — campaign title, status badge, and control buttons
- Top Cards — seven metric summary cards
- Charts and Link Activity — a pie chart and a link click table side by side
- Tabs — four detailed data tabs at the bottom
1. Header
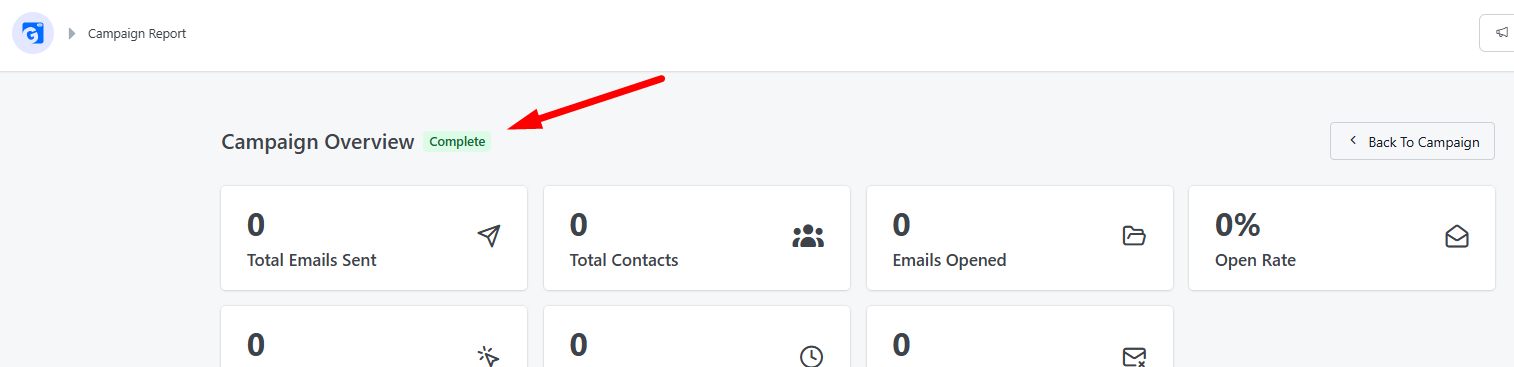
The top bar shows the campaign name and a status badge that reflects the current state of the campaign.
|
Status |
Badge Color |
Meaning |
|
Complete |
Green |
Campaign finished sending to all contacts |
|
Pending |
Yellow |
Campaign is queued and waiting to send |
|
Progressing |
grey |
Campaign is actively sending |
|
Paused |
Yellow |
Campaign has been manually paused |
Header Buttons
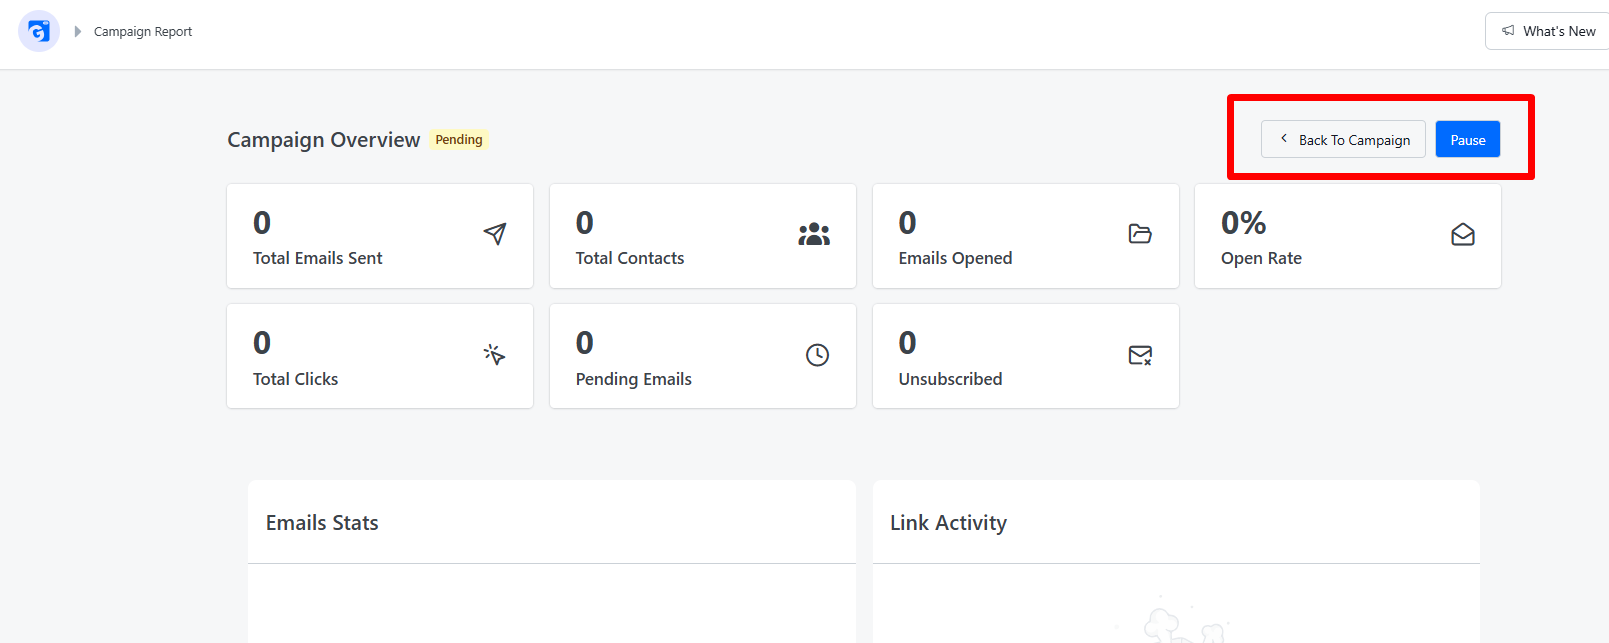
- Back to Campaign — returns you to the main Campaigns list.
- Pause / Resume — toggles the campaign between active and paused states. This button is only visible while the campaign has not yet completed. If the campaign was paused with a reason, a tooltip icon appears next to the status badge showing the reason.
2. Top Cards
Seven metric cards are displayed across the top of the report. Each card is clickable — clicking one filters the Emails tab below to show only the relevant contacts and smoothly scrolls the page down to the tab.
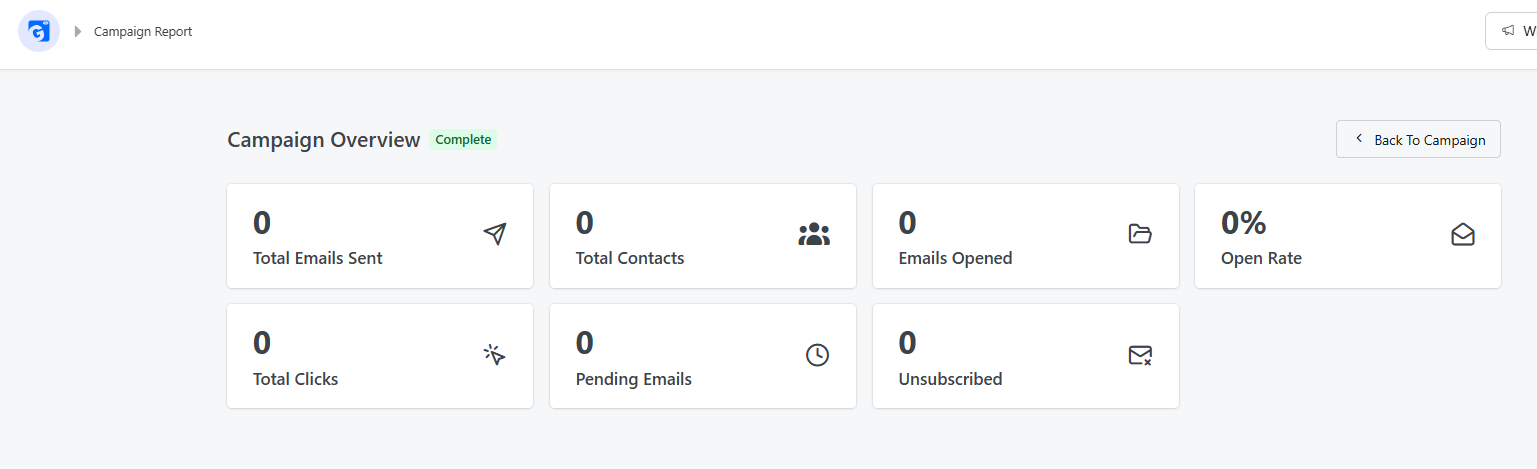
|
Card |
What It Shows |
Clicking It Does |
|
Total Emails Sent |
Number of emails successfully dispatched |
Shows all emails in the Emails tab |
|
Total Contacts |
Total number of contacts targeted by this campaign |
Shows all emails in the Emails tab |
|
Emails Opened |
Number of contacts who opened the email |
Filters the Emails tab to opened only |
|
Open Rate |
Percentage of sent emails that were opened |
Filters the Emails tab to opened only |
|
Total Clicks |
Number of link clicks across all emails |
Filters the Emails tab to clicked only |
|
Pending Emails |
Emails not yet sent |
Shows all emails in the Emails tab |
|
Unsubscribed |
Contacts who unsubscribed after receiving this campaign |
Shows all emails in the Emails tab |
3. Email Stats and Link Activity
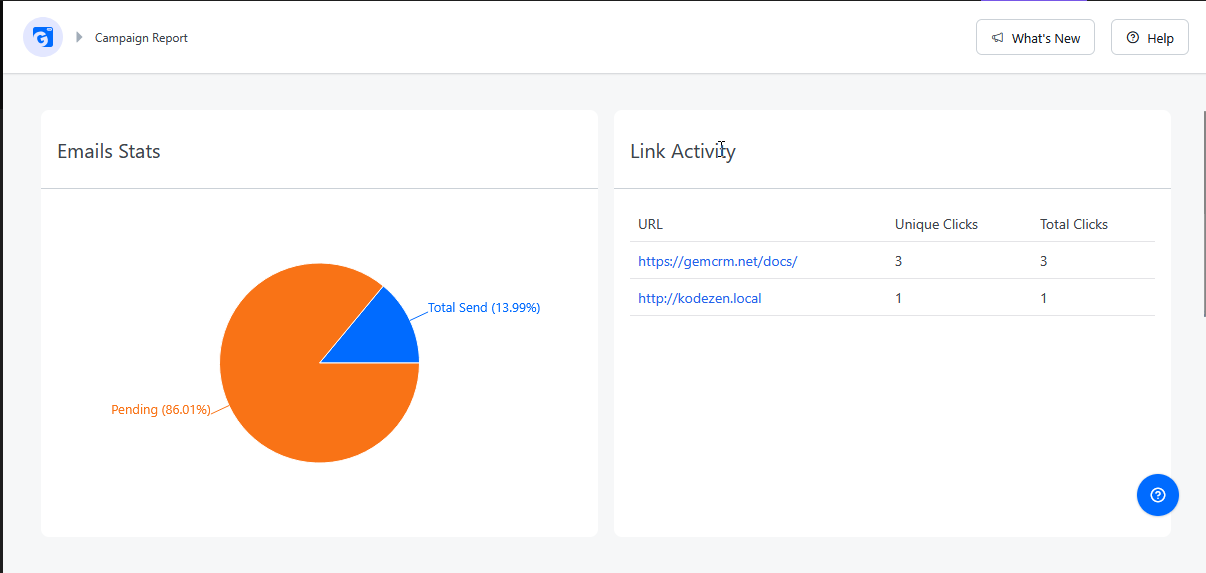
These two panels sit side by side below the top cards.
Email Stats (Pie Chart)
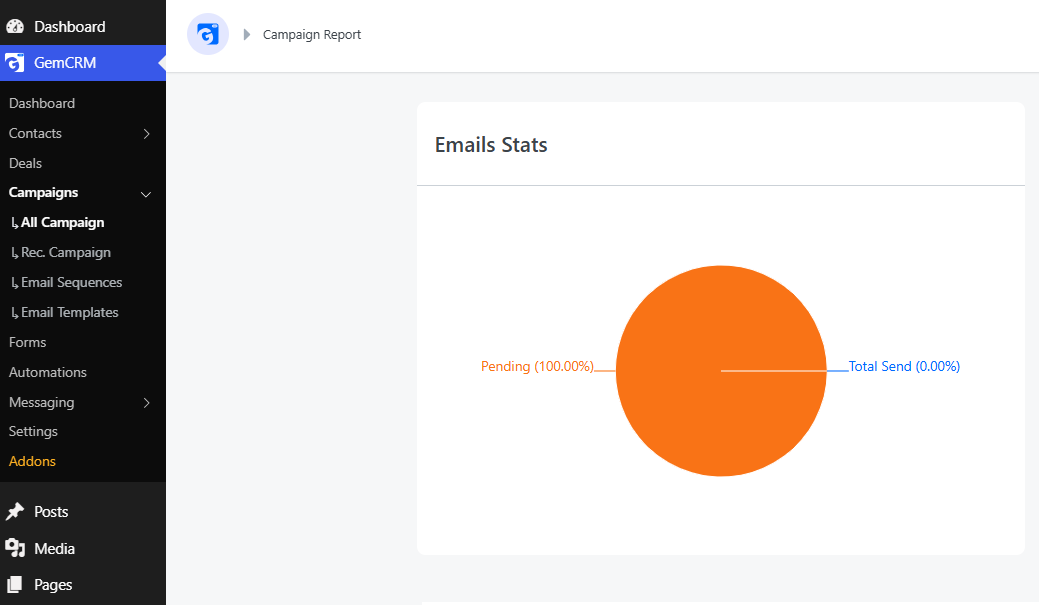
A pie chart that visually breaks down the delivery progress of the campaign as a percentage of total contacts.
- Total Send (blue) — the share of contacts who have already been sent the email
- Pending (orange) — the share of contacts whose emails are still waiting to be sent
Hover over a slice to see the exact percentage and value in a tooltip.
Link Activity
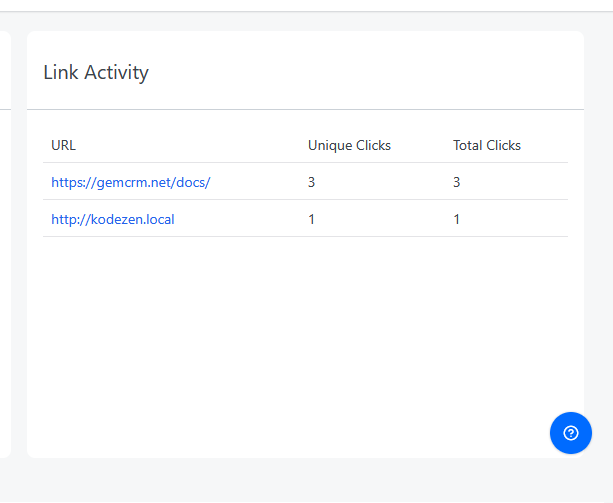
A table listing every tracked URL included in the campaign email, with click data per link.
|
Column |
Description |
|
URL |
The tracked link that was included in the email |
|
Unique Clicks |
How many individual contacts clicked this link at least once |
|
Total Clicks |
The total number of times this link was clicked, including repeat clicks |
If no links were clicked yet, an empty state illustration is shown.
4. Report Tabs
The bottom section contains four tabs with detailed data about different aspects of the campaign.
Campaign Details
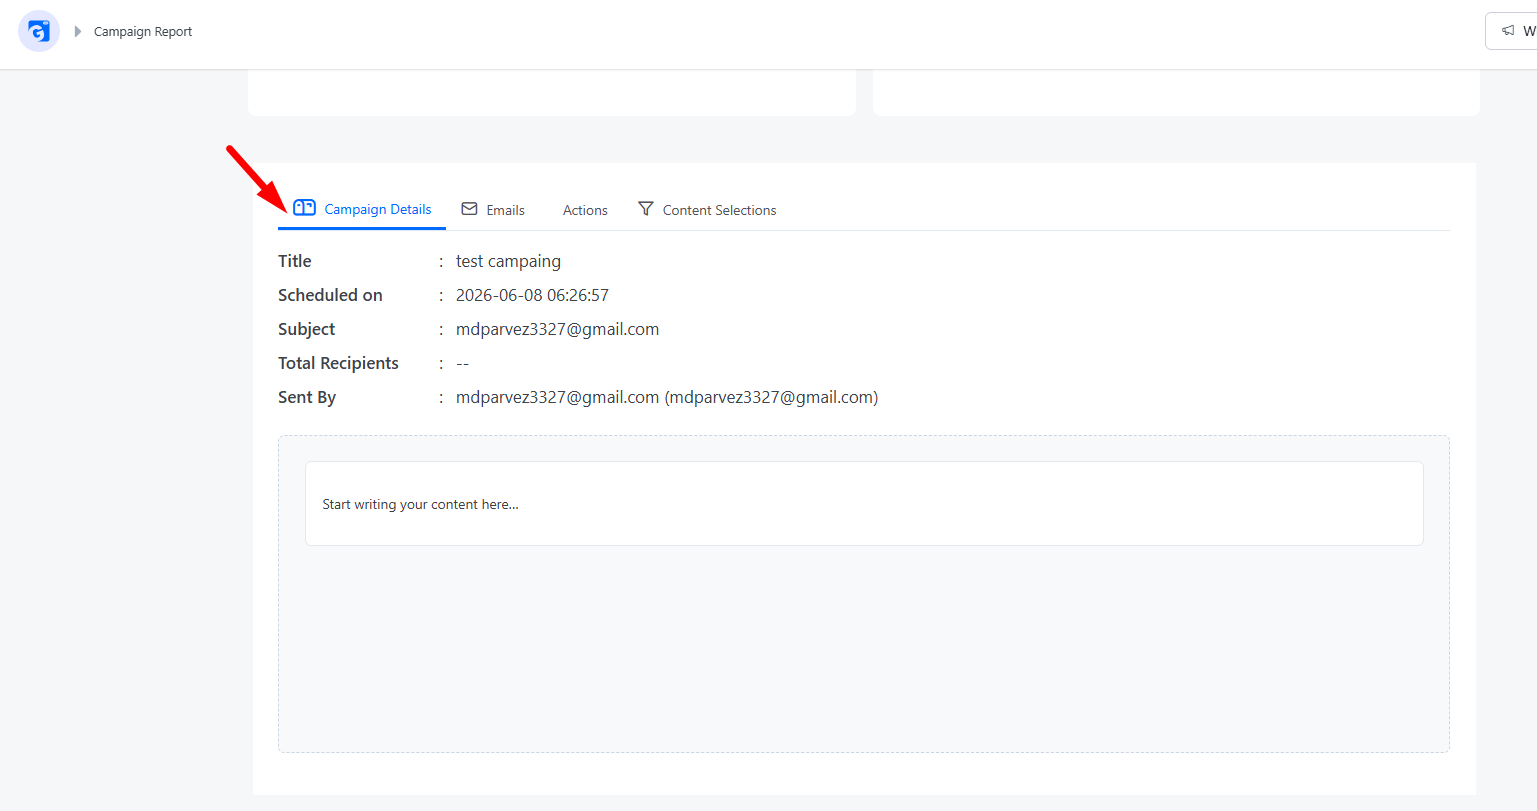
A summary of the campaign’s core configuration at the time it was sent.
|
Field |
Description |
|
Title |
The internal name of the campaign |
|
Scheduled on |
The date and time the campaign was scheduled to send |
|
Subject |
The email subject line sent to contacts |
|
Total Recipients |
The number of contacts who were targeted |
|
Sent By |
The name and email of the team member who created and sent the campaign |
Below the metadata, the full rendered email body is displayed in a preview panel so you can see exactly what the contacts received.
Emails
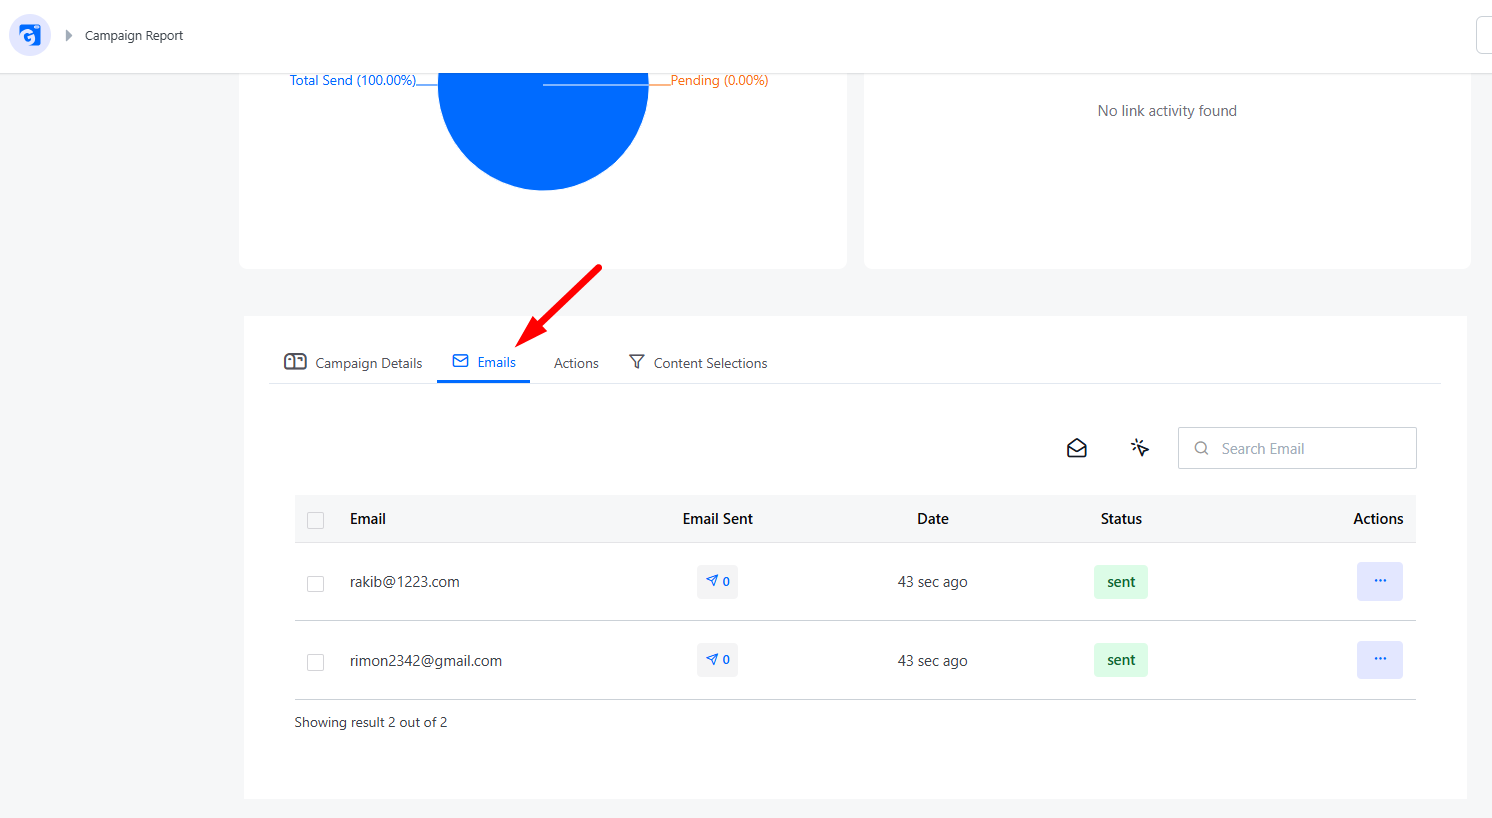
A per-contact log of every email in this campaign. Each row represents one sent (or pending) email to a specific contact.
|
Column |
Description |
|
|
The contact’s email address |
|
Email Sent |
Shows a click count badge and an open indicator icon if the contact opened the email |
|
Date |
How long ago the email was sent |
|
Status |
sent (green) or failed/other status (red) |
|
Actions |
Three-dot menu with a Resend option |
Filtering Emails
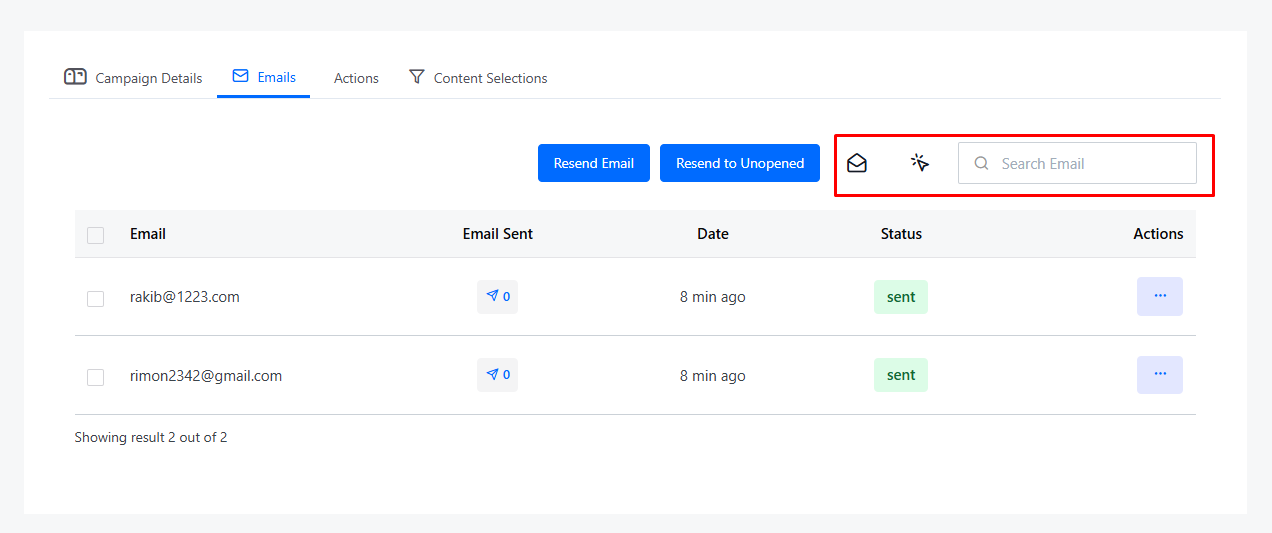
Use the filter buttons in the top-right corner of the tab to narrow the list:
- Open icon — shows only contacts who opened the email
- Click icon — shows only contacts who clicked a link
- Close (×) icon — clears all active filters and resets the view
- Search — search contacts by email address
These same filters are applied automatically when you click the Emails Opened, Open Rate, or Total Clicks cards at the top of the page.
Resending Emails
Resend to a single contact: Click the three-dot menu (⋯) on any row and select Resend to send the email again to that specific contact.
Resend to all unsent contacts (available when campaign is Complete): Click the Resend Email button in the tab header to queue the campaign for all contacts who did not receive it.
Resend to unopened contacts (available when campaign is Complete): Click the Resend to Unopened button to re-send the campaign to every contact who received it but never opened it.
Actions
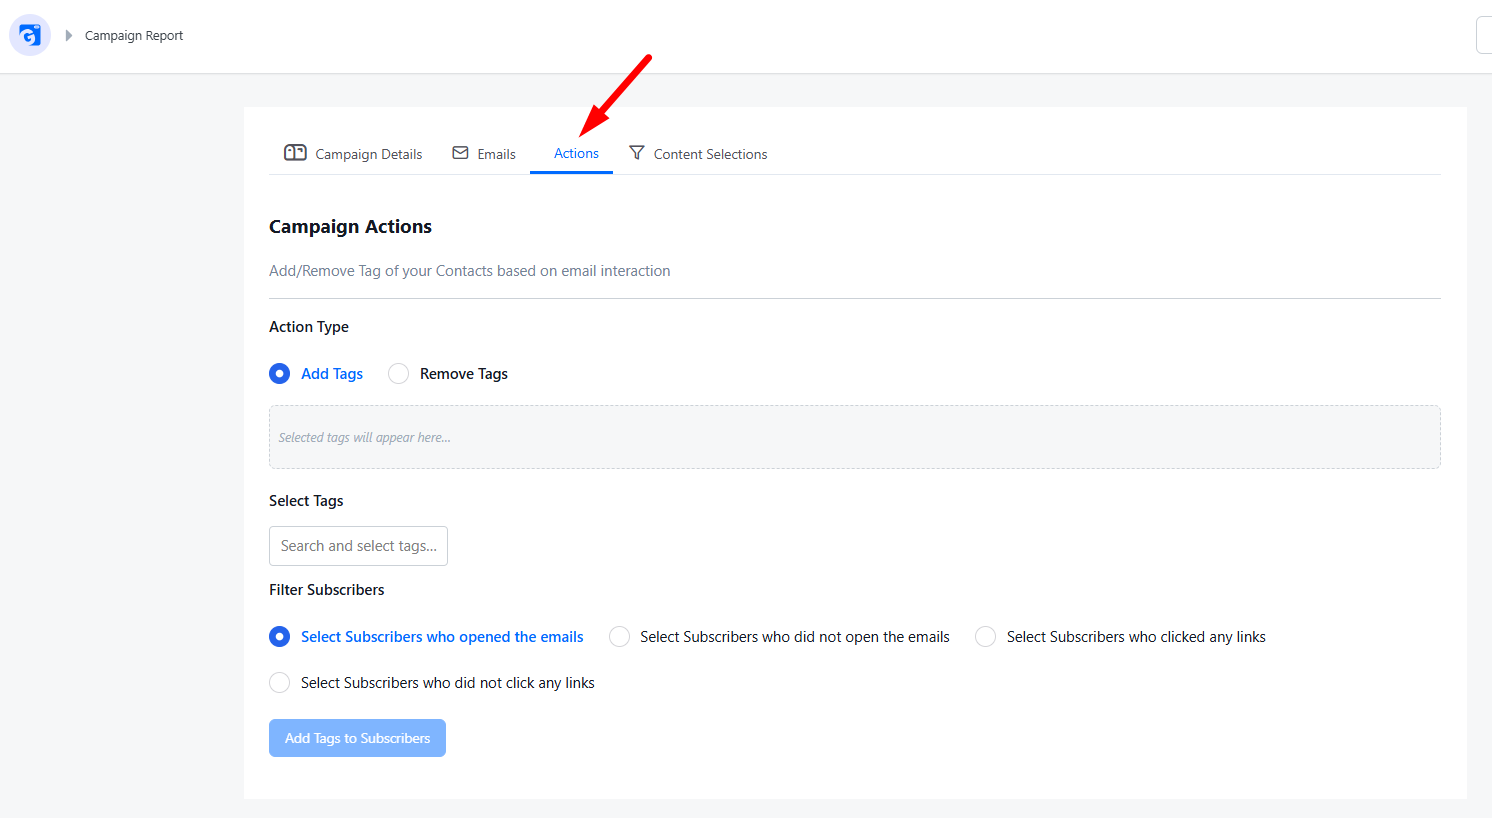
Use the Actions tab to automatically add or remove tags from contacts based on how they interacted with the campaign email. This is useful for segmenting engaged subscribers or following up with inactive ones.
How to Set Up a Campaign Action
- Action Type — choose one:
- Add Tags — applies the selected tags to matching contacts
- Remove Tags — strips the selected tags from matching contacts
- Select Tags — search and select one or more tags from the dropdown. Selected tags appear as removable badges in the panel above. Click the × on a badge to remove it.
- Filter Subscribers — choose which contacts the action should apply to:
- Subscribers who opened the emails
- Subscribers who did not open the emails
- Subscribers who clicked any links
- Subscribers who did not click any links
- Click Add Tags to Subscribers or Remove Tags from Subscribers (the button label updates based on your Action Type selection) to save and apply the action.
The save button is disabled until at least one tag is selected.
Content Selections
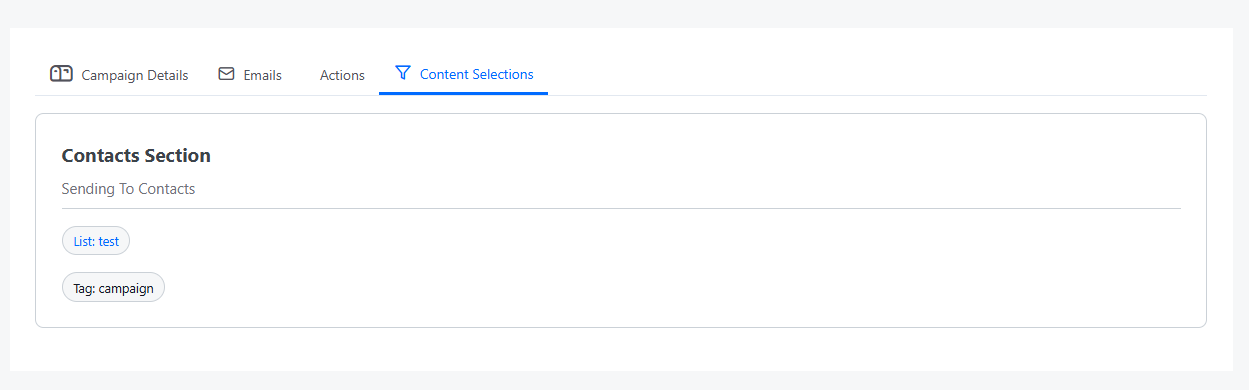
A read-only summary of the audience targeting rules that were configured when this campaign was created.
- Included — the lists and tags whose contacts received this campaign
- Excluded — the lists and tags whose contacts were deliberately left out
If no filters were applied and all contacts were targeted, the section displays a note confirming that no filter was set. If no exclusions were configured, it confirms that no exclusion filter was applied.