


In GemCRM, the Deal Module lets you track and manage your entire sales pipeline. You can monitor deal stages, assigned values, expected close dates, and activities — all from a single place. This article will guide you through the process of using this feature.
One notable feature of the Deal Module is its Kanban board view, which lets you visualize deals across different pipeline stages and drag them forward as they progress.
Activate/Enable Deal Module
You can enable the Deal Module feature from the Addons section. Follow the steps below —
Enable Deal Using Addons
First, go to the Addons section in your GemCRM Sidebar.
You will find the Deal addon card. Click the toggle button to activate it. Once enabled, the toggle turns blue, and the status changes to Active.
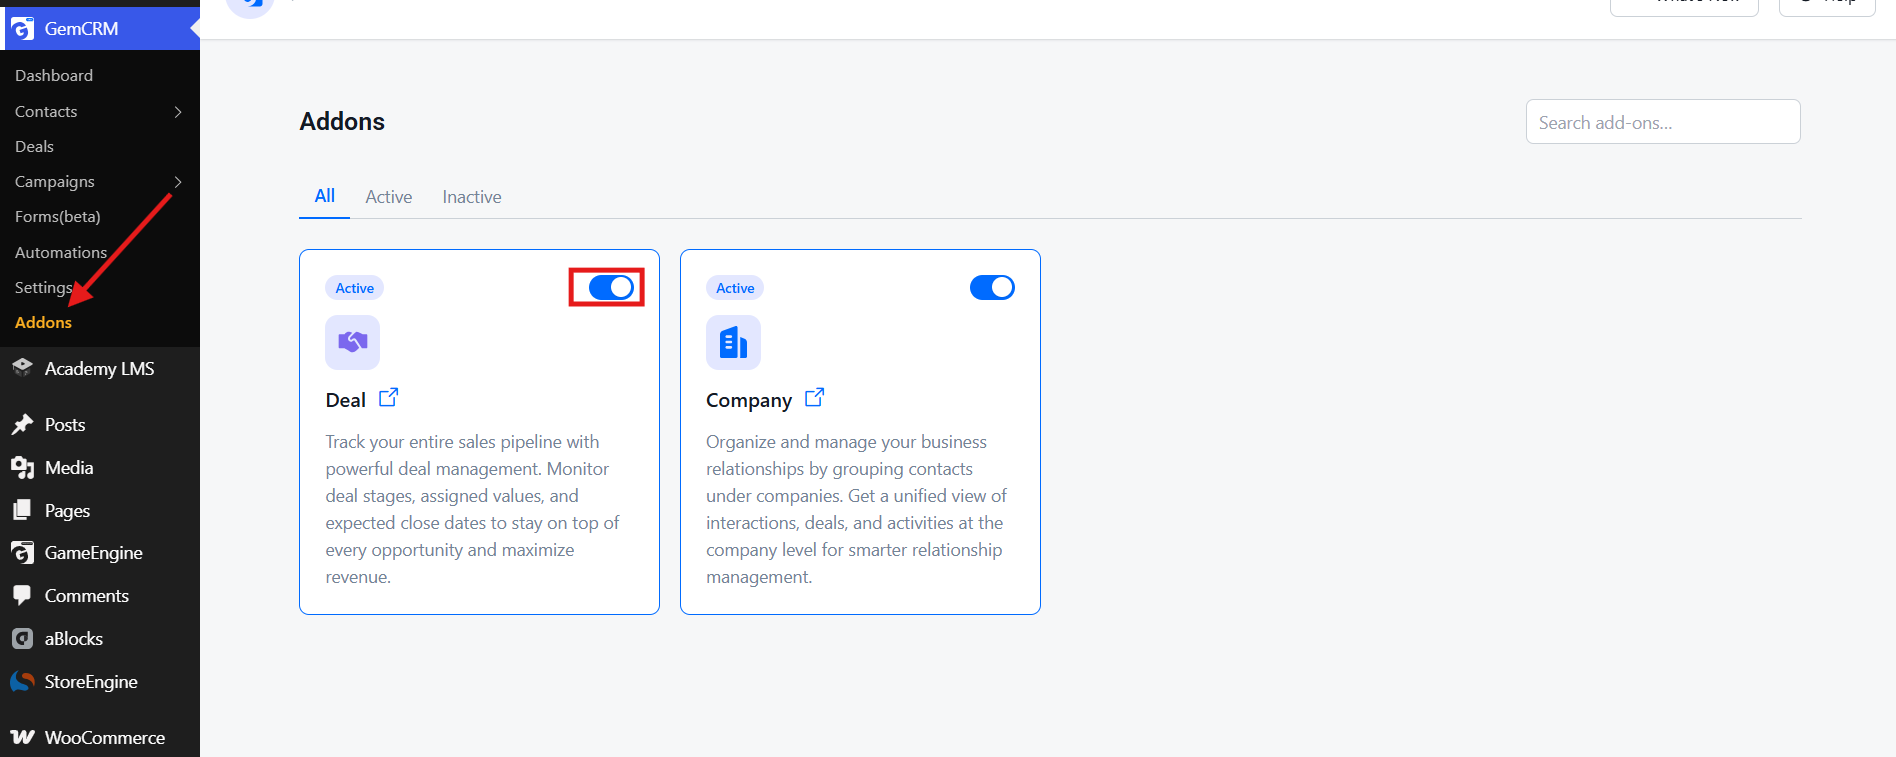
After activation, a new Deals option will appear directly in your GemCRM Sidebar, ready to use.
Adding Deals
After enabling the Deal Module, go to Deals from the GemCRM Sidebar.
The Deals page provides a quick summary at the top, showing:
- Total Deals — the total number of deals in the pipeline
- Pipeline Value — the combined monetary value of all deals
- Open Deals — deals currently in progress
- Won Deals — deals that have been successfully closed
You can view your deals in Kanban or List view using the toggle buttons at the top right. You can also click Manage Stages to customize your pipeline stages.
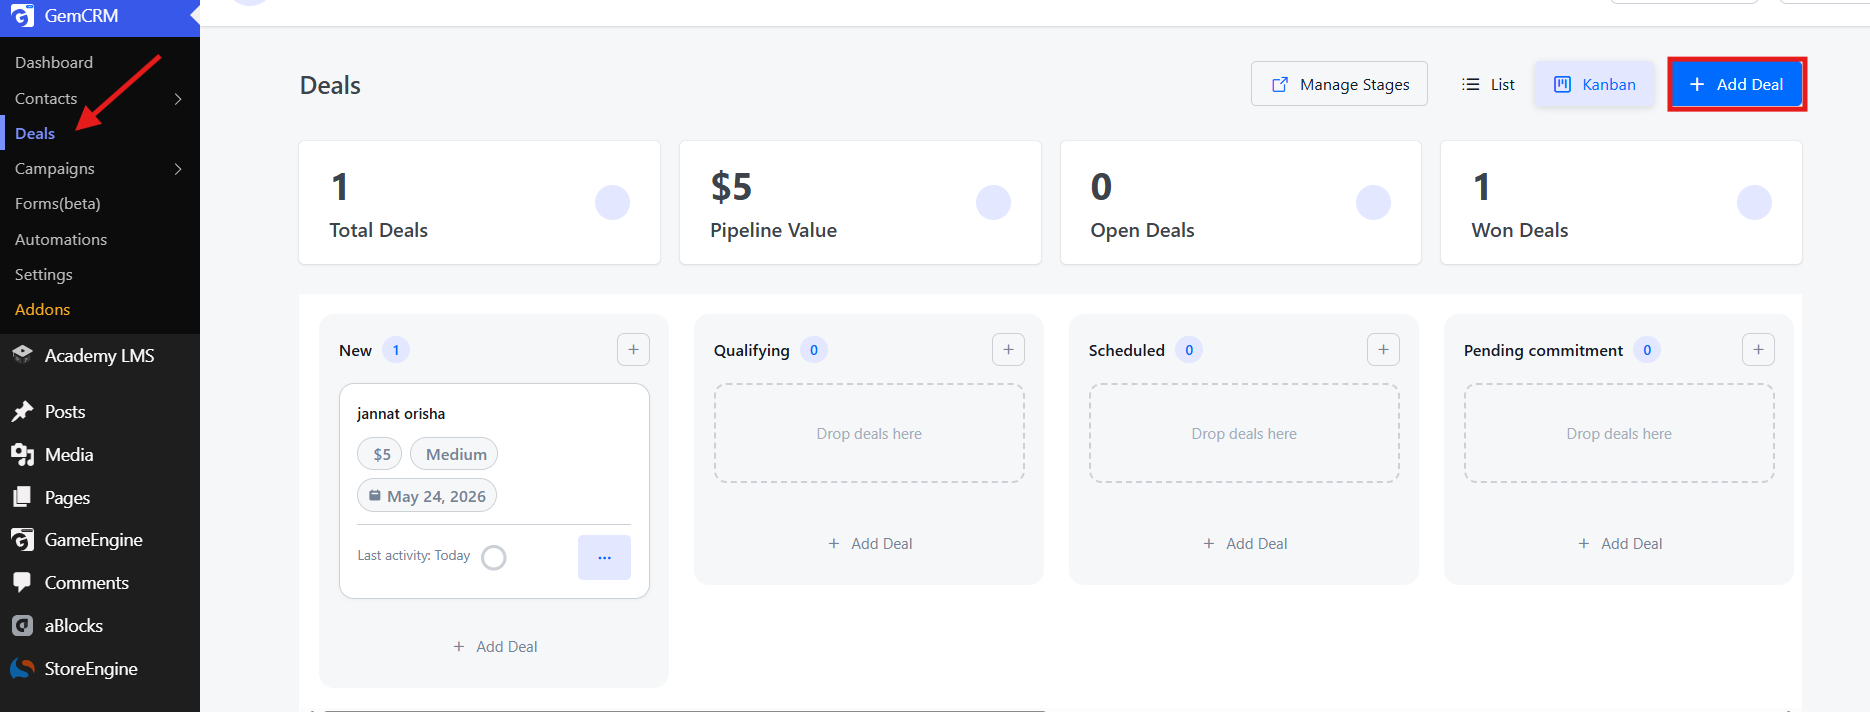
To add a new deal, click the + Add Deal button at the top right. A pop-up will appear to enter the deal details.
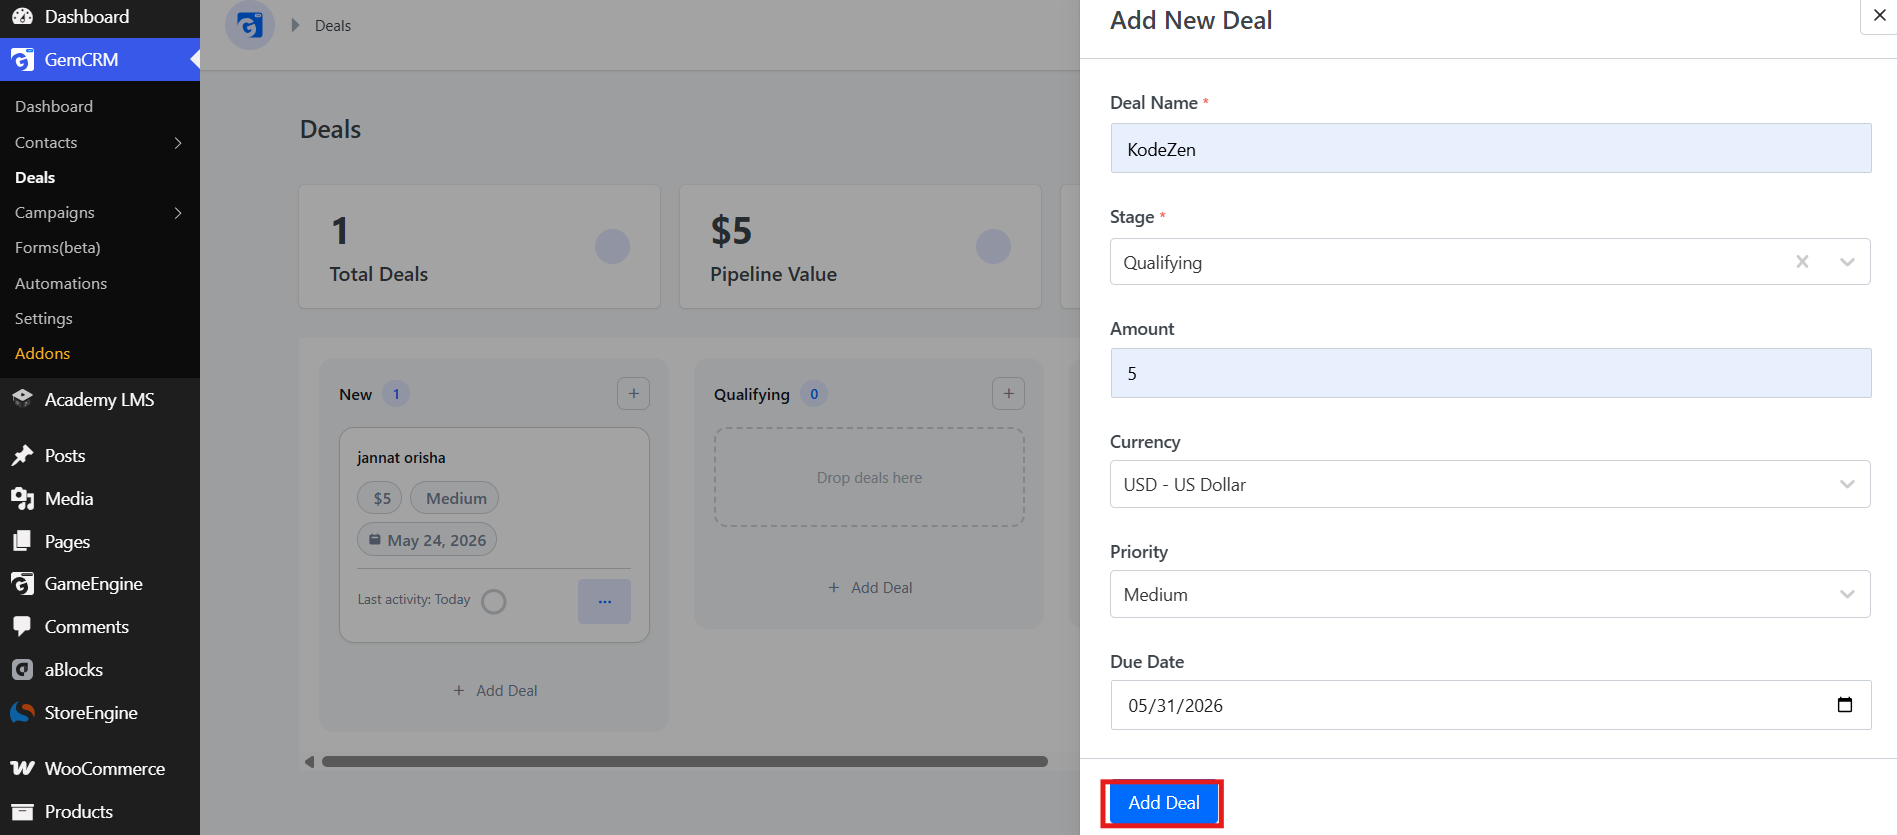
Fill in the following fields:
- Deal Name (required) — the name or title of the deal
- Stage (required) — the current pipeline stage (e.g., Qualifying, Scheduled, etc.)
- Amount — the monetary value of the deal
- Currency — the currency for the deal value (e.g., USD – US Dollar)
- Priority — set the priority level (Low, Medium, High)
- Due Date — the expected close date for the deal
Once you have filled in all the necessary information, click the Add Deal button to save it.
After a deal is created, you can click on it to open the Deal Details page, which gives you access to four sections:
- Overview — see a basic summary of the deal
- Deal Activity — view a timeline of all activities related to the deal
- Notes — add and manage notes for the deal
- Tasks — create and manage tasks assigned to the deal
Notes
You can add notes to track important information about a deal.
From the Deal Details page, click on Notes from the left sidebar.
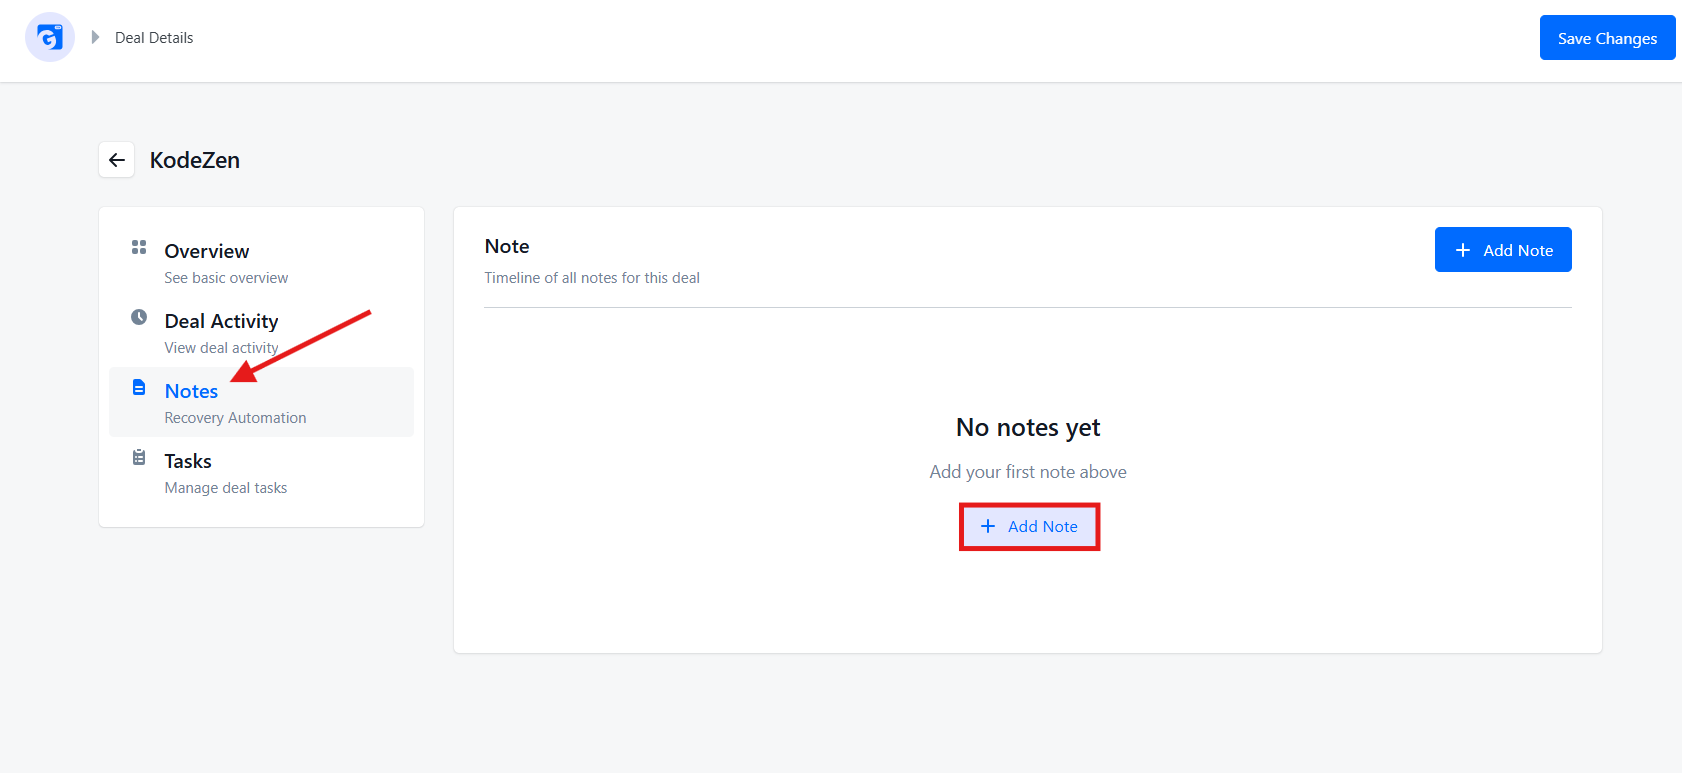
Click the + Add Note button (available both at the top right and in the center of the empty state). A pop-up will appear.
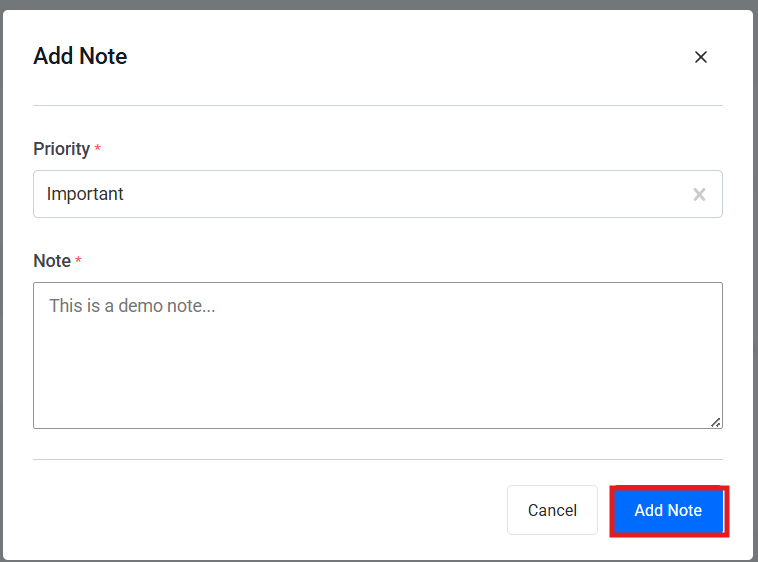
Fill in the following fields:
- Priority (required) — set the importance level of the note (e.g., Important)
- Note (required) — write the content of your note
Once done, click the Add Note button to save it. All notes will appear as a timeline under this section.
Tasks
You can create tasks to manage action items and follow-ups for a deal.
On the Deal Details page, click Tasks in the left sidebar.
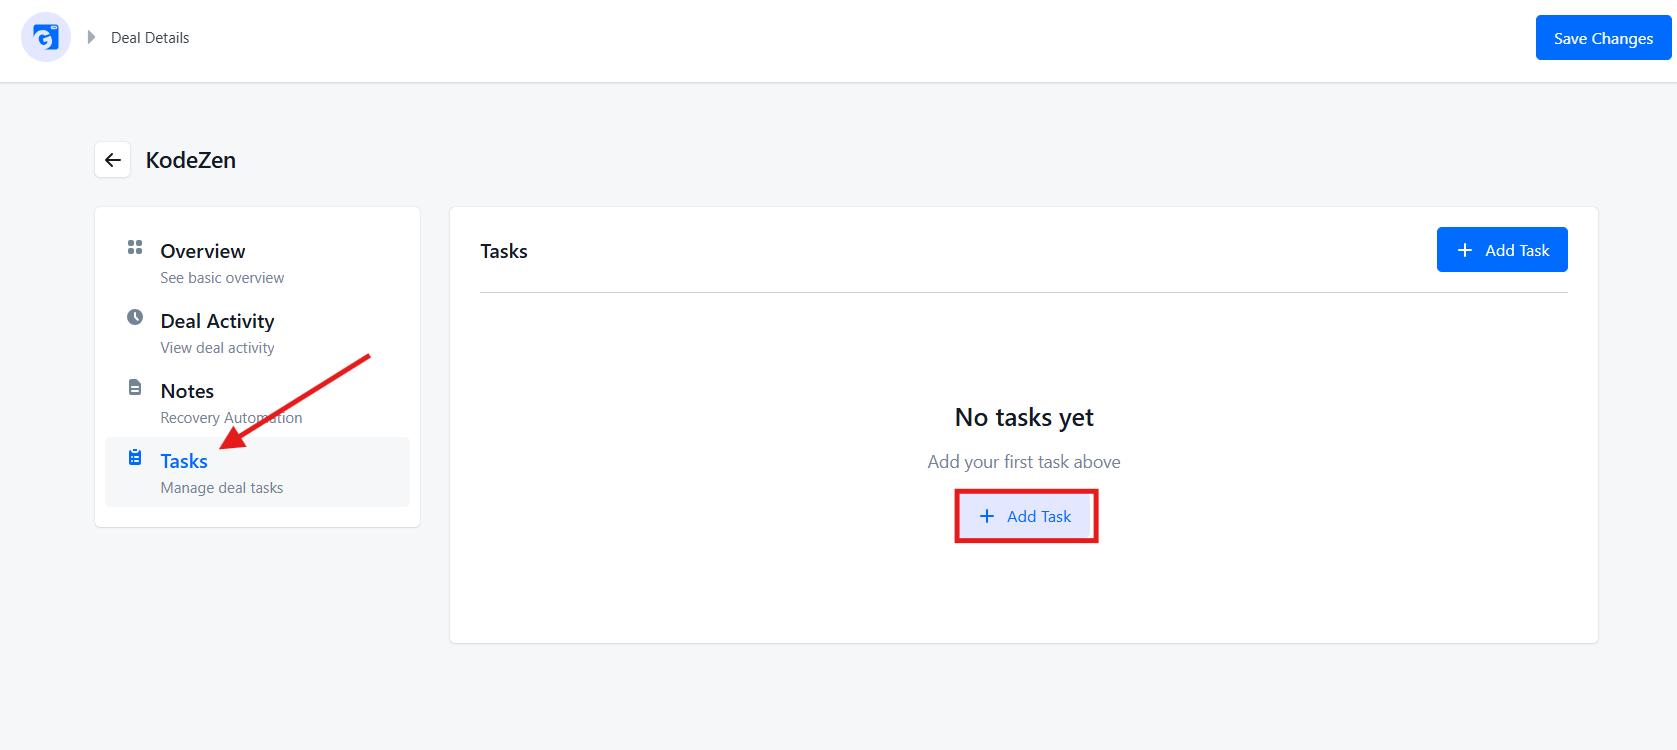
Click the + Add Task button (available both at the top right and in the center of the empty state). A pop-up will appear.
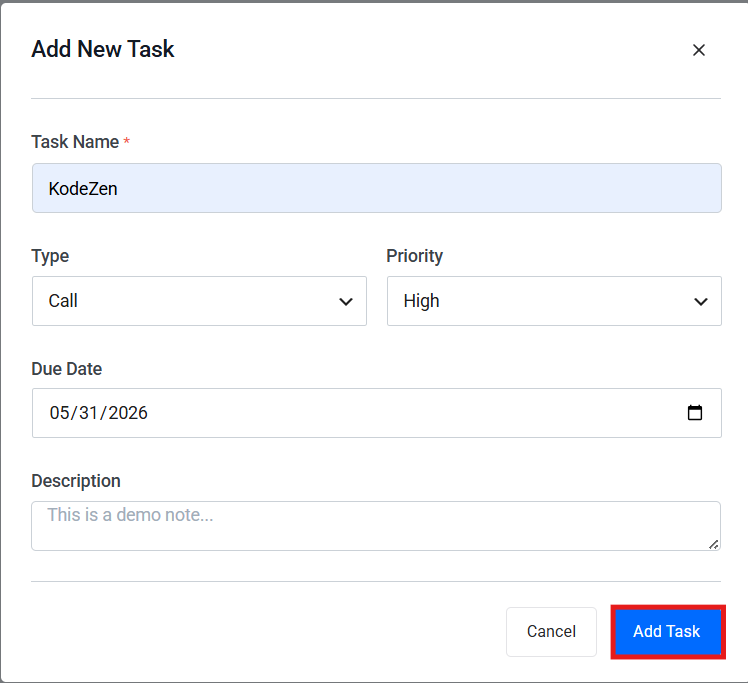
Fill in the following fields:
- Task Name (required) — the name or title of the task
- Type — the type of activity (e.g., Call, Email, Meeting)
- Priority — set the priority level (Low, Medium, High)
- Due Date — the deadline for completing the task
- Description — add any additional details or instructions for the task
Once done, click the Add Task button to save it. Your tasks will be listed and can be managed directly from the Tasks section of the deal.
Here, there is a missing overview section and a deal activity