


The Deal Settings page lets you configure the default currency for deals and manage the stages in your sales pipeline. Use this section to tailor the deal workflow to match your team’s process.
Requirements
Before accessing Deals Settings, make sure the following are in place:
- GemCRM Pro must be active on your site.
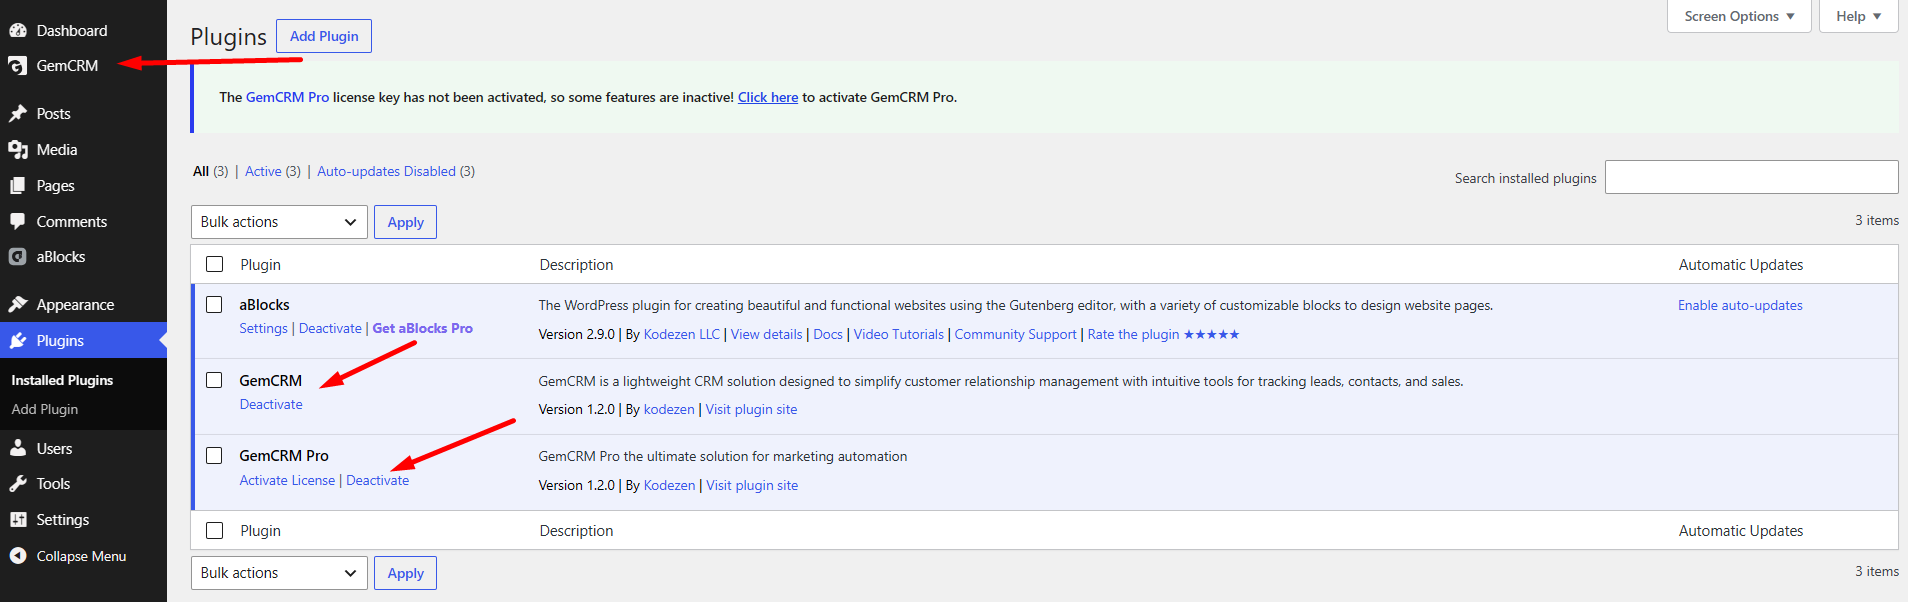
- The Deal Addon must be installed and activated. If it is not activated, a prompt will appear
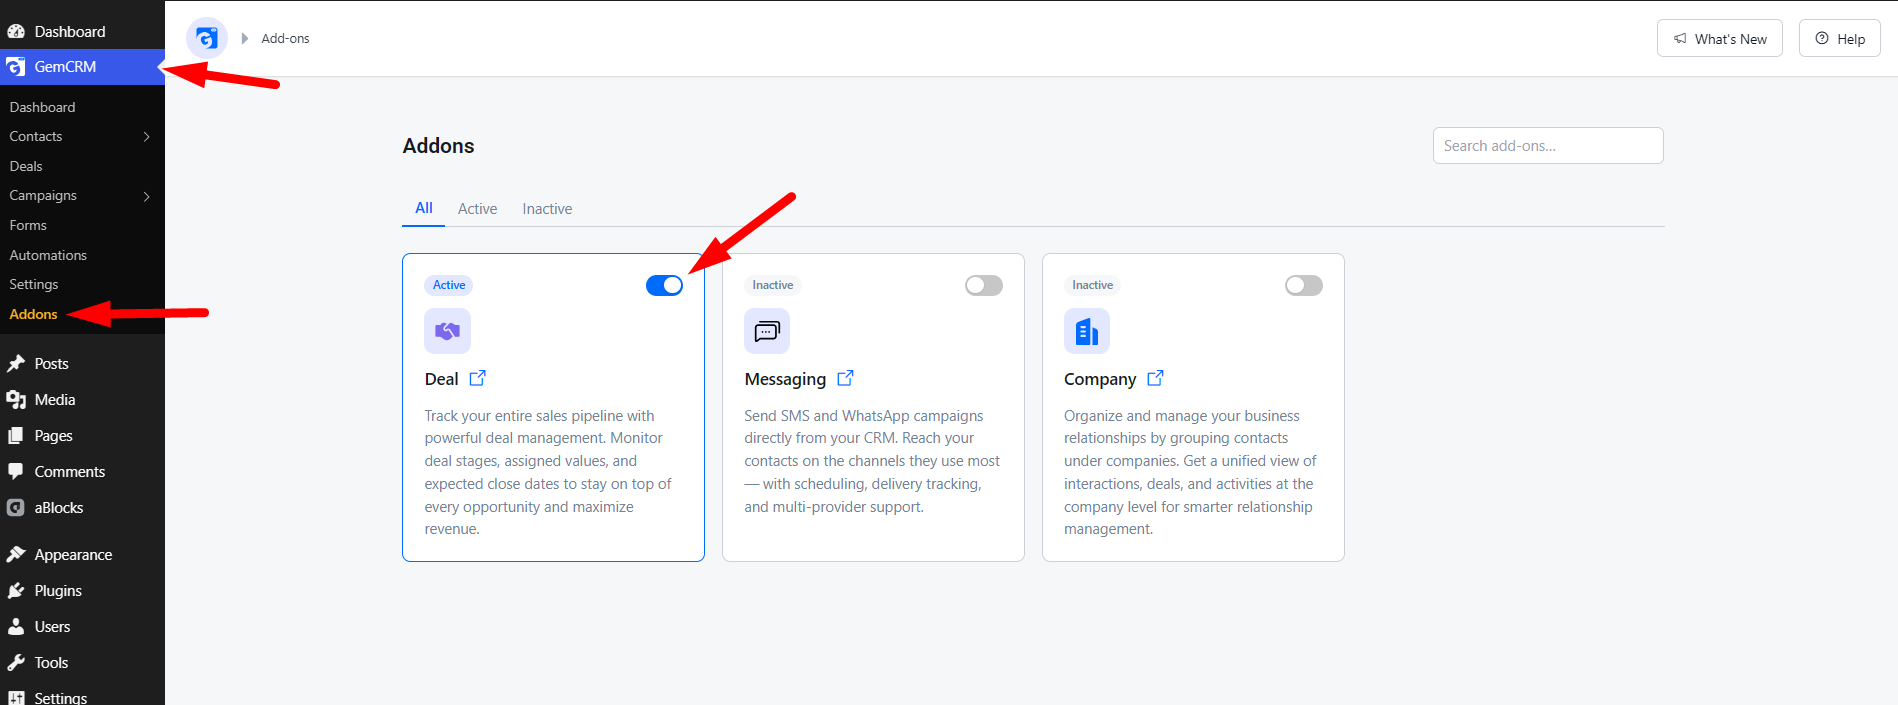
- on the page with a direct link to the Addons page where you can enable it.
Getting There
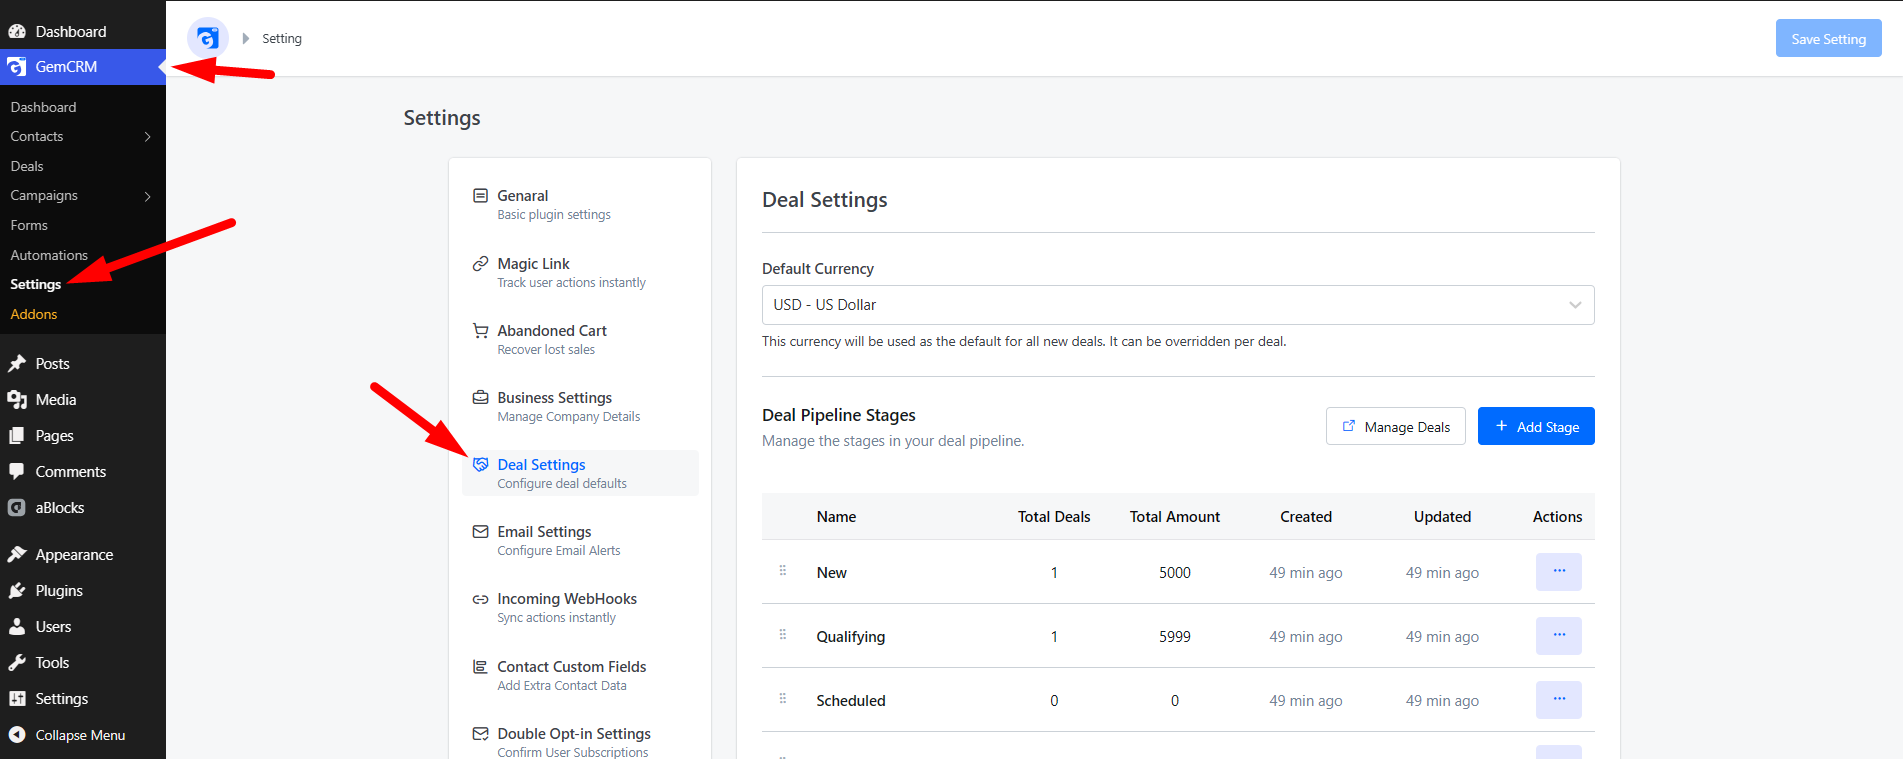
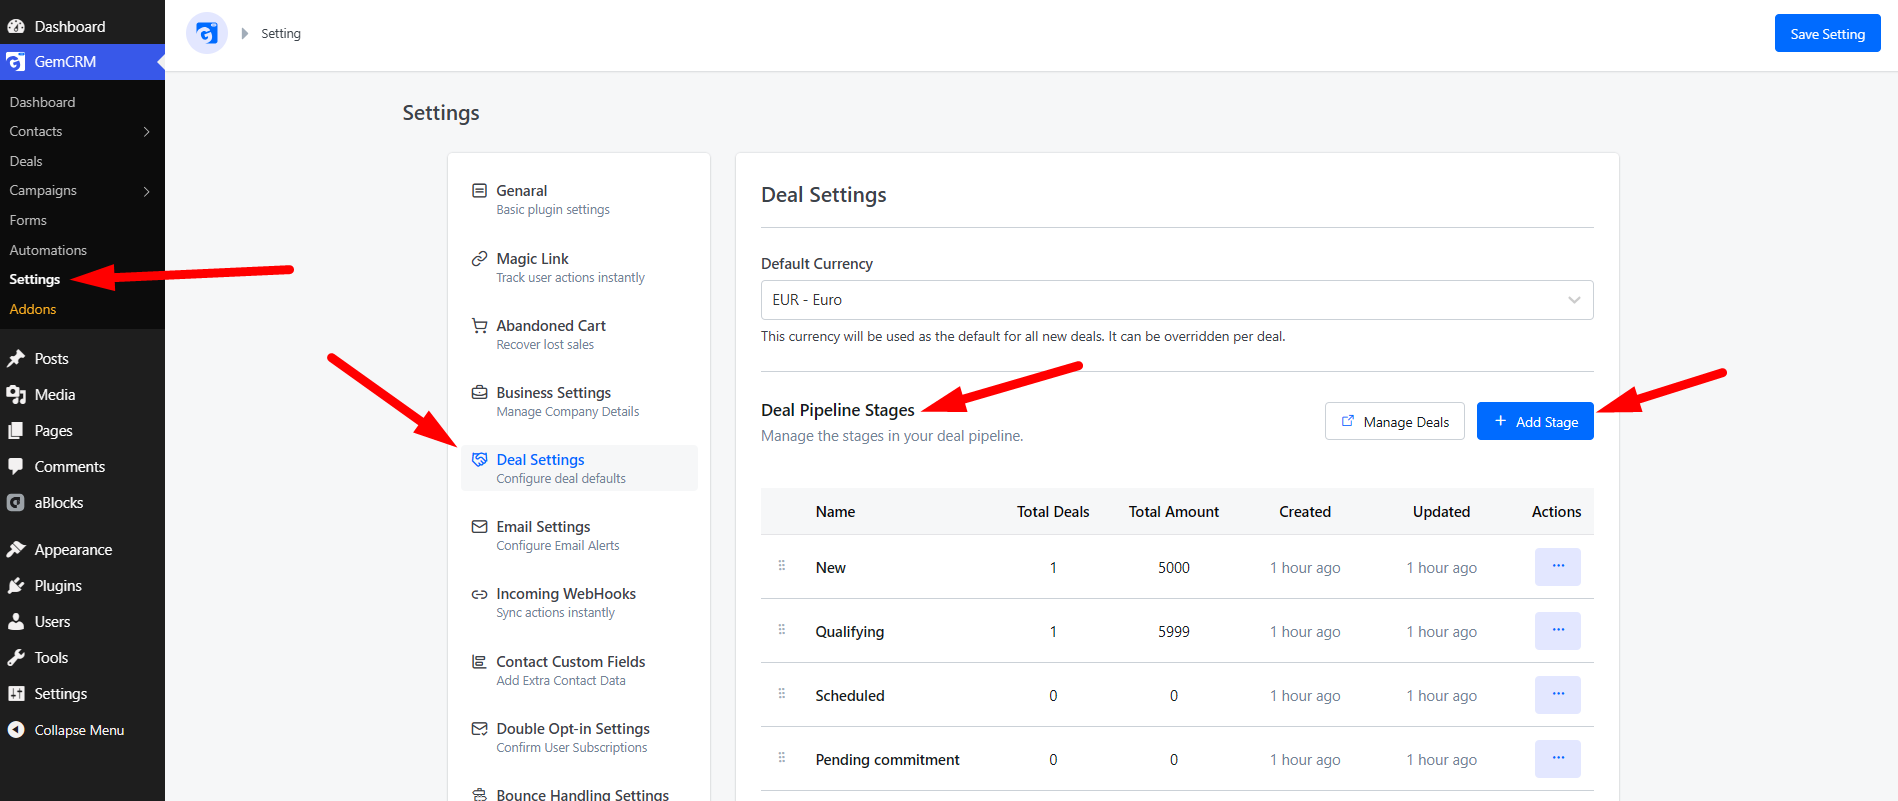
Navigate to GemCRM → Settings, then click the Deal Settings tab from the settings sidebar.
Default Currency
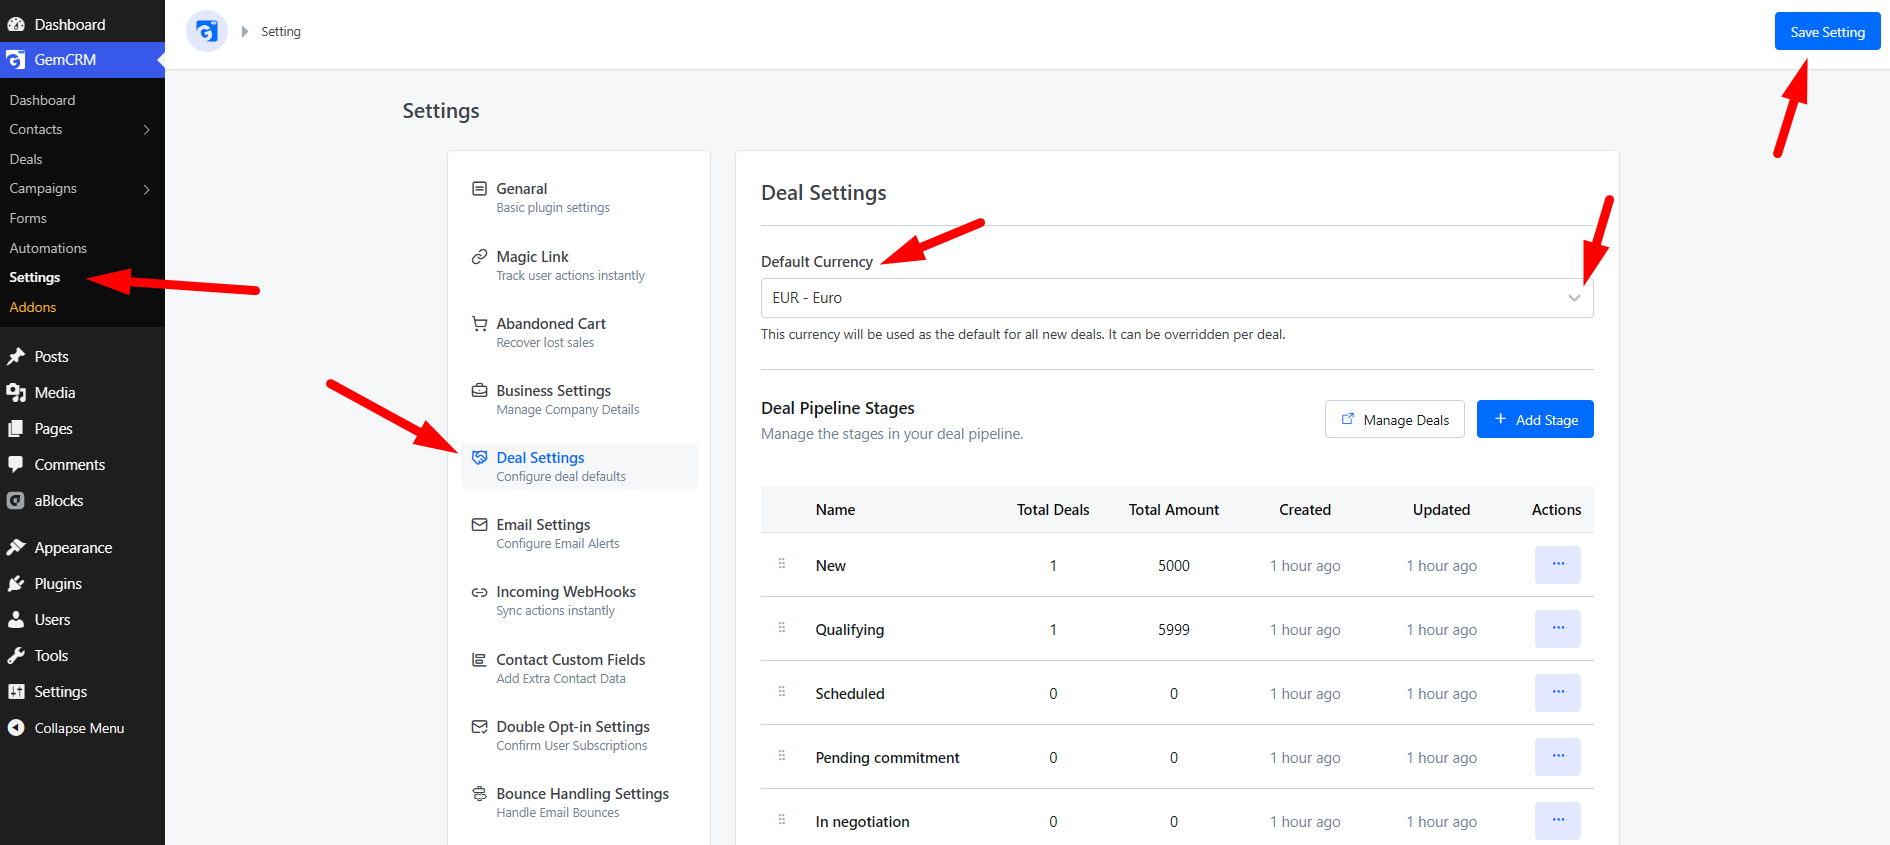
The Default Currency field sets the currency that will be automatically applied to every new deal you create.
- Click the currency dropdown to open the selector.
- Type in the search box to filter by currency name or code (for example, type USD, EUR, or British).
- Select your preferred currency from the list.
- The selected currency can still be overridden on a per-deal basis when creating or editing an individual deal.
After making your selection, save the settings using the Save Changes button at the bottom of the settings page.
Deal Pipeline Stages
The Deal Pipeline Stages table lists every stage in your deal pipeline. Stages represent the steps a deal moves through — from initial contact to a final outcome. Each row shows:
|
Column |
Description |
|
Name |
The label displayed for this stage across the CRM |
|
Total Deals |
How many deals are currently sitting in this stage |
|
Total Amount |
The combined value of all deals in this stage |
|
Created |
How long ago this stage was created |
|
Updated |
How long ago this stage was last modified |
|
Actions |
Edit or delete the stage |
Adding a Stage
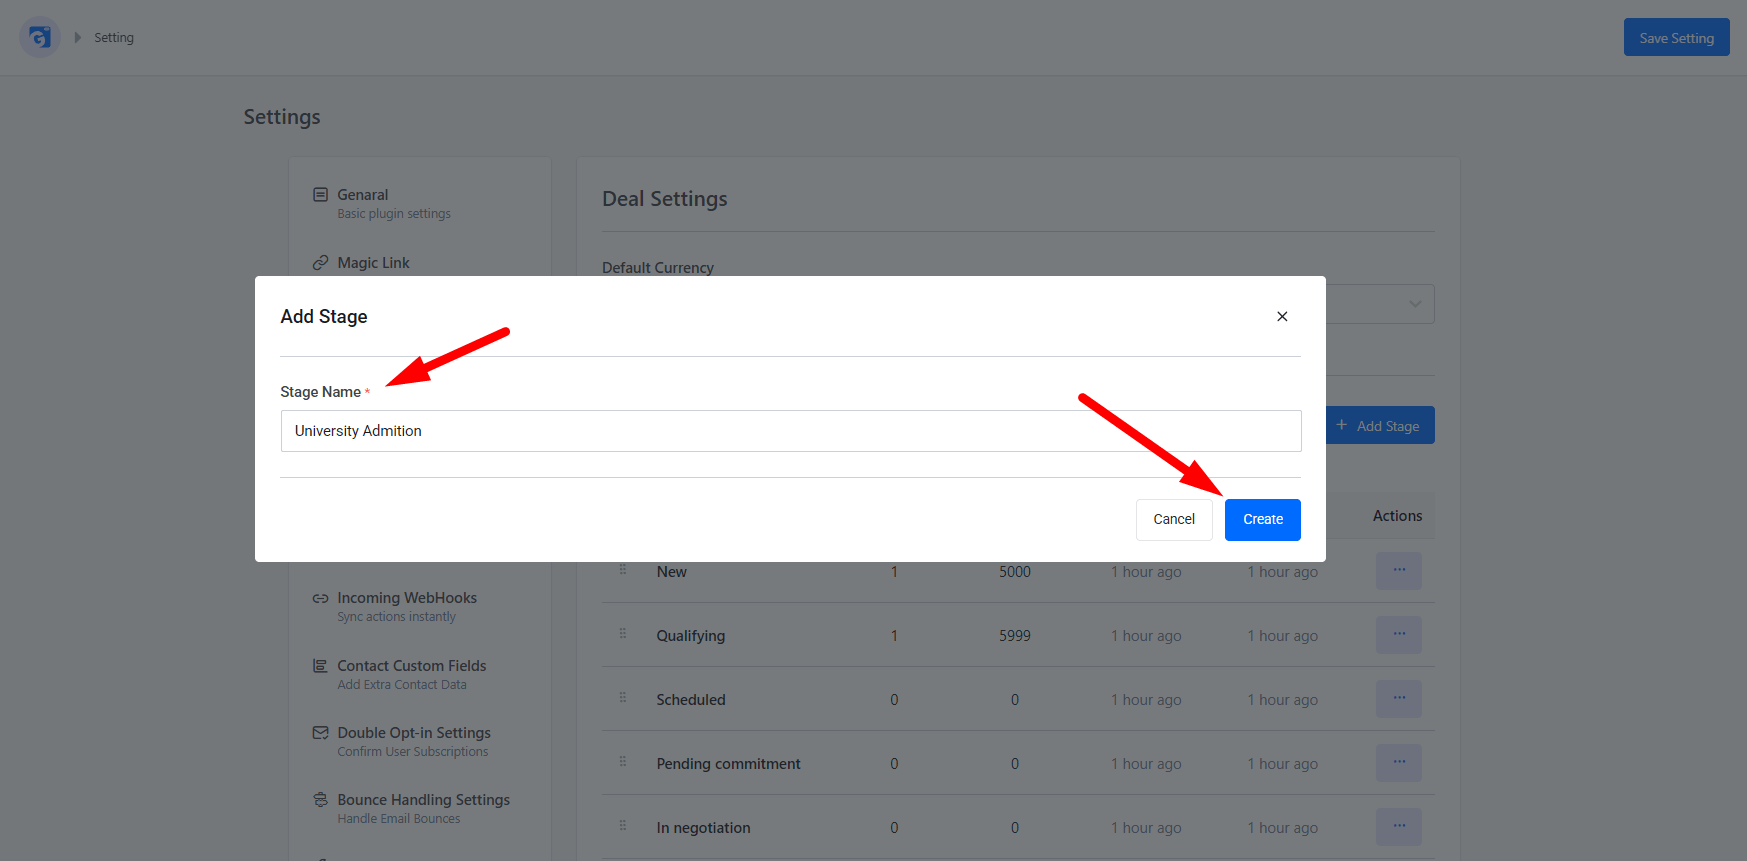
- Click the Add Stage button in the top-right corner of the pipeline table.
- A modal dialog will appear with a Stage Name field.
- Enter a descriptive name for the stage (for example, Proposal Sent or Negotiation).
- Click Create to save the new stage.
The stage will immediately appear in the pipeline table and become available when creating or moving deals.
Editing a Stage
- Find the stage you want to update in the table.
- Click the three-dot menu (⋯) in the Actions column for that row.
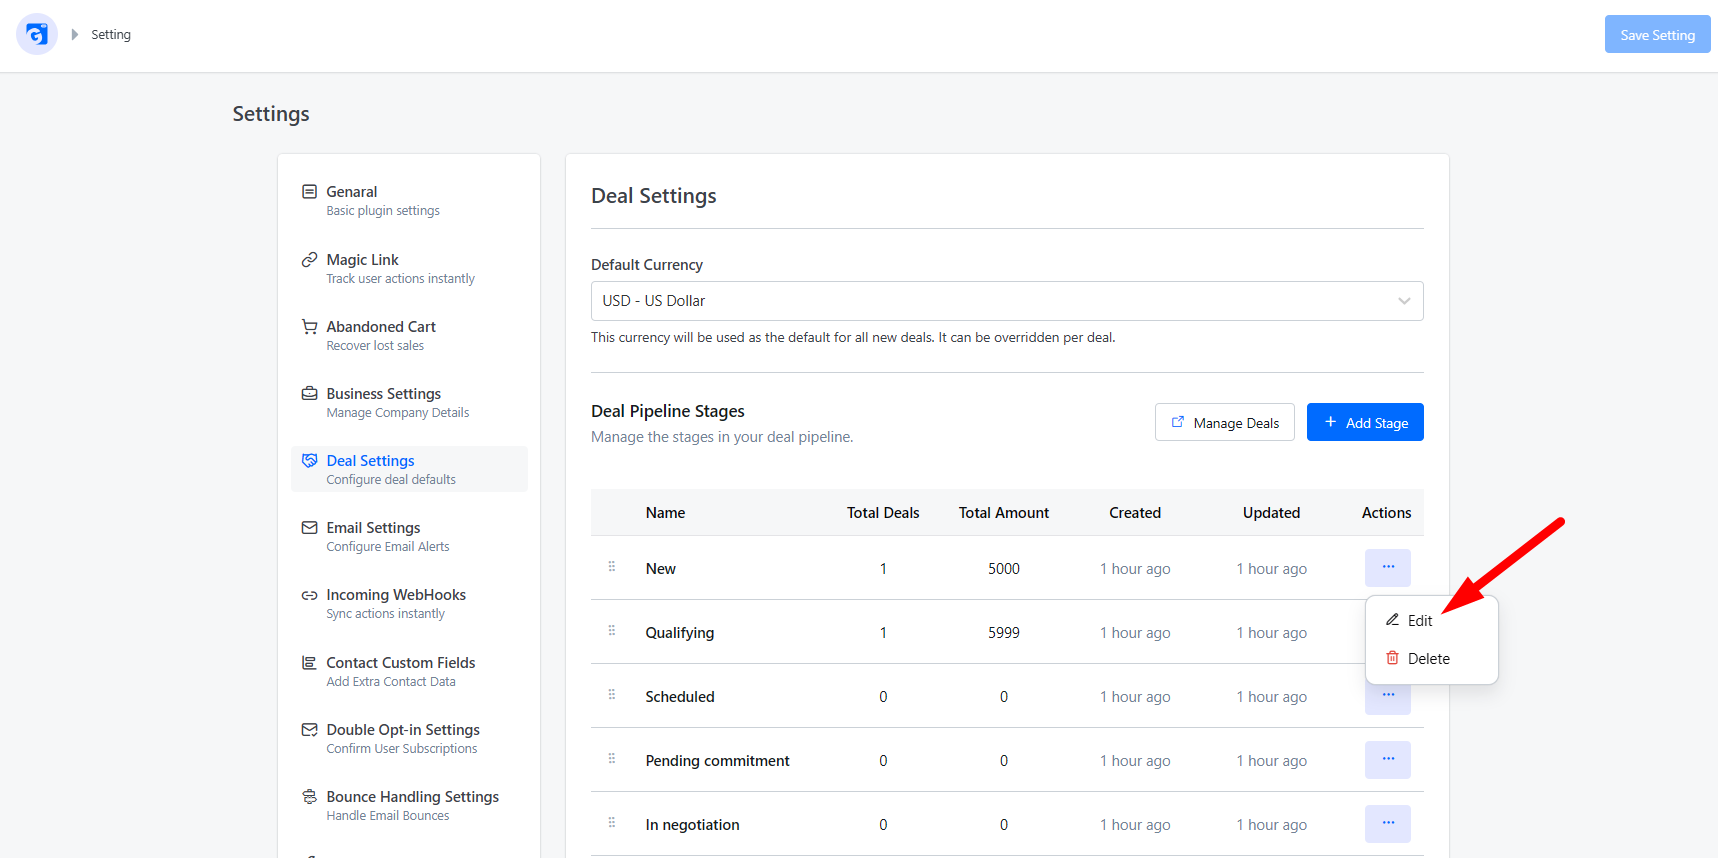
- Select Edit from the dropdown.
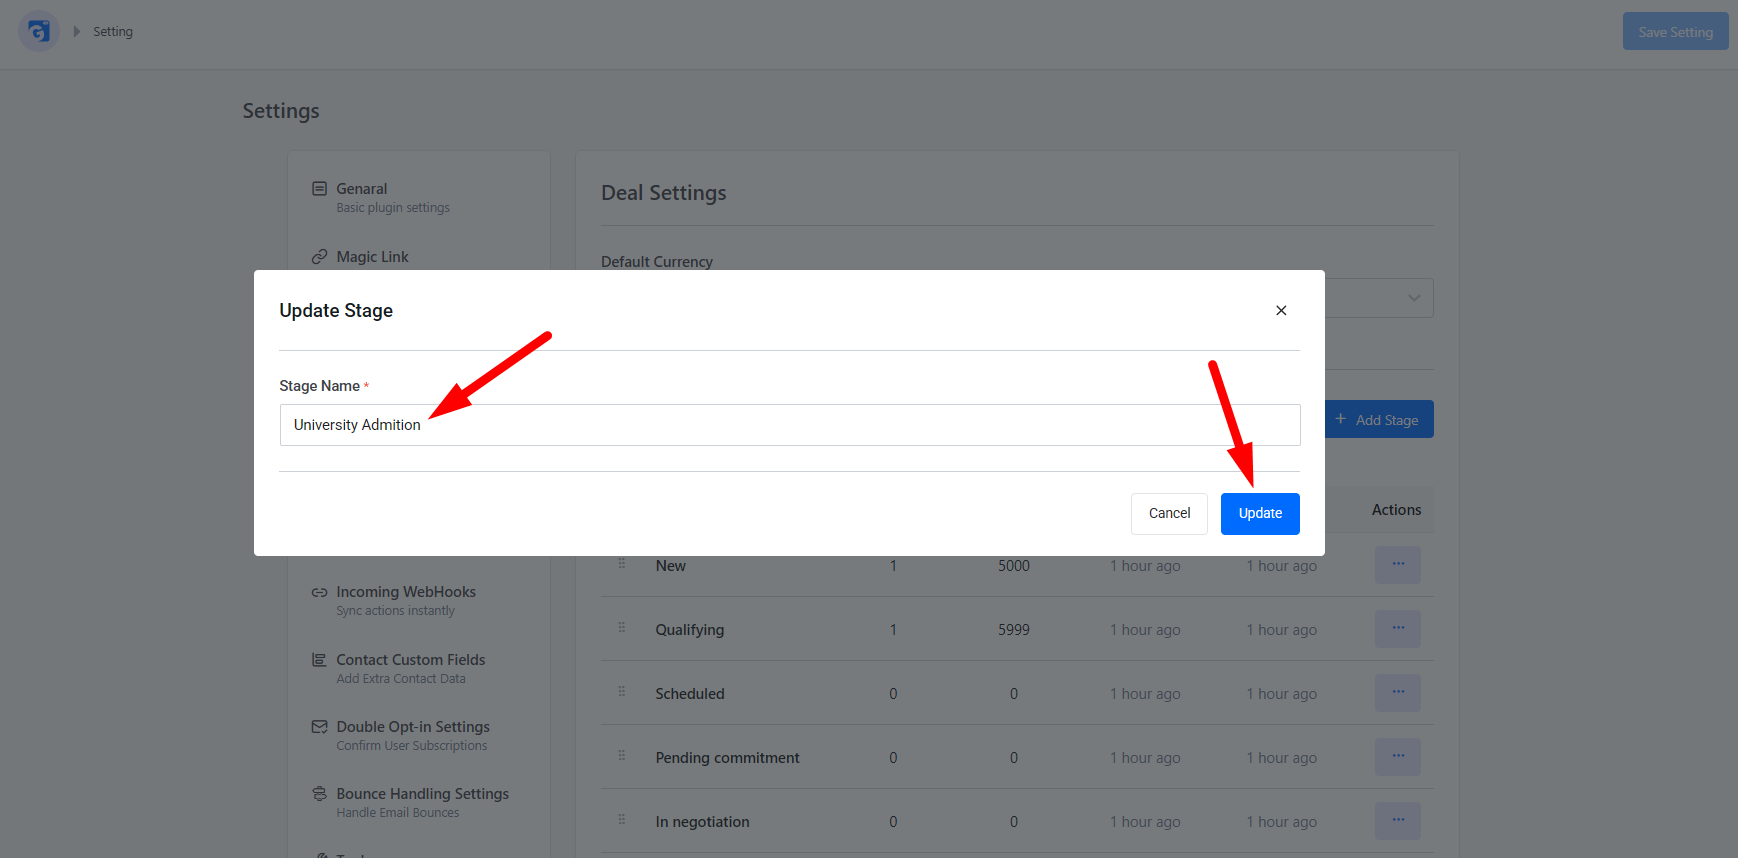
- The same modal will open, pre-filled with the current stage name.
- Update the name and click Update to save your changes.
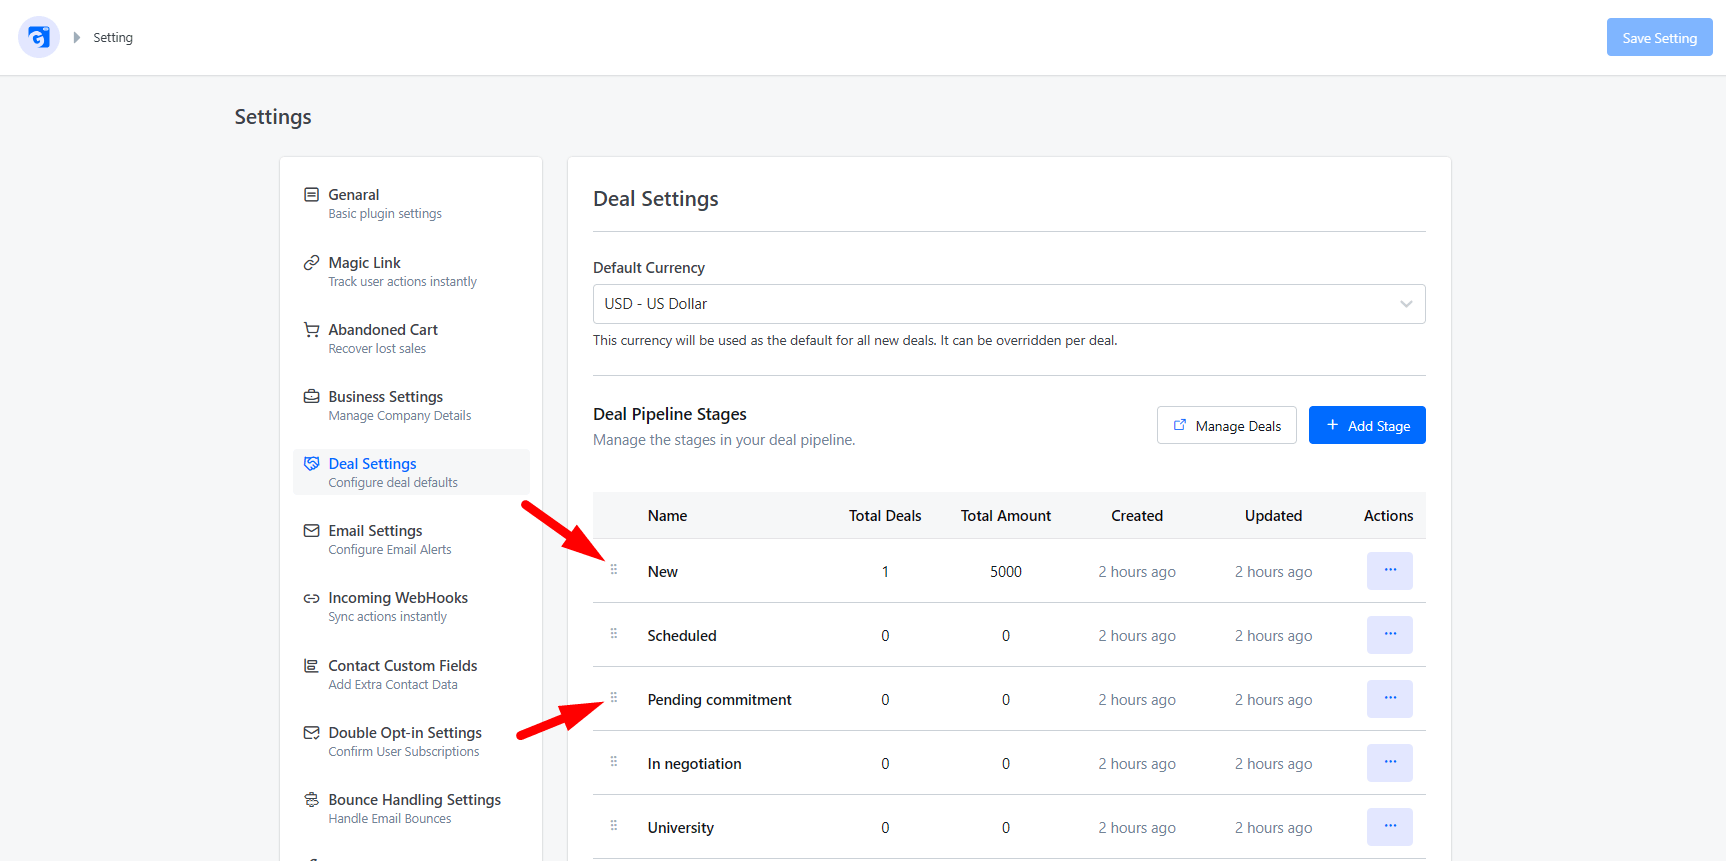
Reordering Stages
You can drag and drop stages to change the order they appear in the pipeline.
- Hover over a stage row — a drag handle will become visible.
- Click and drag the row to its new position, then release to drop it.
- The order is saved immediately without needing to click Save Changes.
Note: The system stages Lost and Won are fixed and cannot be reordered. Attempting to drag them will display a warning message.
Deleting a Stage
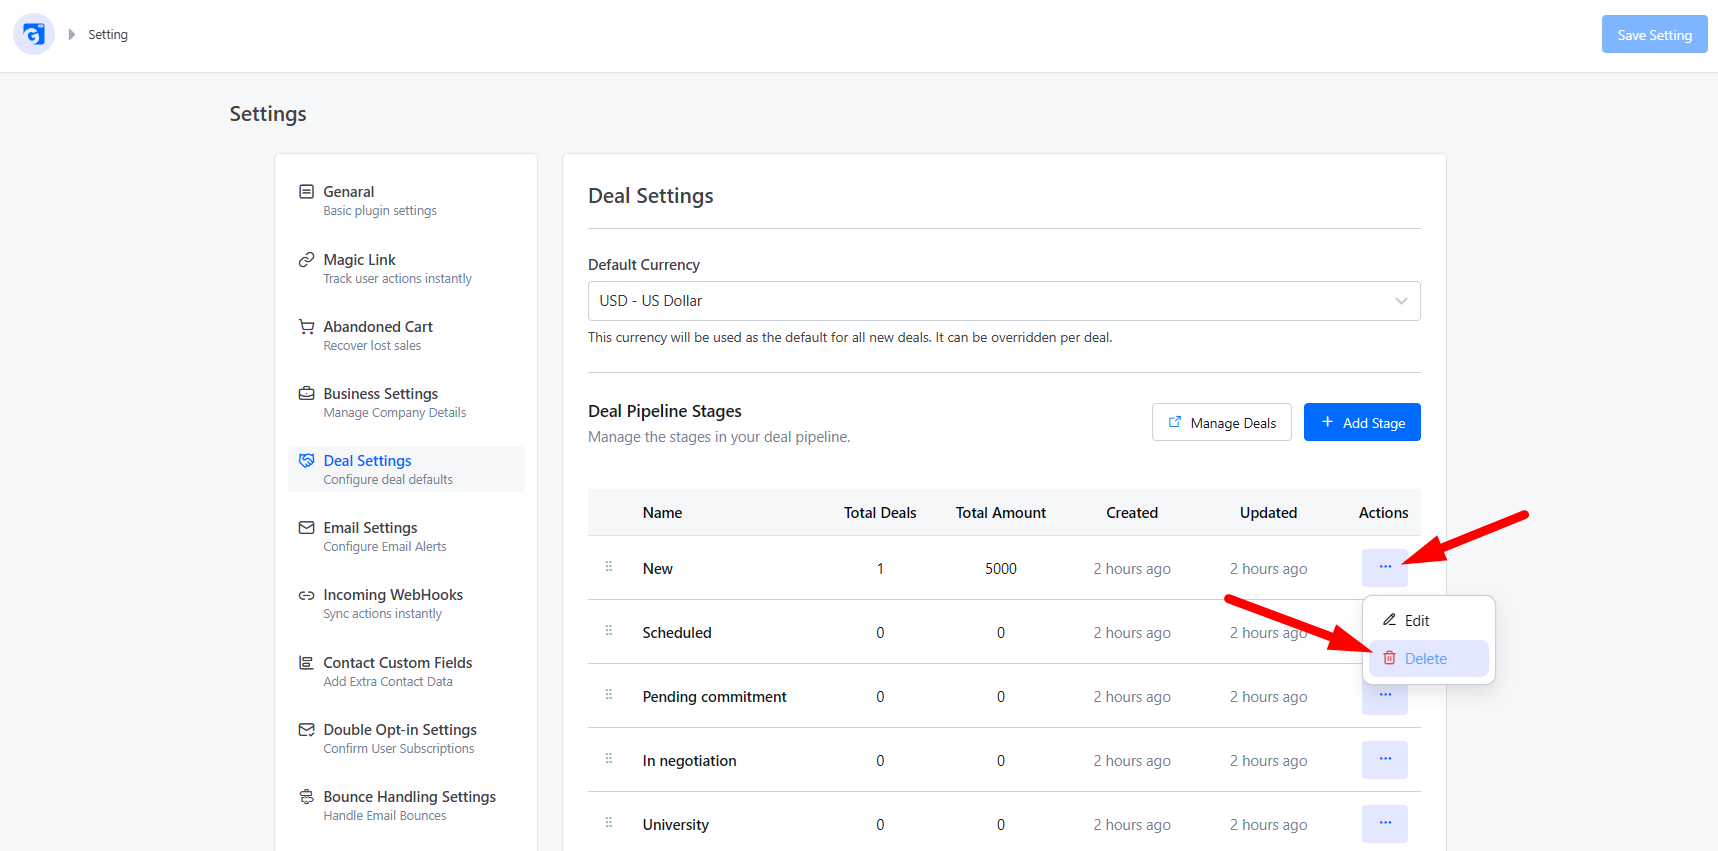
Deleting a Single Stage
- Click the three-dot menu (⋯) in the Actions column for the stage you want to remove.
- Select Delete from the dropdown.
- The stage will be permanently removed.
Navigating to Deals
The Manage Deals button in the top-right corner of the pipeline section takes you directly to the Deals list page, where you can view, create, and manage individual deals.