




Here’s something most WordPress site owners don’t want to admit: they work hard to get visitors, and then those visitors vanish — forever. No follow-up. No relationship. No second chance to make an impression.
Social media seems like the obvious answer. But Instagram reach can disappear overnight when an algorithm shifts. Facebook pages get throttled without warning. Your email list, though? That belongs to you. No platform can take it away.
If you haven’t started building one, you’re leaving real money — and real relationships — on the table.
What Does “Build an Email List in WordPress” Actually Mean?
Building an email list in WordPress means collecting visitor email addresses through signup forms, newsletters, or lead magnets and storing them in an email marketing or CRM platform for future communication.
At its core, the process is simple: you need a form to capture subscribers, a system to manage contacts, and a way to send emails. With the right tools, WordPress makes it easy to set up all three and start growing your audience from a single dashboard.
Why Email Still Dominates in 2026
Despite the rise of social media and new marketing channels, email remains one of the most effective ways to reach and engage an audience. Unlike social platforms, where visibility depends on changing algorithms, email gives you direct access to people who have chosen to hear from you.
The results speak for themselves. Email marketing and automated email sequences can help businesses drive traffic, build relationships, and generate sales at scale.
It’s also highly measurable and easy to personalize. By segmenting subscribers based on their interests and behavior, you can send more relevant content that improves engagement and increases conversions over time.
Most importantly, your email list is an asset you own. While platforms and algorithms may change, your subscriber list remains under your control—making it one of the most valuable long-term assets for any WordPress website or business.
Step-by-step on how to build an email list in WordPress using GemCRM
You don’t need a big budget to start. Here’s a simple, proven workflow:
Step 1: Install GemCRM in WordPress
Download and install GemCRM from your account, then upload the plugin ZIP file via WordPress marketing automation plugins → Add New → Upload Plugin in your WordPress dashboard.
After activating GemCRM with your license key, enter your Pro license key to unlock all premium features.
Step 2: Create an Opt-In Form in GemCRM
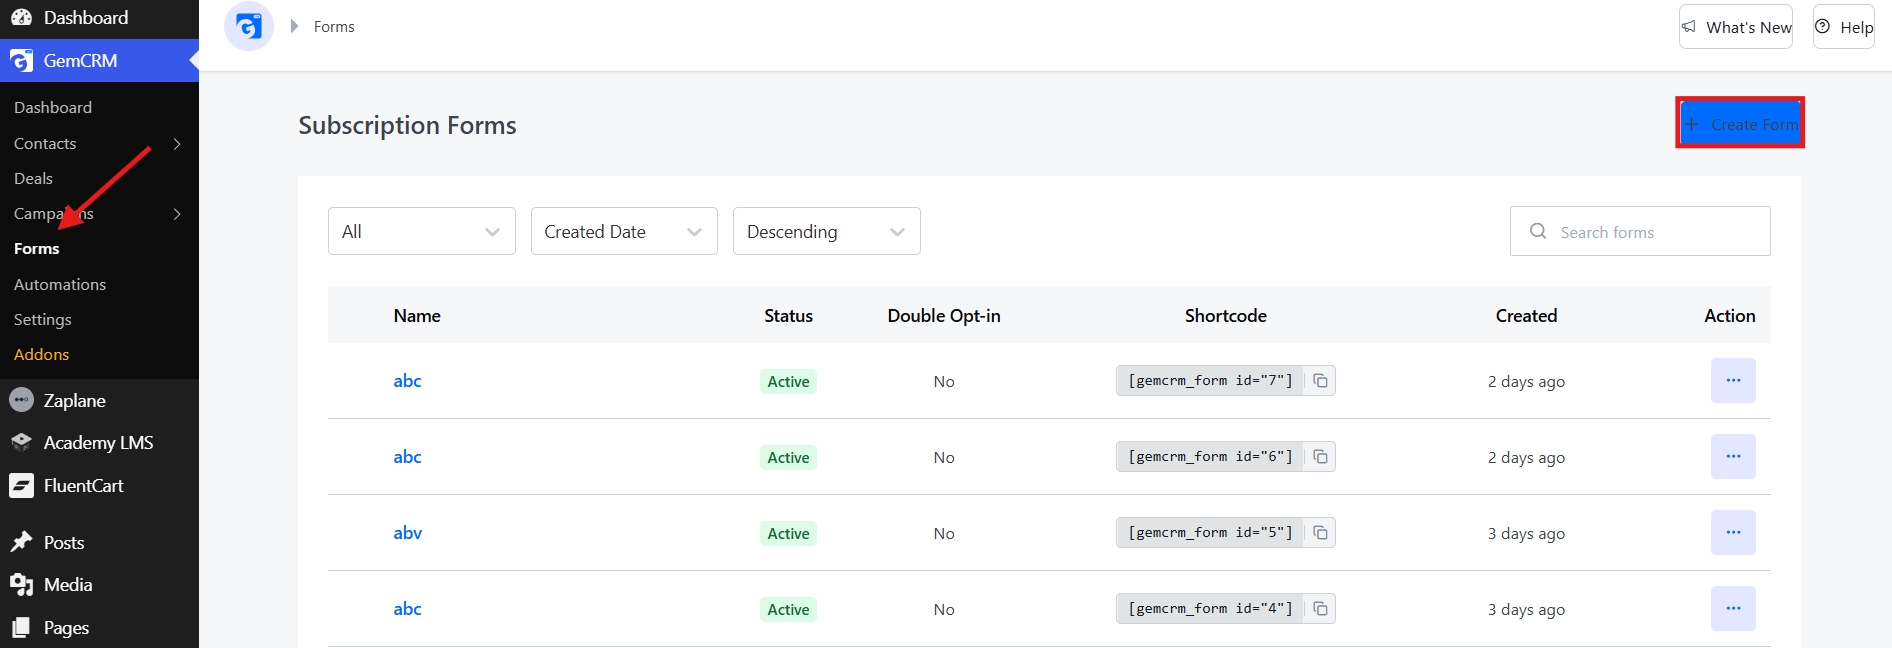
- Go to Forms in the left sidebar → Click + Create Form.
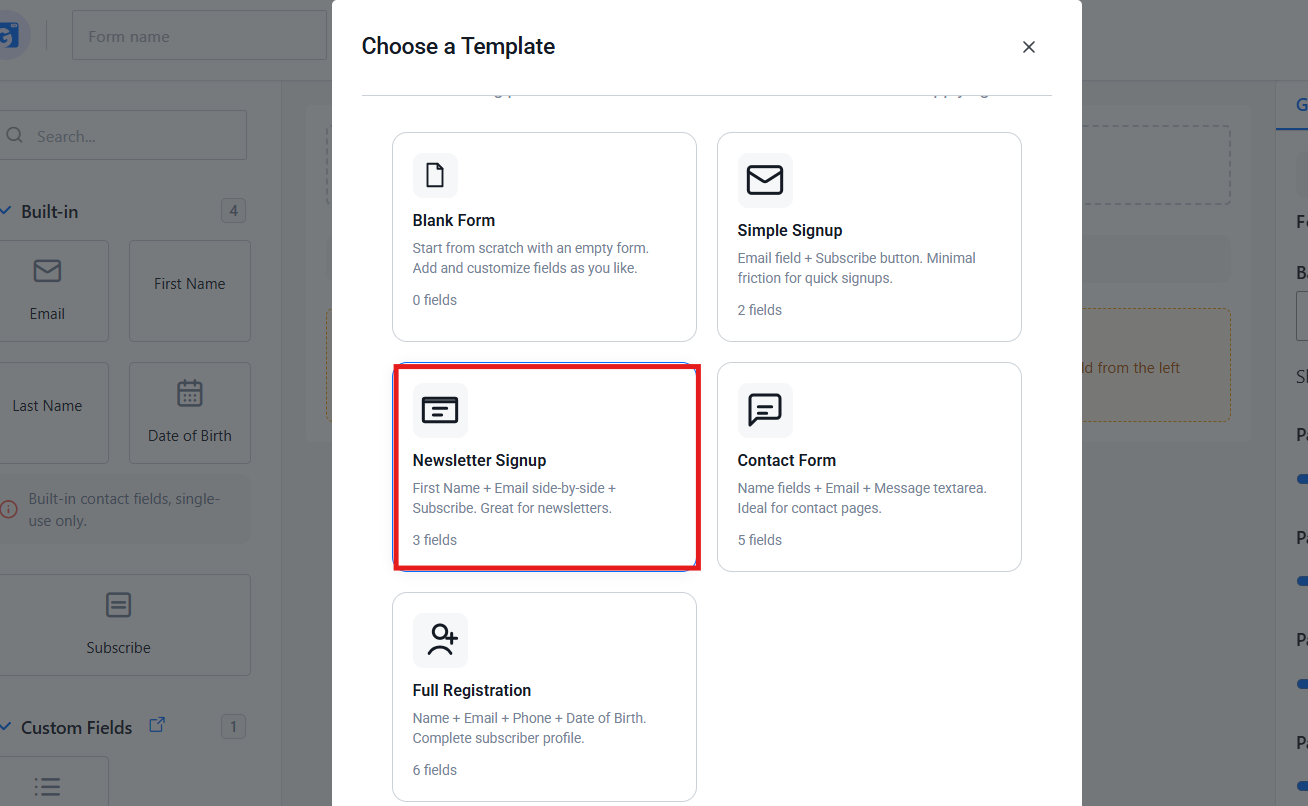
- In the template popup, select Newsletter Signup (First Name + Email + Subscribe).
- In the Form Builder:
- Enter Form Name (e.g., “Blog Newsletter Signup”)
- Change button text to something better (e.g., “Send Me the Tips”)
- Keep only First Name + Email fields
- Adjust style from the right panel if needed
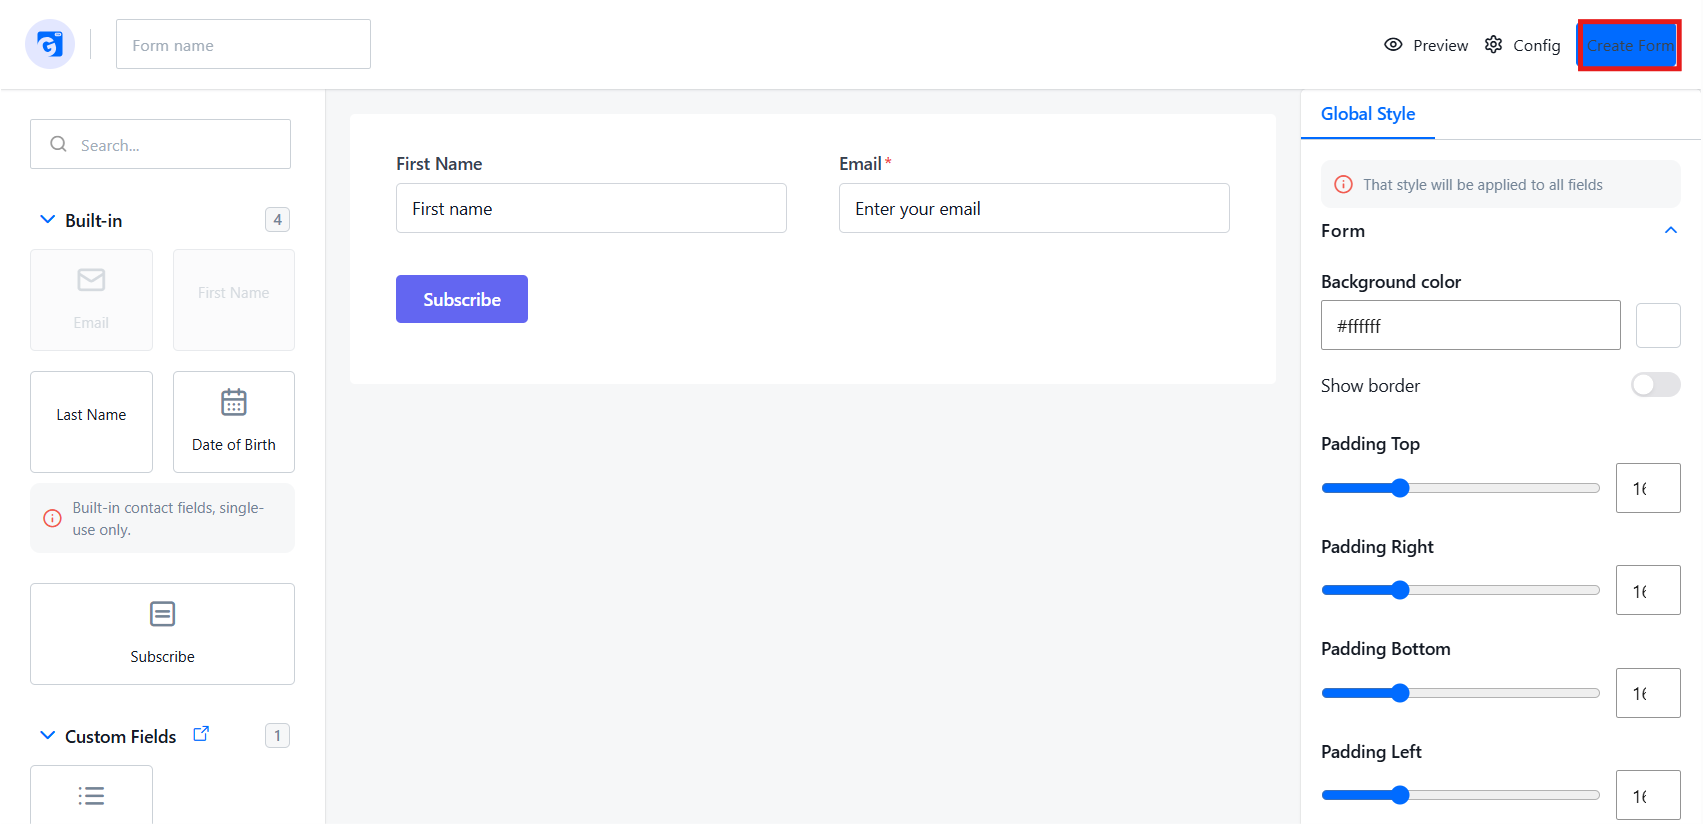
- Click Create Form / Update Form (top right).
- Copy the shortcode shown at the top.
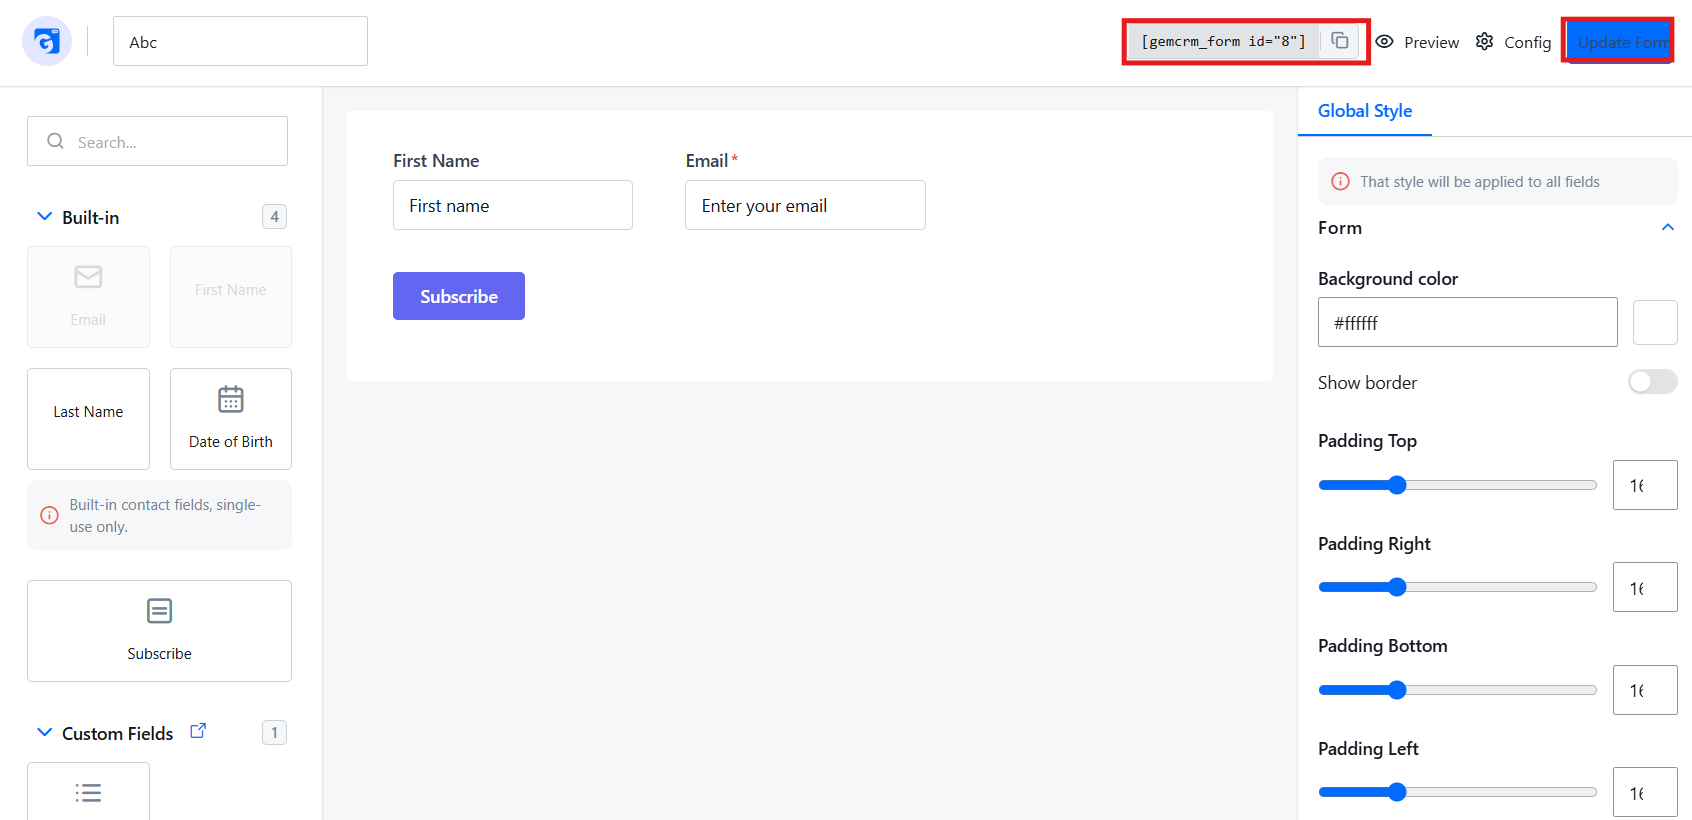
Copy the generated shortcode — you’ll need it for the next step.
Step 3: Add the GemCRM Form to Your WordPress Site
Follow these steps to embed your GemCRM form using the Shortcode block in the WordPress aBlock editor:
- Open any page or post in the WordPress block editor.
- Add a Shortcode block to the editor.
- Paste your GemCRM shortcode (e.g., [gemcrm_form id=”9″]) into the shortcode field.
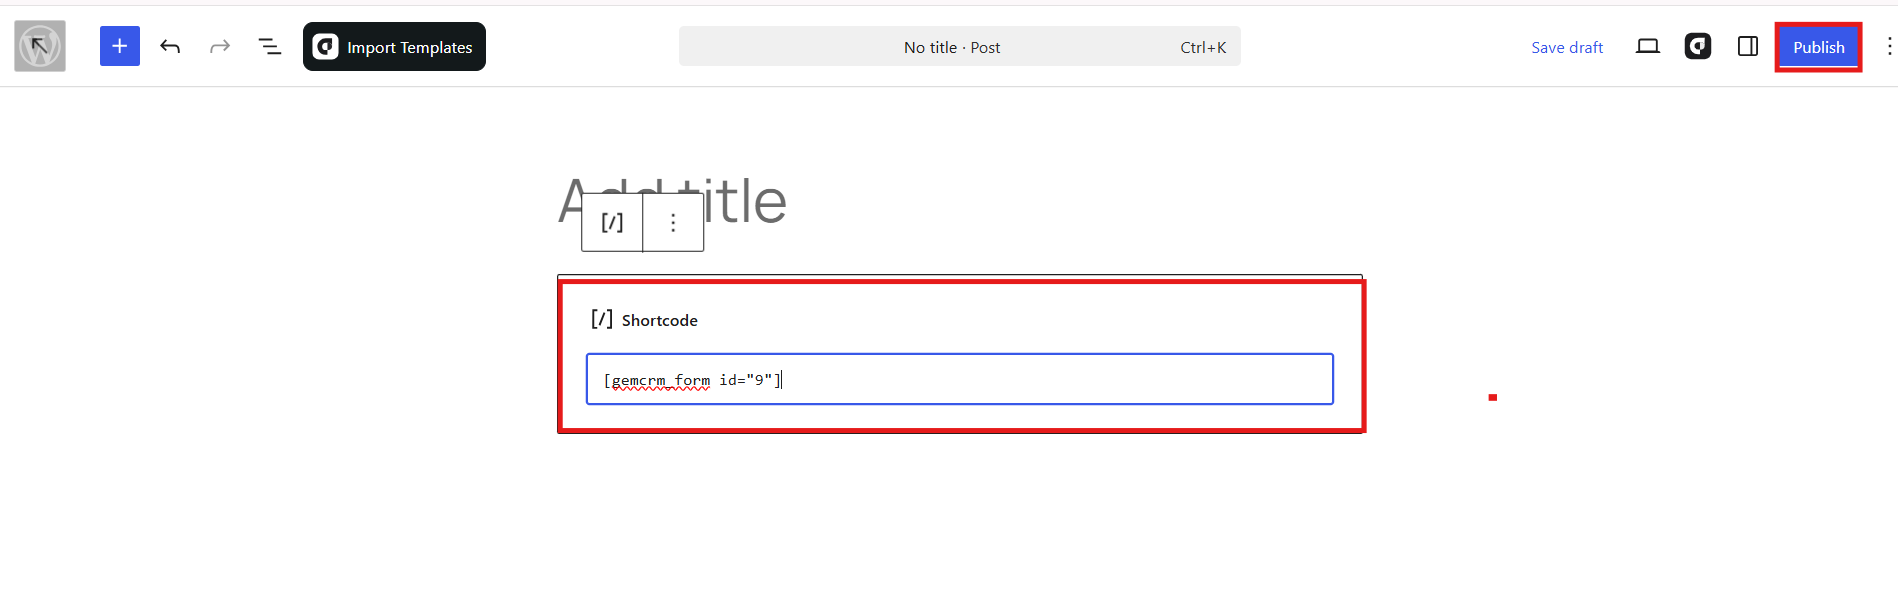
- Click the Publish button in the top-right corner to make the page live.
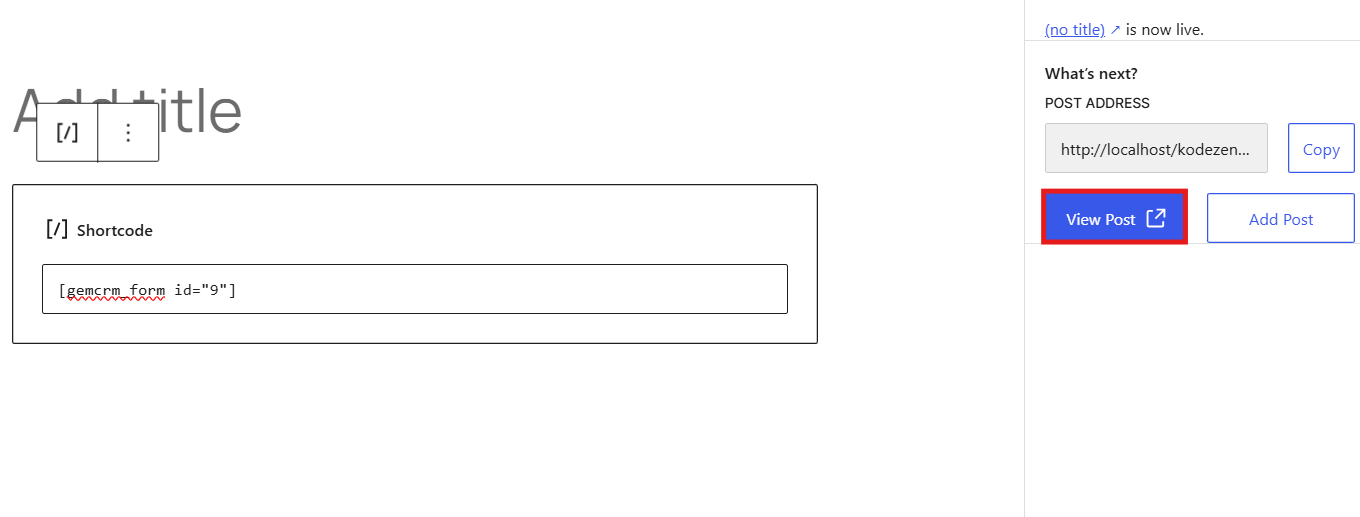
- Click View Post to verify that the form is displaying correctly on your site.
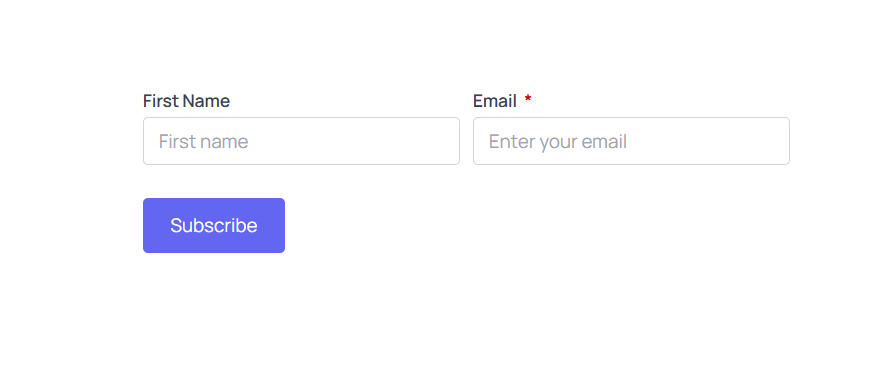
Note: GemCRM also supports Widget embedding (Appearance → Widgets) and Webhook integration with plugins like WPForms or Gravity Forms for more advanced setups.
Step 4: Set Up Automated Lead Magnet Delivery in GemCRM
Once your lead magnet is ready, set up an automated workflow using GemCRM and Zaplane to deliver it automatically whenever a new subscriber joins your list.
Note: GemCRM’s automation features are powered by Zaplane. Before creating workflows, make sure the Zaplane plugin is installed and activated on your WordPress site.
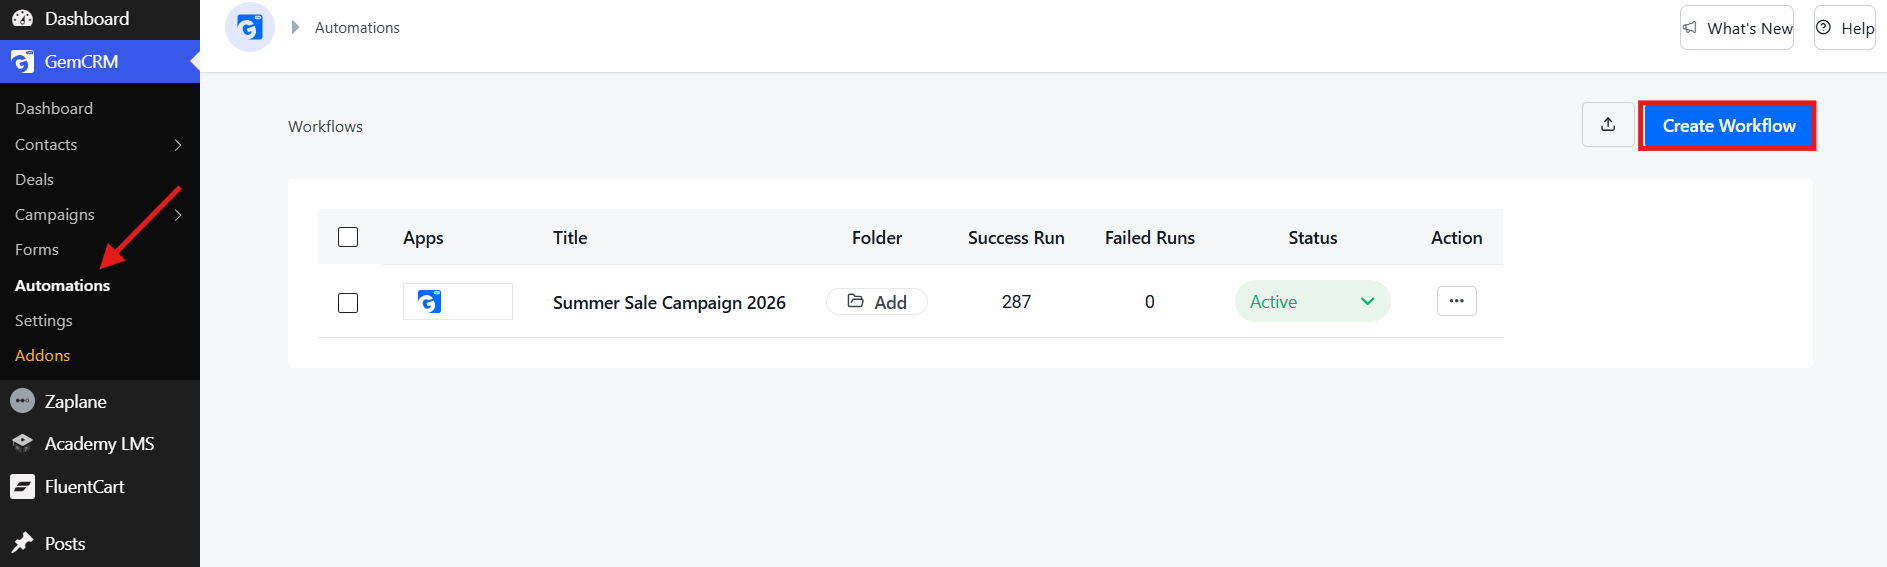
- From the GemCRM dashboard, click Automations in the left sidebar, then click Create Workflow in the top-right corner.
- A pop-up will appear. Enter a name for your workflow (e.g., “Welcome Email – Lead Magnet Delivery”) and click Create.
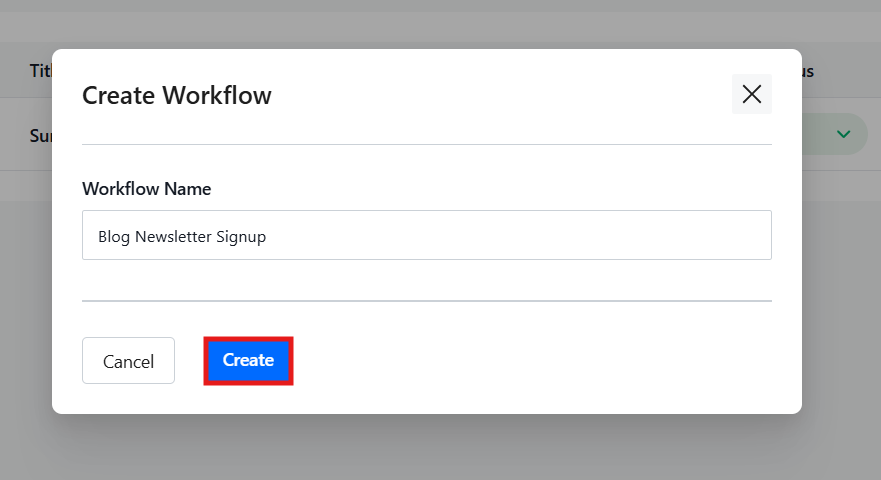
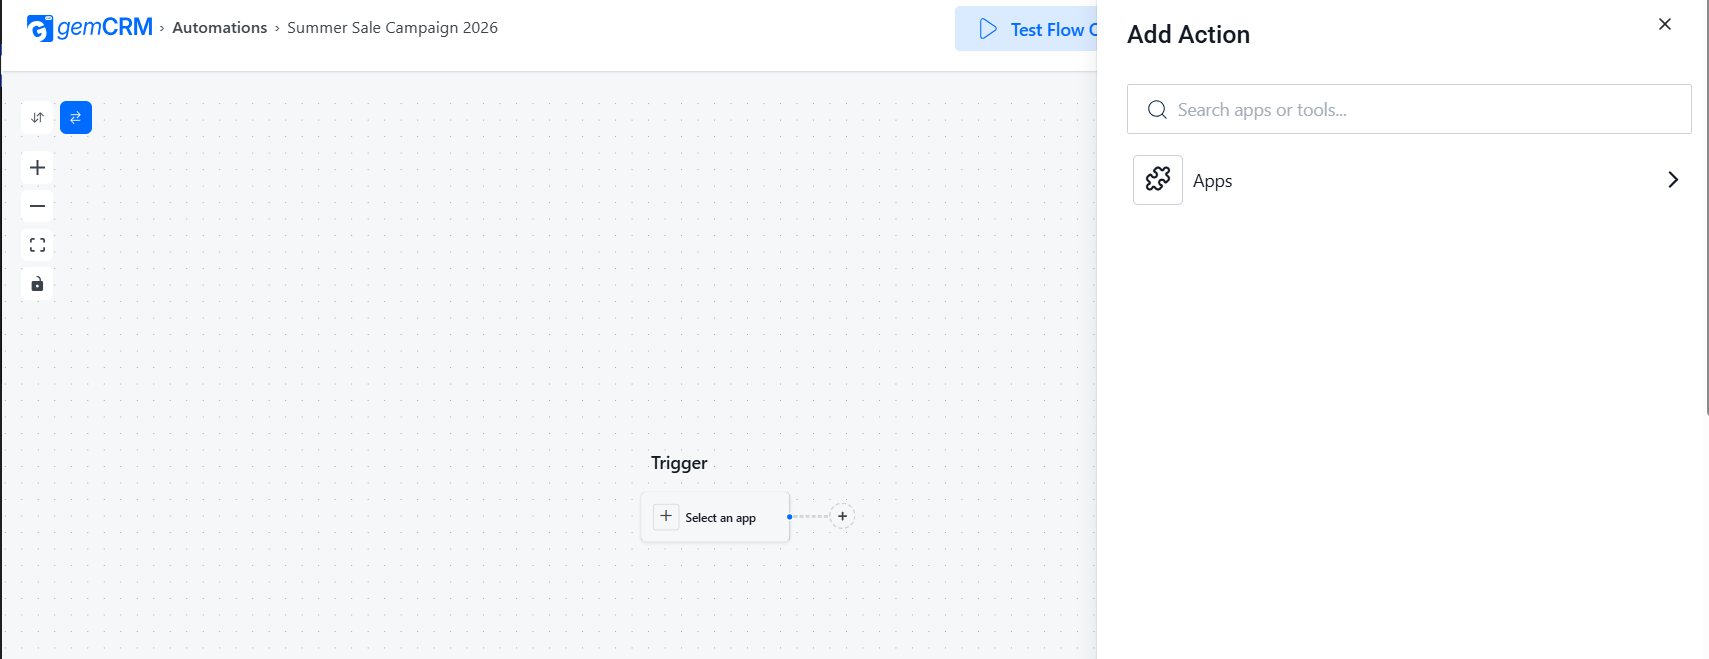
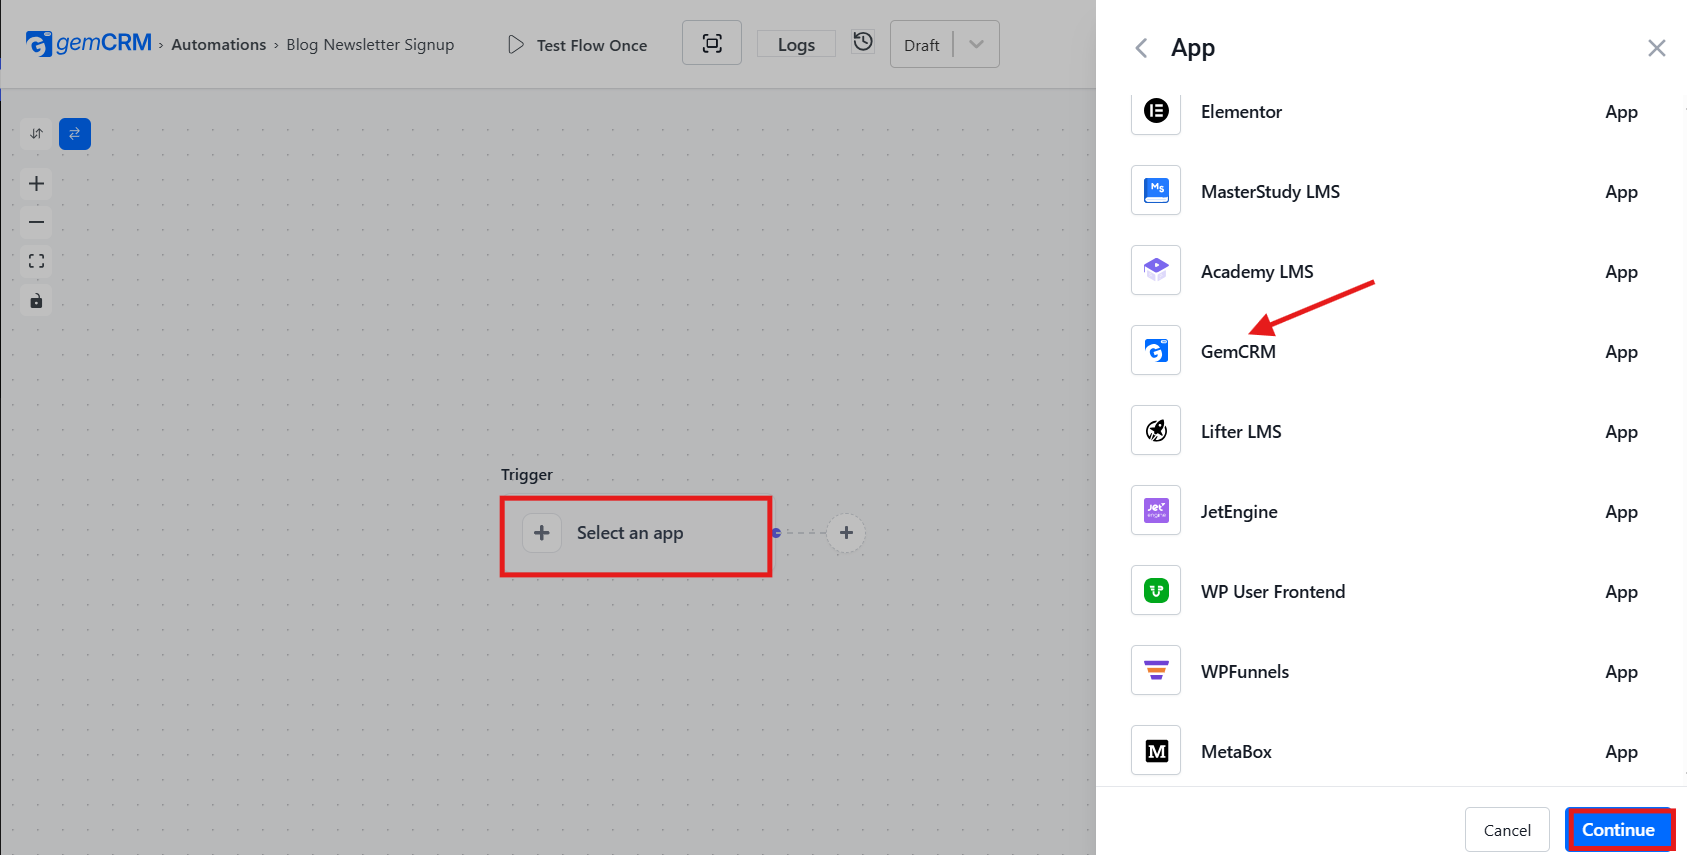
- You will be taken to the workflow builder. Click Select an app under the Trigger section. An Add Action panel will open on the right — click Apps.
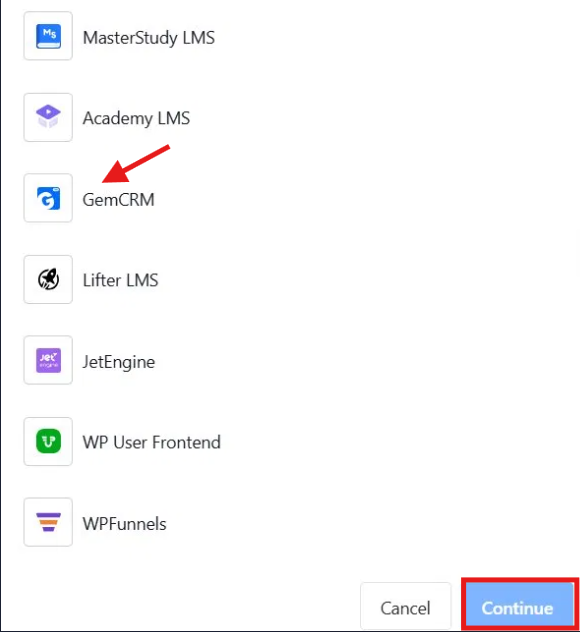
- From the app list, select GemCRM and click Continue.
- Under Trigger Type, select Contact Created and click Continue.
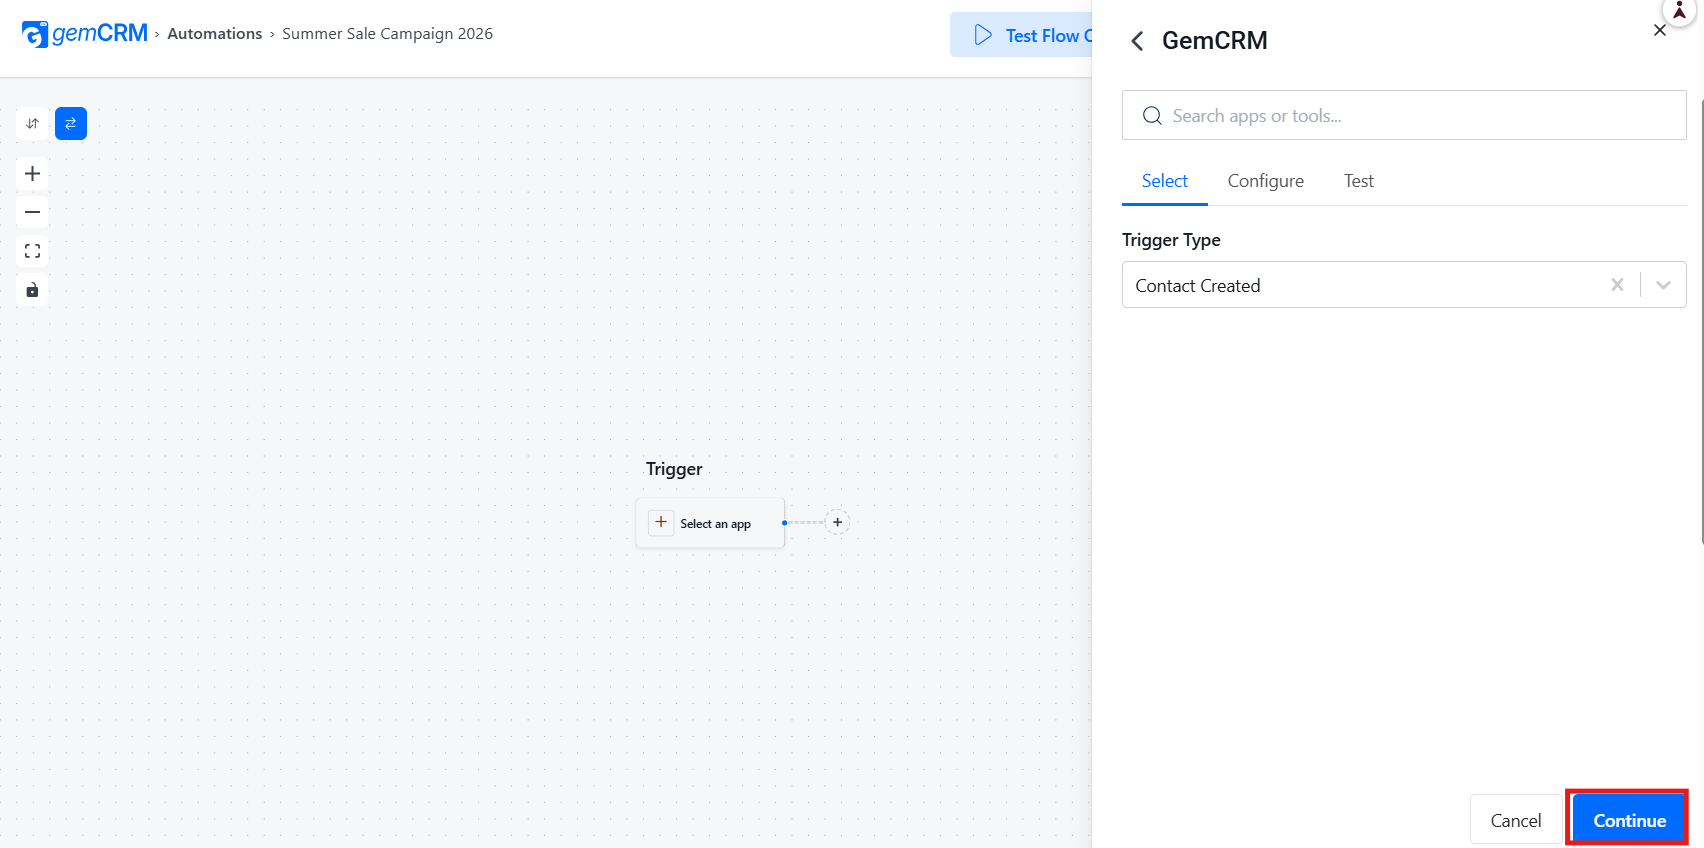
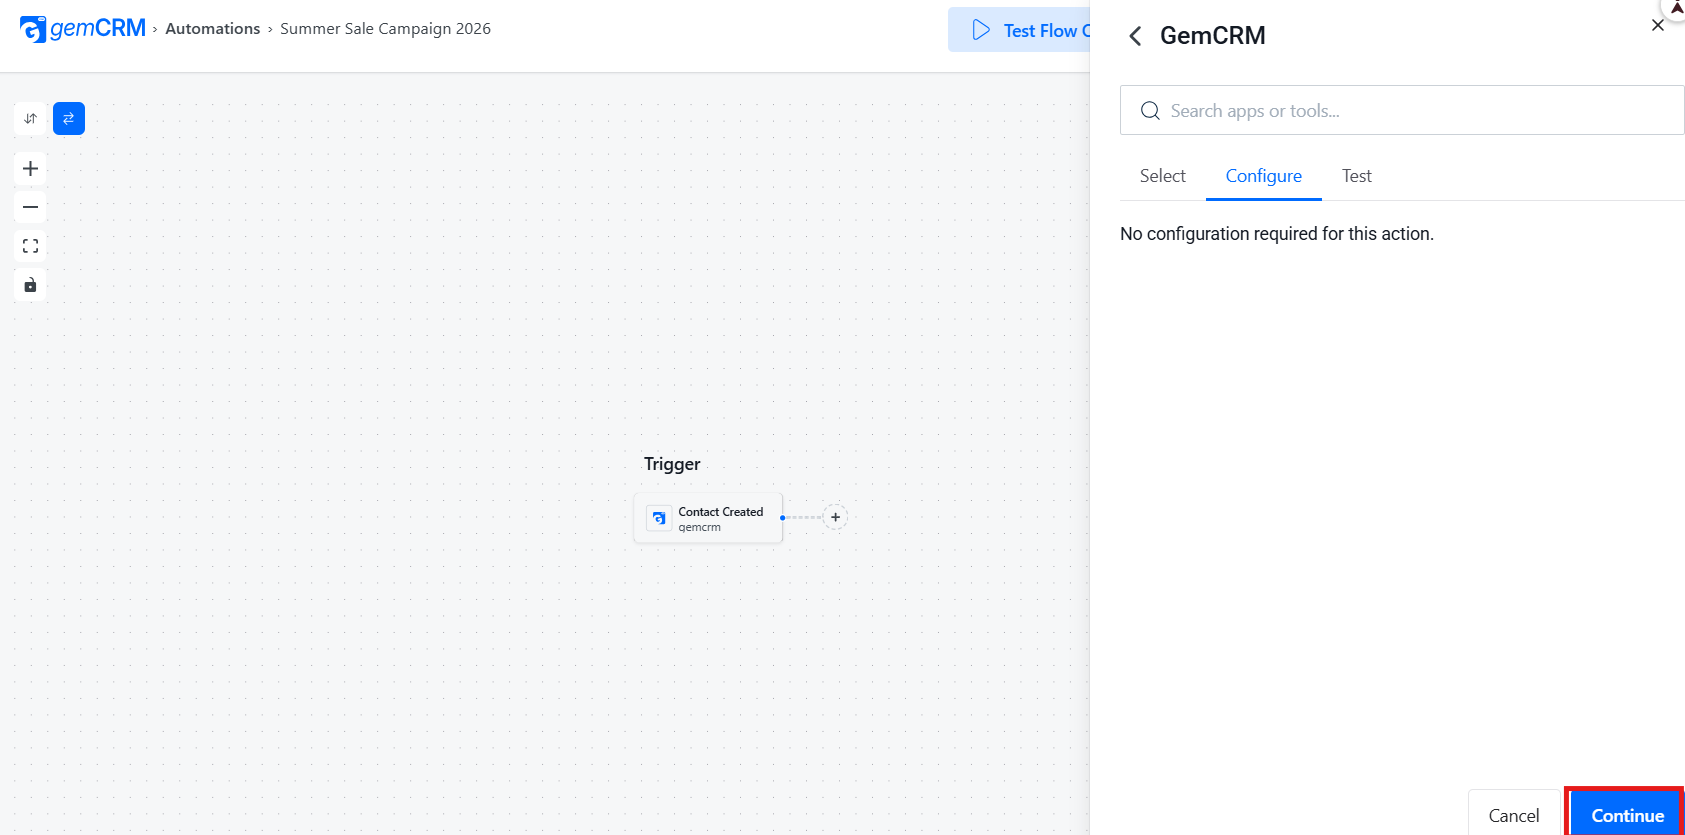
- The Configure tab will confirm “No configuration required for this action.” Click Continue to proceed.
- Your trigger is now set. Click Update in the top-right corner to save the workflow.
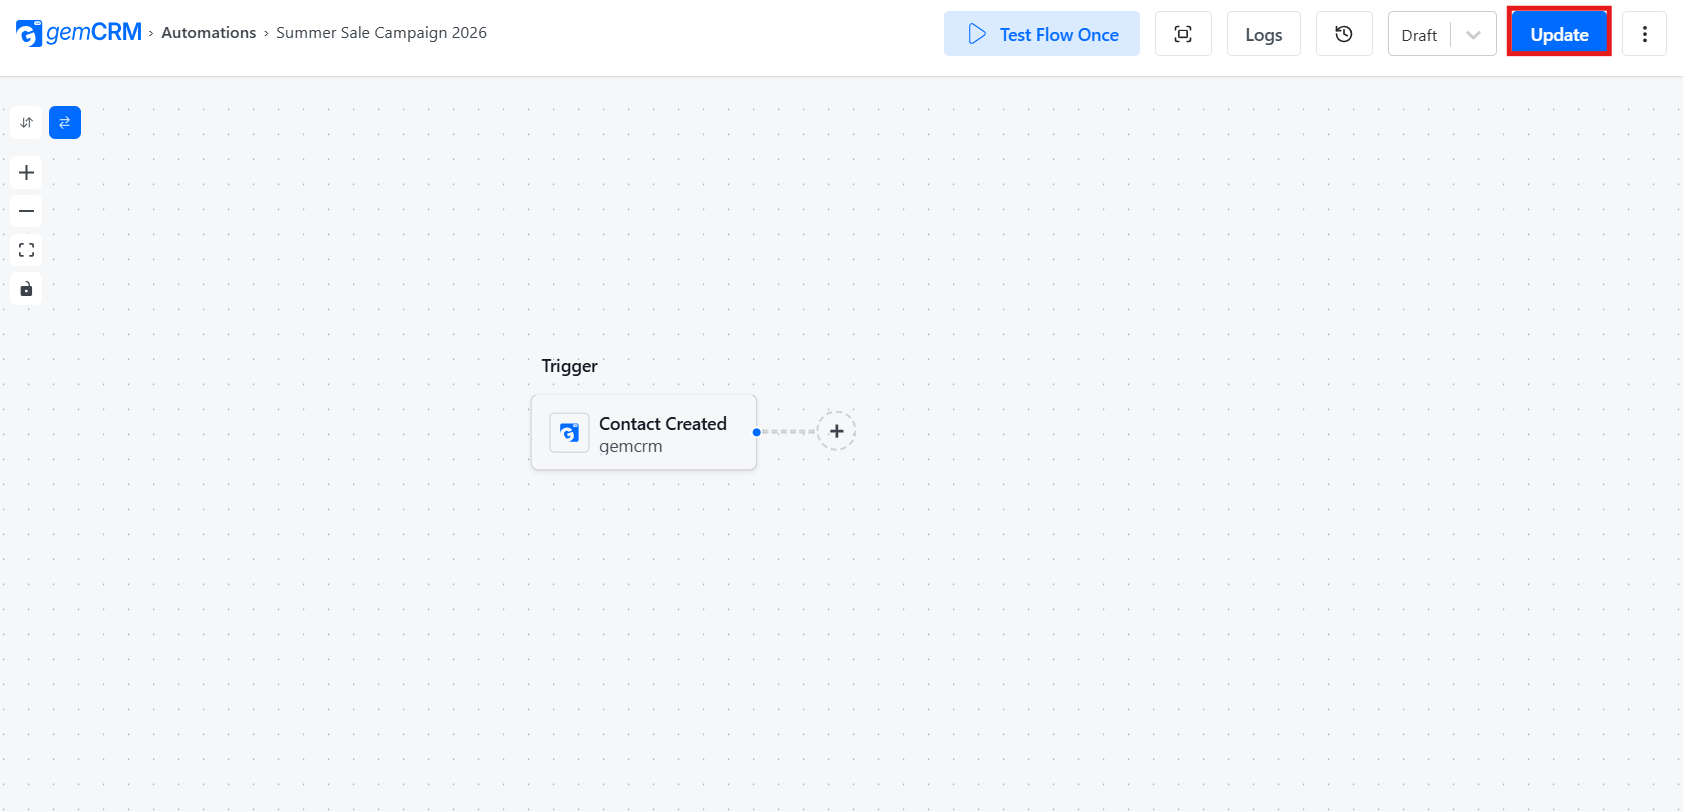
Once the trigger is configured, you can continue building the automation in Zaplane by adding actions such as sending a welcome email, tagging contacts, delivering your lead magnet, or notifying your team.
Step 5: Build a Welcome Sequence in GemCRM
The moment someone subscribes, their interest in you is at its peak. A well-structured welcome sequence builds trust before you ever ask for anything in return.
Follow these steps to build a welcome sequence in GemCRM:
- From the GemCRM dashboard, navigate to Automations and open your existing workflow or create a new one.
- Click the “+” button on the workflow canvas, then select Apps → GemCRM and click Continue.
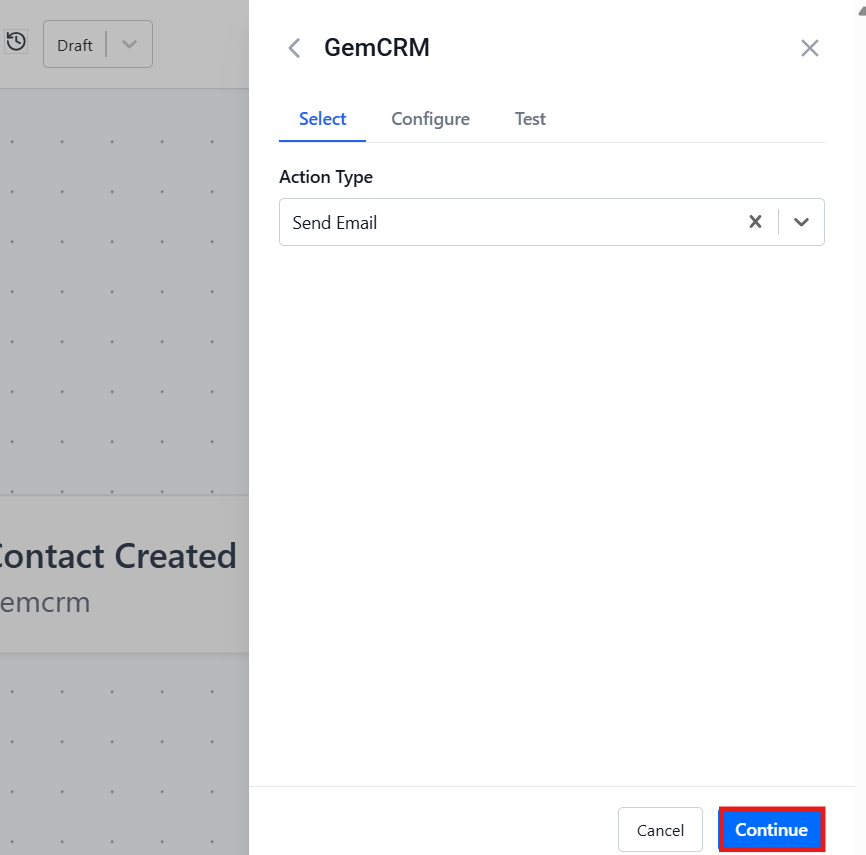
- Under Action Type, select Send Email and click Continue.
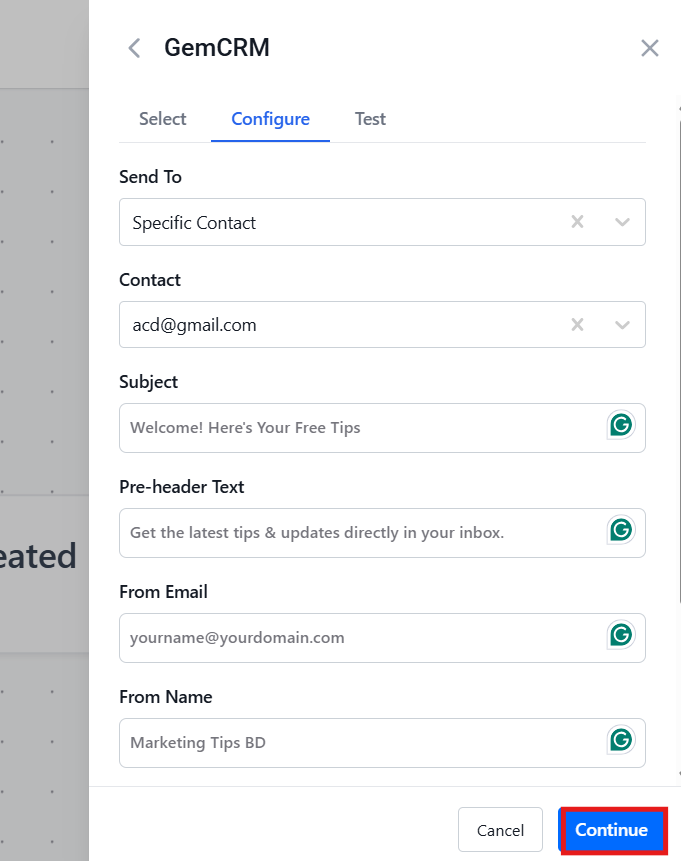
- Configure your first email — fill in the Subject, Pre-header Text, From Email, and From Name fields, then click Continue.
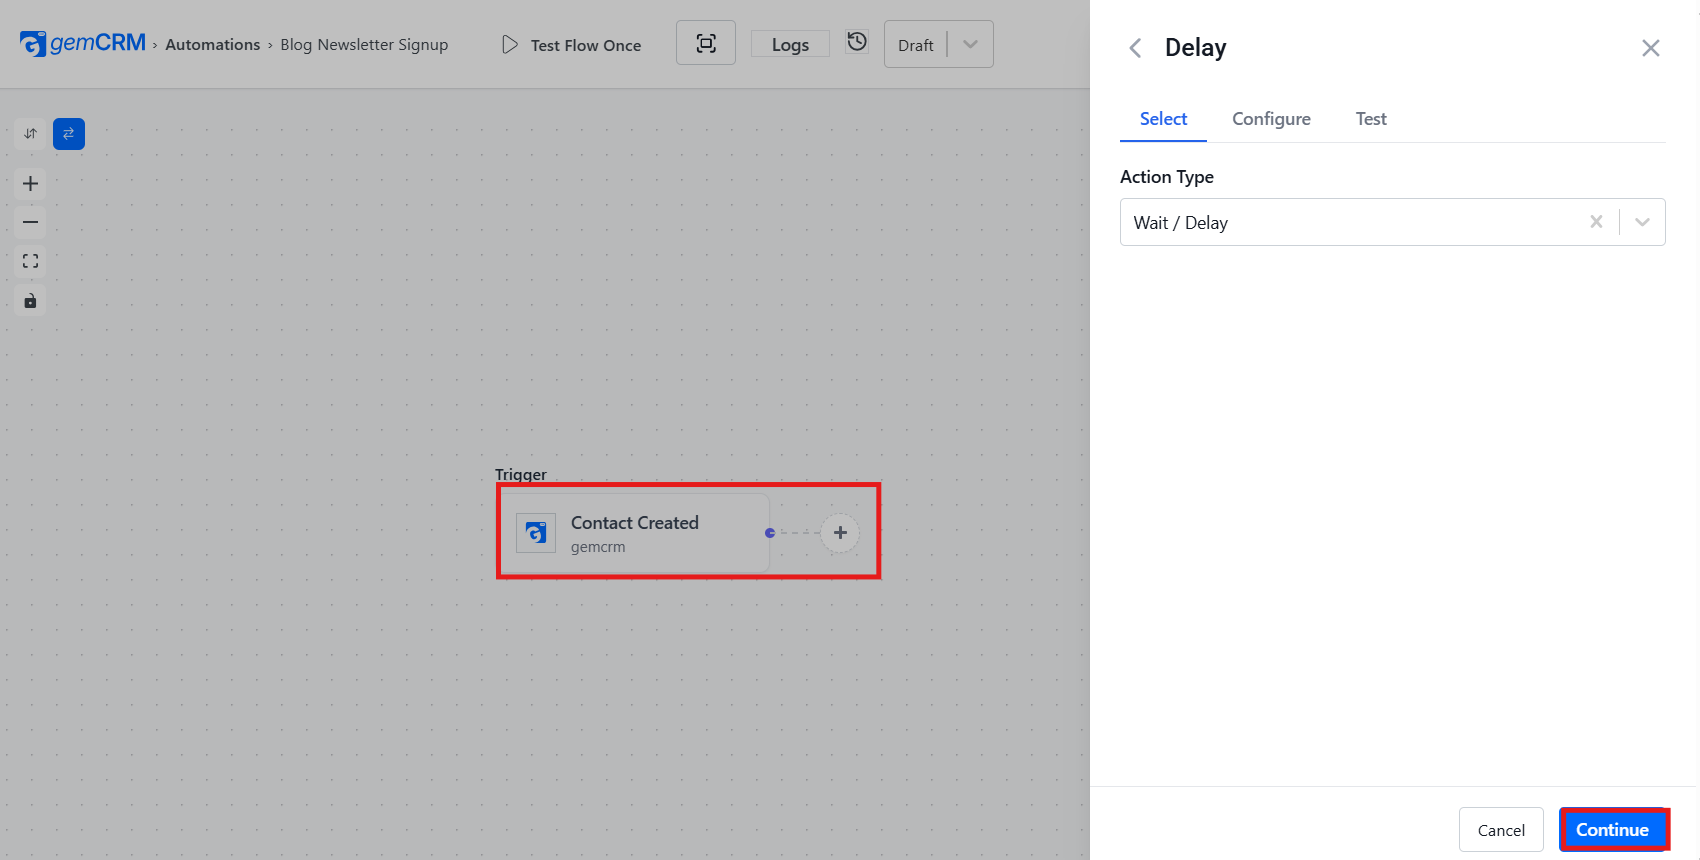
- Click “+” again on the workflow canvas, then select the Delay tool. Under Action Type, select Wait / Delay and click Continue.
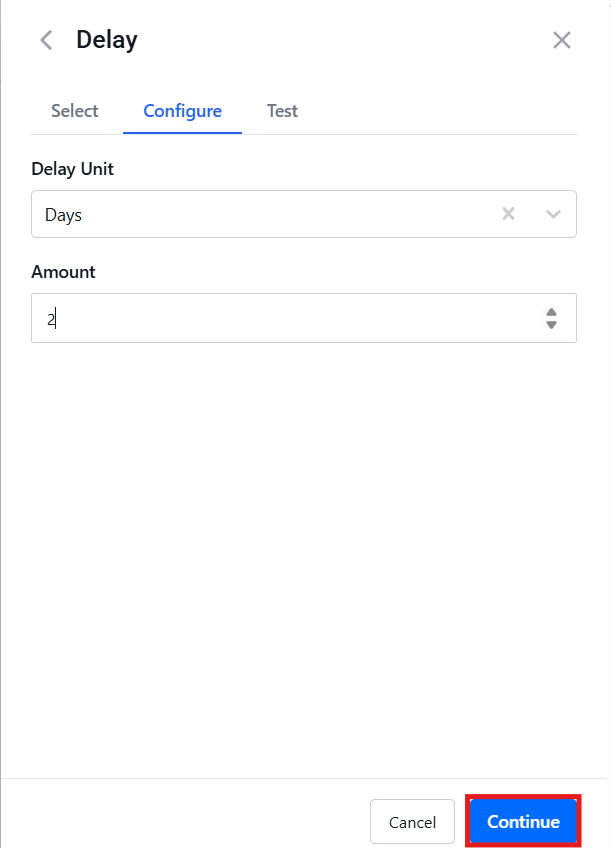
- Set the Delay Unit to “Days” and the Amount to “2”, then click Continue.
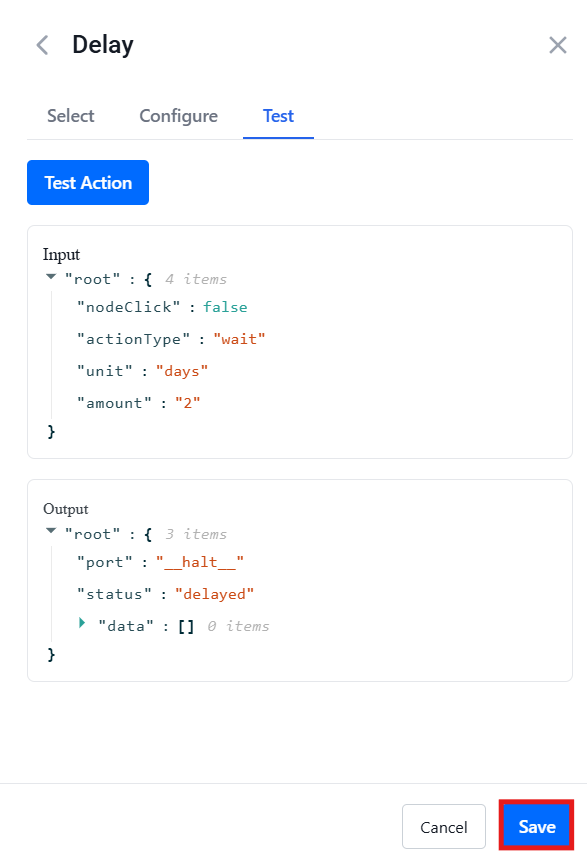
- Click Save to confirm the delay.
- Repeat steps 2–7 for the remaining 3 emails:
- Email 2 (Day 2): Share your single most popular blog post
- Email 3 (Day 4): Tell your story — who you are and why you write
- Email 4 (Day 7): Ask a question or invite a reply
- Click Update in the top-right corner to save the entire workflow.
Once activated, GemCRM and Zaplane will automatically run this welcome sequence for every new subscriber, ensuring emails are delivered at the right time without any manual effort.
Step 6: Use GemCRM’s Dynamic Segmentation
One of GemCRM’s most powerful features is dynamic segmentation using advanced contact filters — the ability to create audience segments that update automatically based on subscriber behavior, tags, and activity.
Follow these steps to create a new segment:
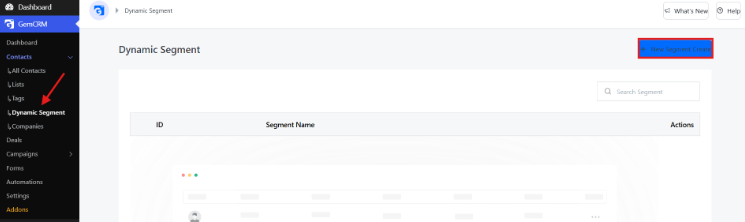
- From the GemCRM dashboard, navigate to Contacts → Dynamic Segment in the left sidebar, then click New Segment Create in the top-right corner.
- Enter a name for your segment in the Name this Custom Segment field (e.g., “Black Friday Deals26”).
- Under Select custom contacts by advanced filters, configure your filter conditions — for example, set Segment/Type to “contact activities,” Field to “last email clicked,” and Operator to “After” with a specific date.
- Click + Add New to add additional filter conditions, or + Add Group to create an OR condition group for more advanced segmentation.
- Once your conditions are set, click Save Segment in the bottom-right corner.
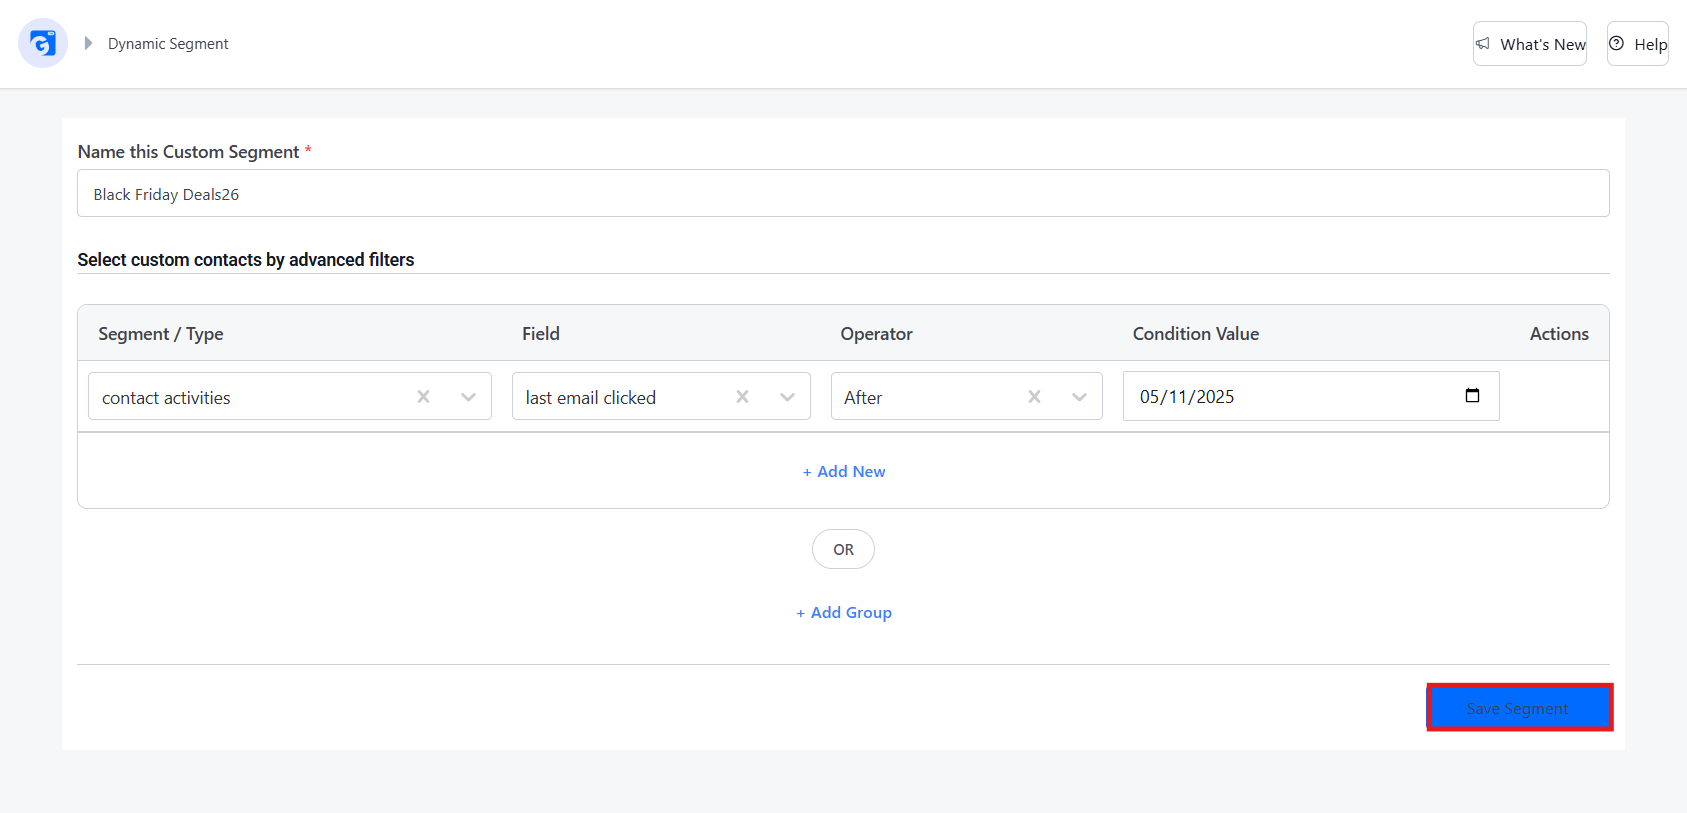
GemCRM will now automatically populate this segment with matching contacts — no manual sorting required. This allows you to send highly targeted campaigns to the right audience, resulting in higher open rates, fewer unsubscribes, and better overall performance.
By automatically grouping contacts based on their behavior and activity, dynamic segmentation helps you deliver more relevant content to the right audience at the right time.
Benefits of Building Your Email List in WordPress for Free
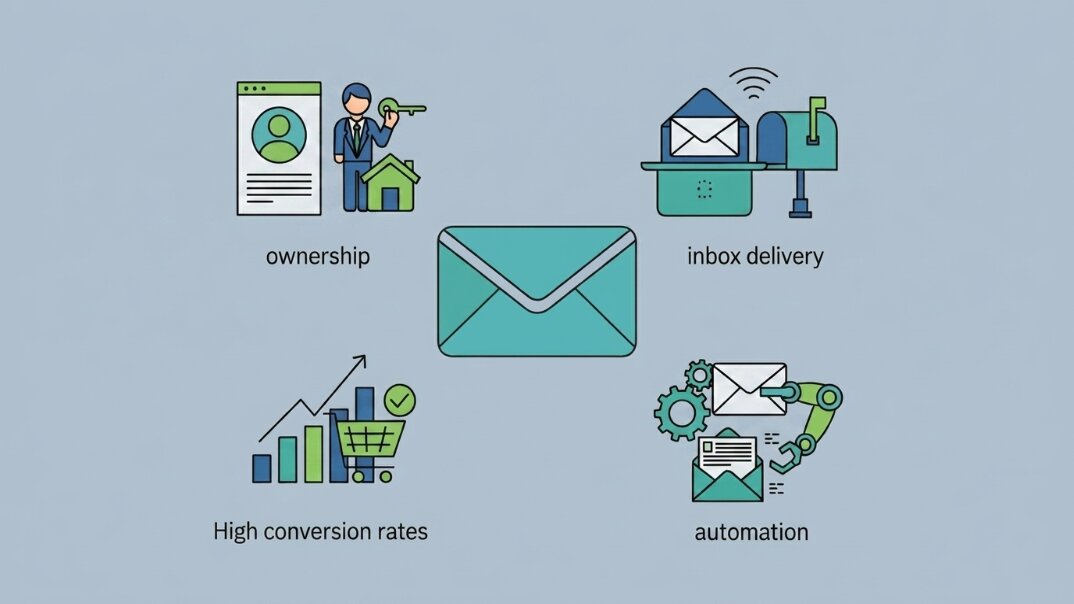
You own the relationship. Unlike social media followers; your email subscribers aren’t controlled by any platform. No algorithm decides whether your audience sees your content.
Direct communication. Emails land directly in your subscribers’ inboxes, giving you a reliable way to share updates, promotions, and valuable content.
Higher conversion potential. Email marketing consistently delivers stronger engagement and conversion rates than most digital marketing channels, making it one of the most effective ways to grow your business.
Scalable growth.You can start with a simple WordPress signup form for collecting email subscribers and gradually expand your strategy with automation, segmentation, and personalized campaigns as your audience grows.
Automation saves time. Once you set up automated email sequences and workflows, new subscribers can be nurtured automatically without requiring ongoing manual effort.
Better audience insights. With tools like GemCRM, you can track subscriber activity, manage and organize contact information, segment contacts based on behavior, and send more relevant messages to the right people at the right time.
2027 Trends: What’s Coming for Email List Building

Email marketing is evolving quickly, and the next few years will be driven by smarter automation, better personalization, and stronger data ownership.
AI-powered segmentation is already helping marketers send more relevant emails based on subscriber behavior and engagement. Features like predictive content recommendations, send-time optimization, and automated audience segmentation are becoming increasingly common.
First-party data will also become more important as third-party cookies continue to disappear. Businesses that own and manage their subscriber data will have a significant advantage when it comes to audience targeting and long-term growth.
Automation will play a bigger role as well. Instead of sending the same message to every subscriber, marketers will rely on behavior-based workflows that automatically deliver the right content at the right time.
Platforms like GemCRM are already moving in this direction by combining contact management, segmentation, and automation within a single WordPress-based system, making it easier for businesses to build and grow their email lists more effectively.
Conclusion
Social media platforms come and go. Algorithms change, and advertising costs continue to rise. But your email list is an asset you own — giving you a direct way to connect with your audience whenever you want.
The best part? You don’t need a complicated setup to get started. Create an opt-in form, offer a valuable lead magnet, and set up a simple welcome sequence. As your list grows, GemCRM helps you manage contacts, automate follow-ups, and build stronger relationships directly from WordPress.
Start small, stay consistent, and focus on providing value. The audience you build today can become one of your most valuable business assets tomorrow.
FAQs
Can I build an email list in WordPress for free?
Yes. You can start building an email list using free WordPress plugins and email marketing tools. GemCRM also offers a free version that allows you to capture and manage contacts before upgrading to advanced features.
What’s the best WordPress plugin for email list building?
The best plugin depends on your needs. If you want forms, contact management, email campaigns, automation, and segmentation in one place, GemCRM is a strong option. Other popular choices include MailPoet and MailerLite.
How do I add a signup form to WordPress?
Most email marketing plugins allow you to embed forms using a shortcode, block, widget, or page builder integration. With GemCRM, you can create a form and add it to any page or post using a shortcode.
Do I need a lead magnet to build my list?
No, but it can significantly improve your signup rate. Offering a useful resource—such as a checklist, template, ebook, or guide—gives visitors a stronger reason to subscribe.